CONTOUR CT28 WALL & CEILING INSTALLATION
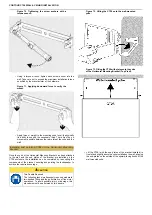
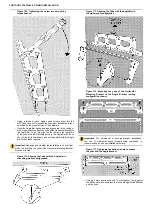
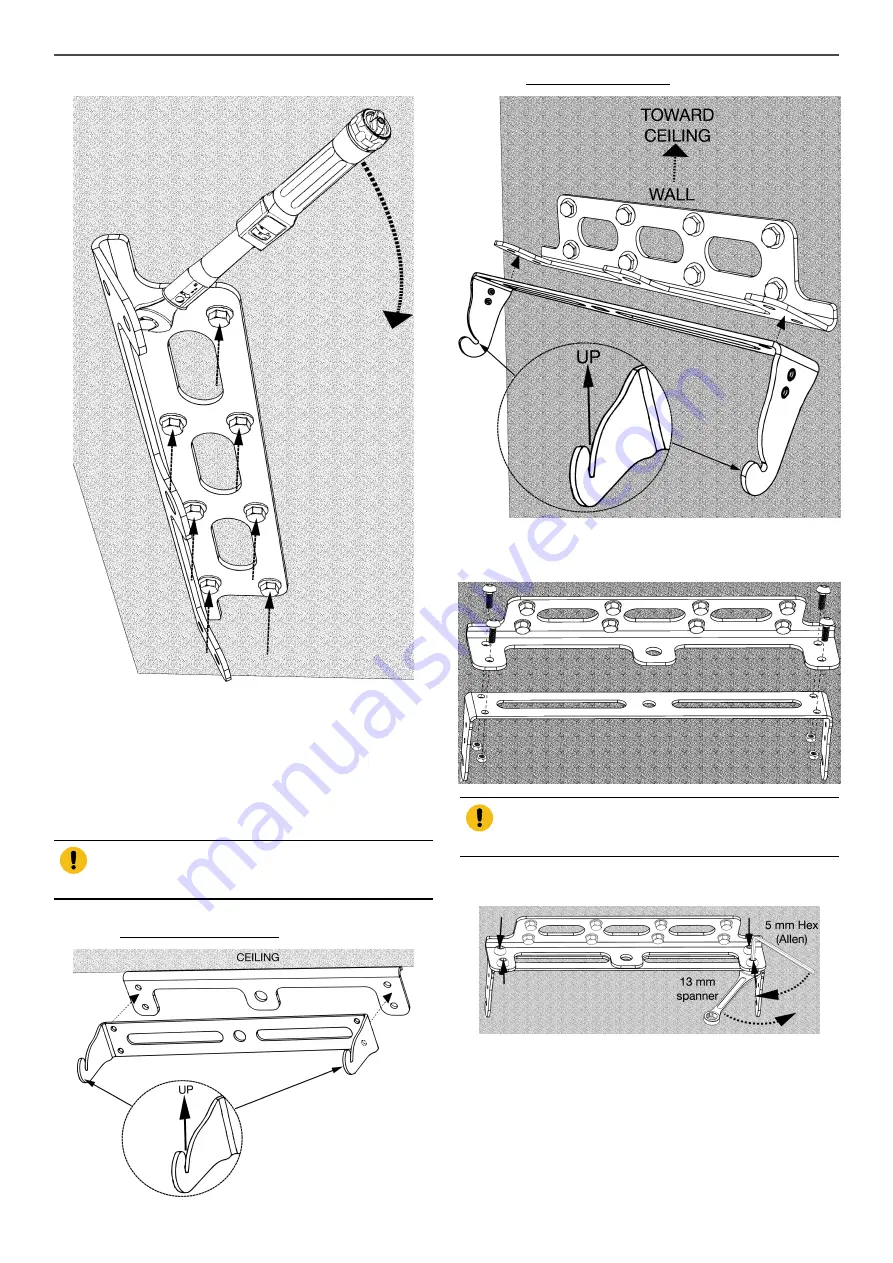
Figure 109. Tightening the screw anchors with a
torque wrench.
•
Using a torque wrench, tighten each screw anchor into the
wall. Take care not to exceed the maximum installation torque
specified by the manufacturer of the hardware.
•
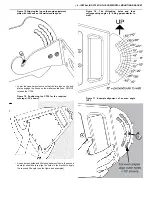
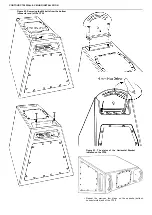
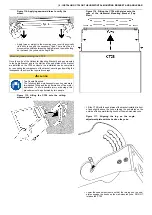
Once the Angle Bar has been properly secured to the ceiling or
wall, it is possible to attach the yoke of the Horizontal Bracket to
the Angle Bar. To do this, align the four holes in the rear plate
of the yoke with the matching holes in the Angle Bar and use
the (4×) bolts, lock-washers and nuts supplied with the Angle
Bar to lock these together.
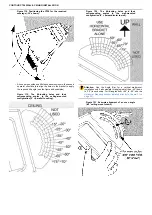
Important: Depending on whether the installation is on a vertical
wall or on a ceiling, the yoke of the Horizontal Mounting Bracket
must be oriented
Figure 110. Aligning the Yoke with the Angle Bar in
the ceiling-mount configuration.
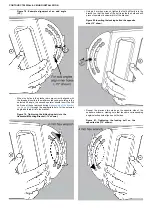
Figure 111. Aligning the Yoke with the Angle Bar in
the wall-mount configuration.
Figure 112. Mounting the yoke of the Horizontal
Mounting Bracket to the Angle Bracket (ceiling
configuration shown).
Important: For permanent or semi-permanent installation,
the use of medium-strength thread-locking compound is
recommended on all user-installed hardware.
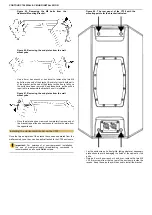
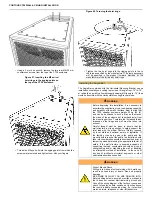
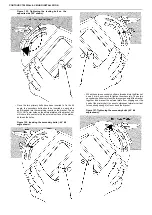
Figure 113. Tightening the bolts and nuts to couple
the yoke and the Angle Bracket.
•
Using a 5 mm hex wrench and a 13 mm spanner, firmly tighten
the bolts and nuts to compress the lock-nuts against the Bracket
and the yoke.
Summary of Contents for Contour CT28
Page 1: ...Contour CT28 Wall Ceiling Installation...
Page 50: ......

