| 3 - INSTALLING LCC44/LCC84 ON A WALL MOUNT BRACKET
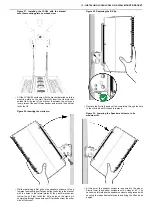
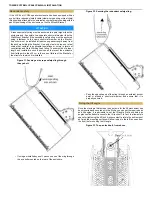
Figure 27. Installing the LCC44 with the bracket
onto the mounting plate, overhead view.
•
Lift the LCC44/84 enclosure with the bracket installed up to the
mounting plate on the wall. Carefully insert the tilt arms that
extend from the rear of the bracket in between the outer and
inner plates of the pan/tilt mechanism, and around the bolt that
locks the tilt.
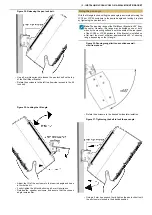
Figure 28. Inserting the clevis pin.
•
While maintaining a firm grip on the speaker enclosure, tilt it up
towards the mounting surface and align the holes in the bracket
with the holes in the lateral plates of the pan/tilt mechanism
(below the bolt that locks the tilt) and insert the clevis pin
completely through these holes until it protrudes from the other
side of the mount.
Figure 29. Replacing the R-Clip.
•
Replace the R-clip (hairpin cotter) completely through the hole
in the clevis pin until it snaps into place.
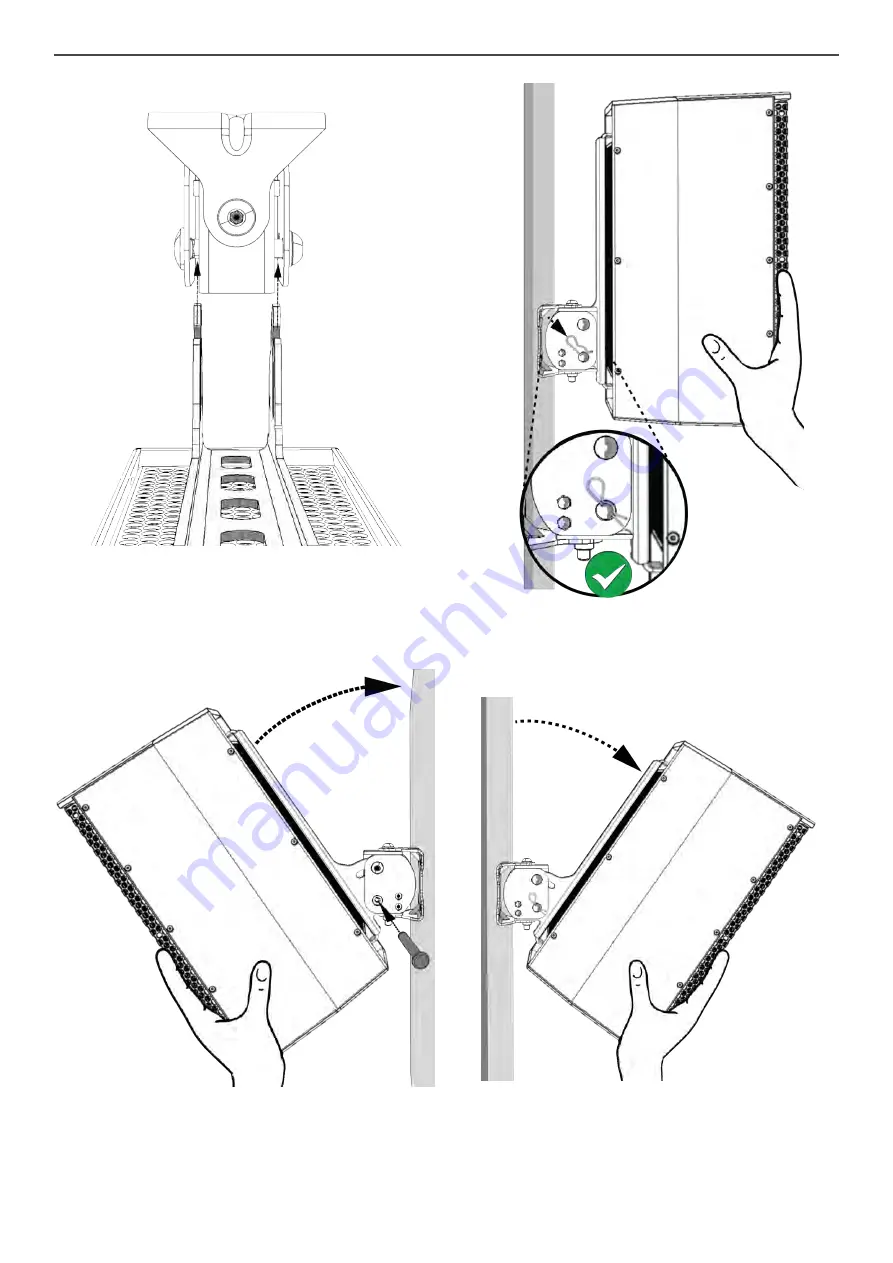
Figure 30. Lowering the Speaker enclosure to its
maximum tilt.
•
At this point, the speaker enclosure is secured to the mount.
Slowly lower the speaker enclosure until it stops at 40°. You
can now safely release the speaker enclosure and proceed with
securing the redundant safety cable and fixing the tilt and pan
angles.

