background image

Copyright 1010music LLC 2023

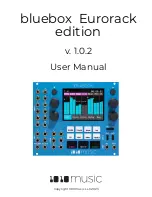
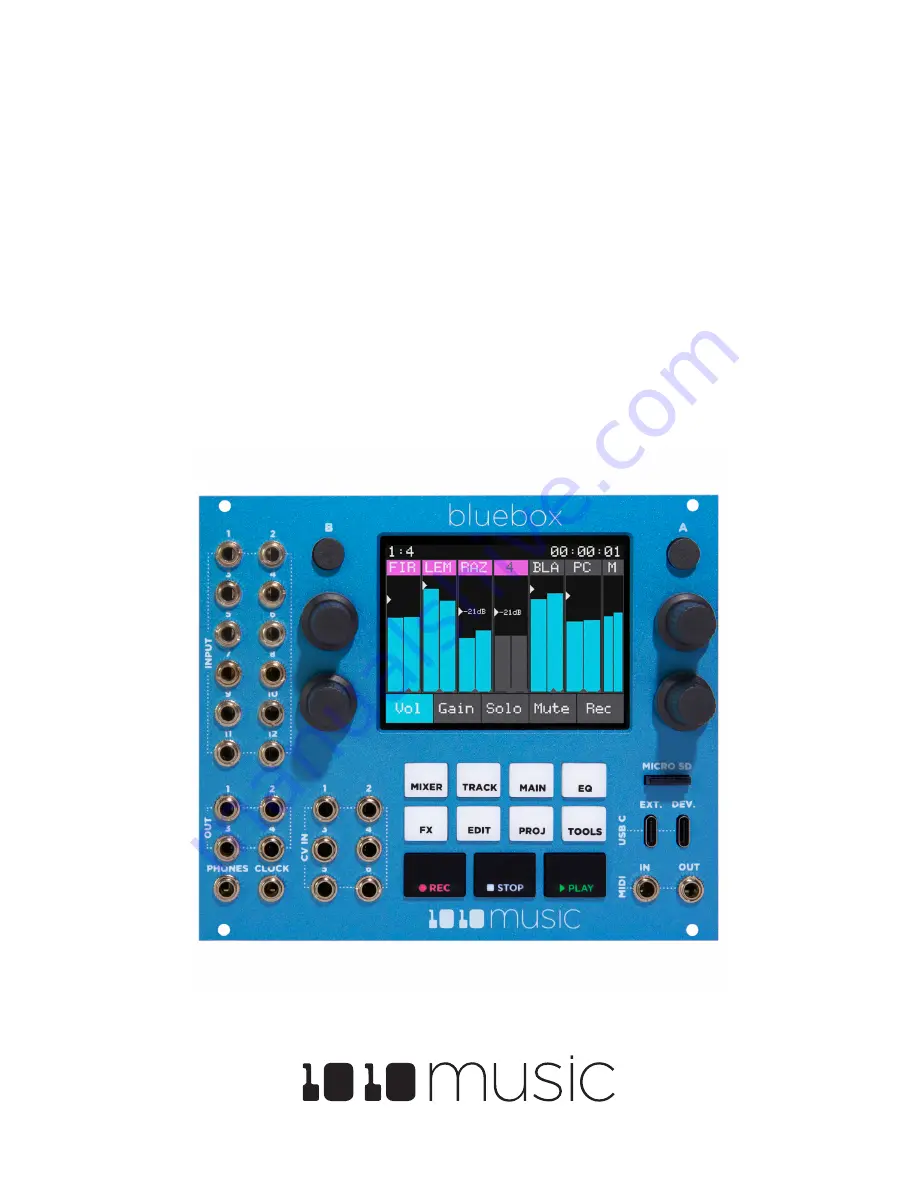
bluebox  Eurorack 

edition

v. 1.0.2

User Manual

Summary of Contents for bluebox Eurorack edition

Page 1: ...Copyright 1010music LLC 2023 bluebox Eurorack edition v 1 0 2 User Manual...

Page 2: ...IXER Mode 13 When to Use TRACK Mode 13 Display Overview 14 PROJ Mode 15 Work with Project Files 15 Save Changes to the Current Project 16 Load a Different Project 16 Create a New Project 17 Rename a P...

Page 3: ...33 Adjust the EQ for a Track or the Main Mix 34 FX Mode 36 FX View Modes 36 Adjust Reverb and Delay Effects Settings 37 EDIT Mode 40 Edit Mode and the Edit Configuration Screen 41 See Where WAV Files...

Page 4: ...54 Update Firmware 55 Update the bluebox Firmware 55 Common Tasks 56 Balance Levels for the Main Mix 56 Mute a Track 56 Mute an Output 56 Configure the OUT 3 and 4 jacks as one Stereo Send or Two Mon...

Page 5: ...w to select the Active WAV file for each track Along the way we will see how to save your settings into different project files configure the metronome adjust the tempo and use MIDI and CV to control...

Page 6: ...r up the rack You will see the Mixer screen with a demo project provided on the microSD card Connect and Configure Inputs and Outputs 1 Connect your audio inputs and outputs along the left side of the...

Page 7: ...ch of the 12 mono 3 5 mm TS jacks You can use a dual mono to stereo adapter to connect a stereo signal to two separate mono inputs if desired Later we will see how to map these to tracks Output Connec...

Page 8: ...ighlighted blue Touch the inputs to toggle them on and off Meter Bridge Layout You can configure bluebox to display meters for 4 6 8 10 or 12 tracks If you keep the track count low the meters will be...

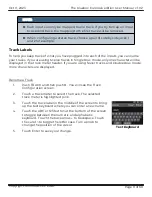
Page 9: ...track meter to select the track The selected track meter is highlighted pink 3 Touch the track label in the middle of the screen to bring up the text keyboard where you can enter a new name 4 Touch t...

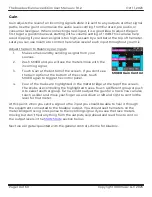
Page 10: ...h the incoming signal 3 Touch Gain at the bottom of the screen If you don t see the Gain option at the bottom of the screen touch MIXER again to toggle the control panel 4 Four of the tracks are highl...

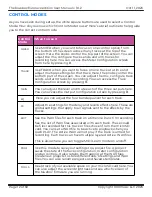
Page 11: ...o access additional screens for a control mode The button for the current control mode is brighter than the others Touch Select tracks or control panels adjust levels and toggle settings Touch a meter...

Page 12: ...bal settings that apply to all signals sent to the effects by the tracks EDIT See the WAV files for each track on a timeline Punch In recording See the list of WAV files associated with each track The...

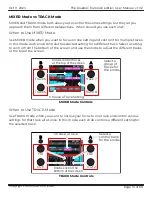
Page 13: ...erent track Select a setting to control from the bottom of the screen and use the knobs to adjust the different tracks at the top of the screen When to Use TRACK Mode Use TRACK mode when you want to n...

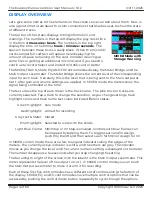
Page 14: ...ime The text across the top of each meter is the track name The pink track or tracks are currently selected Tap a track to change the selection As you change settings track highlight colors and track...

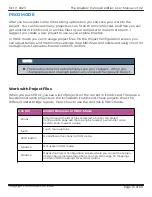
Page 15: ...n you push PROJ you see a list of projects on the current microSD card There are a few demonstration projects on the included microSD card These projects show the different meter bridge layouts Here s...

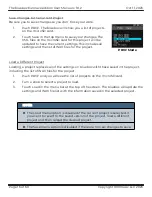
Page 16: ...fferent Project Loading a project replaces all of the settings on bluebox with those saved in the project including the list of WAV files for the project 1 Push PROJ and you will see the list of proje...

Page 17: ...are done typing the new name The bluebox will create the new project with default settings and load it Rename a Project 1 Push PROJ 2 Touch File and then Rename in the menu bar 3 Use the on screen tex...

Page 18: ...and then SaveAs Template 4 Use the on screen text keyboard to enter a name for the new template project Touch Clear at the top of the screen if you want to start with a blank name Turn a knob to chang...

Page 19: ...p knob or touch a setting to select it 4 Turn a bottom knob to change the value for the selected setting Here are the available tempo and metronome settings Project Configuration Setting Description B...

Page 20: ...edition will map this MIDI Control to this setting for this track and display the MIDI mapping in blue on the screen The mapping is in the format Channel CC Number 5 Repeat the process as needed for s...

Page 21: ...ode 4 Select the CV input you want to map from the list by touching it or turning a knob 5 Push MIXER and touch the control option from the bottom of the screen Then touch the track you want to contro...

Page 22: ...e one MIDI CC or CV Input to control each bluebox Eurorack edition setting Each MIDI CC and each CV Input can only map to a single bluebox Eurorack edition setting In CV Assign Mode and MIDI Learn Mod...

Page 23: ...Main output for recording Armed tracks have a red outline Pan Adjust how much of the signal is sent to the left and right channels of the sends for this track FX1 Control the level of the track audio...

Page 24: ...r the knobs and buttons do different things in different modes Here s how they work in MIXER mode Control Control Behavior in MIXER Mode Knobs Adjust selected setting for different tracks Touch Touch...

Page 25: ...the current state of the meter You can use this process to Adjust the volume Adjust the gain Solo one or more tracks Mute tracks Arm tracks for recording Pan tracks between left and right channels Co...

Page 26: ...ions panel was open and go back to that You can touch and control more than one track at a time Arm the Main Output for Recording or Mute the Main Output 1 Push the MIXER button to bring up MIXER mode...

Page 27: ...current levels of the control options for the track selected in the meter bridge at the top of the screen Here s how the controls work in TRACK mode Control Control Behavior in TRACK Mode Knobs Adjust...

Page 28: ...of the current track 3 Push A to toggle the knob focus to the other set of controls or tap a control panel to give it focus 4 Touch and hold a knob on the screen and then drag your finger to change th...

Page 29: ...then drag your finger left and right or up and down to adjust the level for that meter Mute an Output 1 Push MAIN to select Main mode 2 Touch the MUTE button under the heading for the output you want...

Page 30: ...lect a value for that setting MAIN Configuration MAIN Configuration Scroll for More Settings NOTE A compressor allows the overall output level to sound higher by pushing down the level of the highest...

Page 31: ...o 3 Send 4 Send These settings are only enabled if 3 4 Mode is set to Mono Controls whether the tracks send their signals to OUT3 and OUT4 before or after the track Vol level is applied The Gain is al...

Page 32: ...to be gradually at applied at Threshold Knee and is fully applied at Threshold Knee with a gradual transition between the two 0 0 dB to 18 0 dB Lookahead Increase this number to give the compressor mo...

Page 33: ...ents the frequency response for the current selection In this graph the x axis represents frequency and the y axis represents the gain that will be applied at that frequency The resulting graph is cal...

Page 34: ...he Type of equalization to be used for this filter band The selected value is displayed in the lower right corner of the grid The options are None L Cut Low cut filter L Shelf Low Shelf Param Parametr...

Page 35: ...er Boost or attenuate the gain for a series of bands around the selected center frequency Gain is the amount of attenuation or boosting that is applied at the selected frequency Frequency is the cente...

Page 36: ...n the FX screen Here s how to use the controls in FX mode FX View Modes Push the FX button multiple times to cycle through the three different view modes Control Control Behavior in FX Mode Knobs Adju...

Page 37: ...trols in the pink box 6 Touch an on screen knob and drag left and right or up and down to change the value of the setting 7 Touch an onscreen button to toggle its state 8 In the Reverb view mode you c...

Page 38: ...er is On this is the center frequency of the frequency band that the delay will be applied to Width When Filter is On this is the range of frequencies on either side of the Cutoff that will be include...

Page 39: ...to remove higher frequencies from the reverb processing Low C The low frequency cutoff When all the way down all frequencies are allowed into the reverb processing Dial this up to remove lower freque...

Page 40: ...e microSD card to the project and assign which WAV files will playback for a track Edit mode is where you can choose which tracks you want to hear playback a WAV file while listening to the live input...

Page 41: ...me which is displayed in measures beats You can alter the starting measure number but not the beat number Touch the Enable button in each column to enable that feature While in Edit mode press B to ac...

Page 42: ...f a track This can be done to correct small mistakes in an otherwise good recording or to add a bit of something different in the middle of a track You may want to use the PLAY FROM feature described...

Page 43: ...o Active 4 Push MIXER 5 Make sure the track is not armed for recording If the track has a red frame touch the Rec button at the bottom of the screen and then touch the track to disarm it 6 Push the bl...

Page 44: ...it in your computer The card is spring loaded Push it in to get it to pop out Copy the file you want onto the microSD card Under the Projects folder on the card there is a folder named for each proje...

Page 45: ...om the microSD card to free up space Rename a WAV File When bluebox records a WAV file the file name is track number track name number For example if you have renamed track 2 to DRUMS the third record...

Page 46: ...d from the microSD card Touch anywhere else on the screen to cancel Playback a Recording of the Main Output The list of files in EDIT mode does not include the WAV files that were recorded from the Ma...

Page 47: ...the available space on the microSD card and the current firmware version This is also where you can adjust the brightness of the screen Here is what the controls do in TOOLS mode Adjust the Screen Bri...

Page 48: ...Rec button in the control options at the bottom of the screen push MIXER again 2 Touch Rec in the control options at the bottom of the screen 3 Arm the tracks you want to record by touching them The...

Page 49: ...again 2 Touch Rec in the control options at the bottom of the screen 3 Touch the Main meter on the right to arm the Main mix for recording You can record the Main mix and individual tracks at the sam...

Page 50: ...want to add and then touch Load You can navigate to other folders to find the file if needed Touch the to go back to a previous folder in the hierarchy or touch Load to drill into a folder in the lis...

Page 51: ...it receives audio at 44 1 kHz it will convert it to 48 kHz automatically Receive USB Audio To receive the USB audio signal on the bluebox Eurorack edition you must configure the bluebox to route the U...

Page 52: ...r or iOS device 3 Send signals to the inputs of bluebox or playback WAV files recorded on bluebox The Main output bus of bluebox will be routed to your computer or iOS device NOTE When you have a pair...

Page 53: ...C bluebox won t find them when you open the project You can add the files to tracks if needed In addition to the WAV files each project folder also has two XML files assets xml and project xml These f...

Page 54: ...IDI device to send a clock signal The bluebox will automatically follow the incoming clock Setup bluebox to Send a MIDI Clock 1 Connect a MIDI Device that is ready to follow a clock signal to either t...

Page 55: ...ds to see the list of available firmware downloads Download the desired file to your computer Unzip the contents of the file Some computers will unzip it automatically when you download it 4 Put the b...

Page 56: ...for a track to adjust the volume for that track Do this for all the tracks until you get the mix you want Mute a Track 1 Push MIXER If you don t see Mute in the control options at the bottom of the sc...

Page 57: ...ou want to control 3 Push the A button until the pink knob focus ring is around the right control panel 4 Turn the top left knob to adjust the send to FX1 which is the delay 5 Turn the top right knob...

Page 58: ...4 5 Repeat steps 4 5 and 6 for additional tracks as needed TRACK Mode Use Two Mono Outputs for External Effects Processing 1 Push Main and then push the B button to access the Main Configuration scre...

Page 59: ...bottom right of the Sound window to open the Headphones Properties window 5 In the Headphones Properties window click on the Advanced tab 6 In the drop down within the Default Format frame select 2 ch...

Page 60: ...with your bluebox https 1010music com cablerecommendations Look for how to videos that show the bluebox in action on the 1010music YouTube page youtube com c 1010music playlists The bluebox for deskt...

Reviews: