background image

8

9

7. Position the tonearm over the desired location (groove) on the record.
8. Move the tonearm lift lever to the down position to move the tonearm toward the 

record. Alternatively, place the needle over the desired location on the record.

9. Carefully lower the tonearm on the record.
10. When you are finished playing the record, raise the tonearm, return it to rest on the 

arm clip, and turn the Start/Stop dial to the Stop.

Bluetooth Operation

This turntable has a Bluetooth transmitter to wirelessly send audio to a Bluetooth 
speaker.
1. Power on your Bluetooth speaker and ensure it is in pairing mode.
2. Power on the turntable. BT will auto search when the turntable turns on and the BT 

LED indicator light will flash.

3. When pairing, the light will flash twice per second and will become solid when 

paired successfully.

4. To disconnect pairing, power off the turntable or turn off Bluetooth pairing on your 

Bluetooth speaker.

5. This turntable will connect to the nearest Bluetooth speaker. If after 2 minutes no 

Bluetooth speaker can be found to pair with, the Bluetooth transmitter will become 
inactive and the LED will turn off. If you need to connect again, power off the turntable 
and the speaker then power on again.

Bluetooth Indicator

Bluetooth Stauts

Flash

Auto searching and pairing

Solid

Paired successfully

Off

Inactive

Recording onto a PC through USB Jack:

For installing and recording instructions, refer to the BRIEF INTRODUCTION OF 
AUDACITY webpage at 

https://www.audacityteam.org/download/

Recording the vinyl to your computer:
1). Follow the instructions in this manual to play the vinyl. 
2). Open Audacity on your computer and follow the recording steps as instructed on 

the Audacity webpage referenced above.

Audacity and USB Connection

Audacity supports Windows95 / Window XP / Window 7 / Vista or more advanced 
version, with the EMS memory more than 128MB and Audacity take space of 5MB.

Instructions for PC Encoding After Recording

Software instructions

1. Connect the USB cable to your turntable and your computer. No extra drivers are 

required.

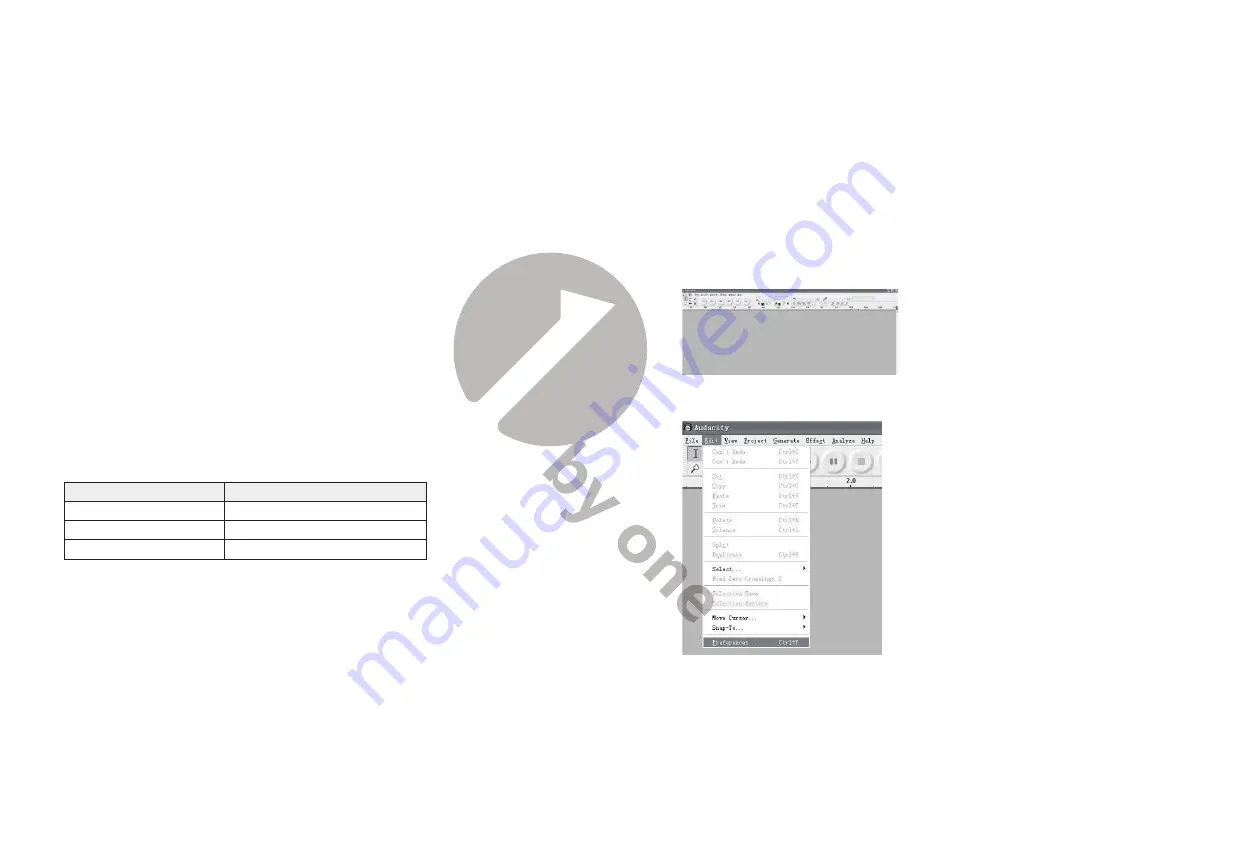
2. Recording

2.1) Open Audacity

2.2) Open the “Edit” menu, then choose “Preferences”

Summary of Contents for Belt Drive

Page 1: ...Belt Drive Turntable System Instruction Manual 1byone Products Inc 1230 E Belmont Street Ontario CA USA 91761 Customer Service 1 909 391 3888 www 1byonebros com Made in China...

Page 2: ...the obsolete outlets 10 Protect the power cord from being pinched or walked on particularly close to the power plug or the point at which the power cord connects to the product 11 Unplug this product...

Page 3: ...Cartridge Alignment Protractor 10 USB PC Cable 11 Instruction Manual This turntable is supplied with a factory fitted cartridge that s already adjusted Note Instructions provided in this manual for a...

Page 4: ...is balanced position if it is moved up or down Perform this adjustment carefully Tonearm Counterweight Adjust so the tonearm is level 6 Once the tonearm is correctly balanced return and lock it to the...

Page 5: ...ase a separate phono amplifier for moving magnetic cartridges This separate phono amplifier will then connect between your turntable and your amplifier Stereo System Connection Device without phono in...

Page 6: ...rest Bluetooth speaker If after 2 minutes no Bluetooth speaker can be found to pair with the Bluetooth transmitter will become inactive and the LED will turn off If you need to connect again power off...

Page 7: ...ord button and the left and right tracks will appear on the interface Note If you do not see the sound wave on the interface when recording please adjust the line in volume to an appropriate level 2 5...

Page 8: ...3 files directly you should download the LAME MP3 encoder A link to find LAME MP3 can be found at https www audacityteam org download Instructions for Installing LAME MP3 Encoder 1 Download lame_enc d...

Page 9: ...e Be sure to disconnect the product s power cable plug from the outlet 1 Remove the protector from the cartridge 2 Remove the stylus by pulling in the direction of the arrow Installing a New Replaceme...

Page 10: ...ial or production faults but can sometimes be caused by incorrect use or unfortunate circumstances Therefore the following list of common fault symptoms has been included here There is no power The tu...

Page 11: ...e screw as needed following the steps in the last two situations This product s packaging is made from environmentally friendly material and can be disposed of at your local recycling plant Customer S...

Reviews: