RF-Optima W R2 PLUS thermostat
LVS vloerverwarming BV | Flemingstraat 9 | 1704SL Heerhugowaard | NETHERLANDS | T: +31 (0)72 5400560 | info@lvsheating.com
Parameter Settings Explained
Feature 01–
This feature used to calibrate the room temperature when need. For example, if actual room temperature
21.5°C, but thermostat shows 23°C, then you can set this value to -1.5 to calibrate.
Feature 02/03–
Temperature Max.& Min. Limit: This function allows you to limit the use of the up and down temperature by
pr/- buttons.
Menu 05 -
Low Temperature Protection: This is the temperature maintained when the thermostat is in Frost Mode. If room
temperature below 5°C(Settable), thermostat will turn on heating device till room temperature arrive 5°C(Settable).
Menu 09 -
Switching Differential: This function allows you to increase the switching differential of the thermostat. The
default is 0°C which means that with a set temperature of 20°C, the thermostat will switch the heating on at 19.5°C and off
at 20.5°C. With a 0.5°C differential, the heating will switch on at 19°C and off at 21°C.
Menu 11–
This feature used to lock the keys. When lock, you can long press
SET
button 5 seconds to unlock.
Menu 12-
This function allows you to save energy. When enable Open Window Detection function, the system will
automatically stop heating when it detects a sudden drop of room temperature (2°C in 15 minutes as default). This is
normally caused when a window or door is opened without turning off the heating device.
The device will return to the previous mode of operation after 30mins, then letter
OP
disappear. Press any button will exit
OWD function during the heating off period.
Menu 13-
The setting time to detect the drop of room temperature between 2-15mins (15 mins is the default setting).
Menu 14-
The drop temperature to during detect period. Setting between 2-4°C (2°C is the default setting).
Menu 15-
The time to exit OWD mode select. Setting between 10~60min(30min is the default setting).
Installation
Mount the thermostat at eye level. Read the instructions fully so you get the best from our product.
Do not install near to a
direct heat source as this will affect functionality. Do not push hard on the LCD screen as this may cause irreparable
damage.
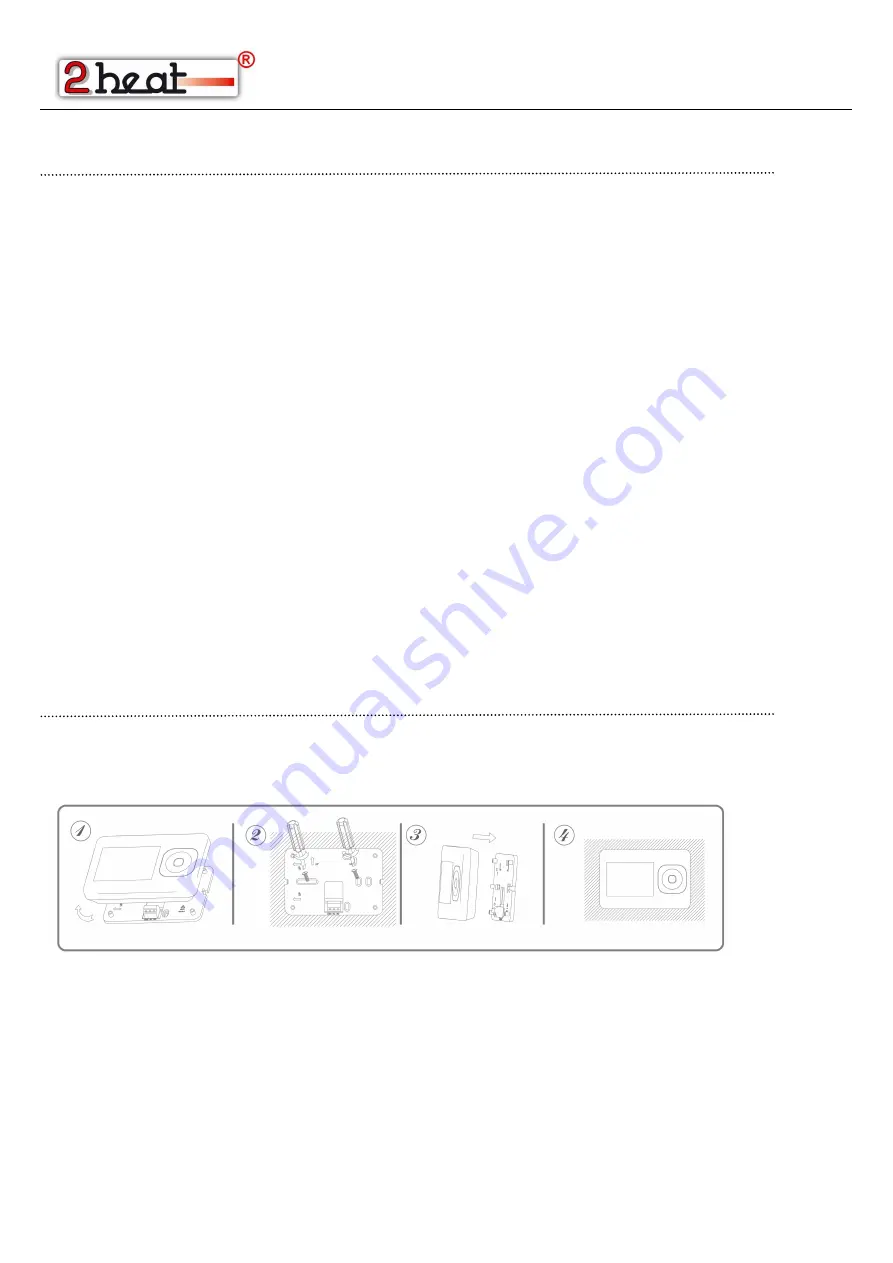
Step 1: Carefully separate the front half from the back plate.
Step 2: Screw the thermostat back plate securely on wall with provided screws
Step 3: Clip the front of the thermostat onto the back plate.


