Configuration & User Manual: 2N IP Intercoms and CCURE 9000
COPYRIGHT
© 2022 2N Telekomunikace a.s.
All rights reserved
6.4
Creating a 2N Intercom Object
This section describes how to create a 2N Intercom Object.
6.4.1
To Create a 2N Intercom
NOTE
If the installation is carried out in an Enterprise environment, please refer to the Post-
Installation in an Enterprise Environment section using General tab definitions table for
reference.
1.
In the Hardware Tree of the Administration Workstation, right click the 2N Intercoms folder and
then right click on 2N Intercoms icon.
2.
Select New.
3.
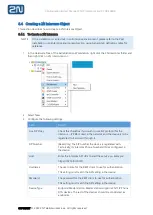
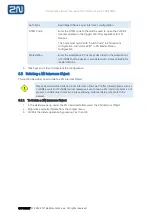
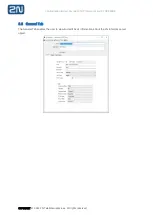
Configure the following settings:
Field
Details
Use SIP Proxy
Check this checkbox if you wish to use SIP protocol for the
intercom
–
IP PBX is used in the network and the device is to be
registered to it and call through it.
SIP Number
(Read-only) The SIP number the device is registered with.
Technically, its Intercom Phone Numbers (ID) as configured in
the device.
Host
Enter the Intercom API URL to start the service on. Example:
https://192.168.170.151/
Username
The user name for the REST client to use for authentication.
This setting must match the API setting in the device.
Password
The password for the REST client to use for authentication.
This setting must match the API setting in the device.
Device Type
Endpoint/Master station. Master station supports
2N® IP Phone
D7A devices. The rest of the devices should be considered as
endpoints.


