20
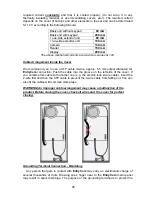
Keep the following outdoor mounting principles:
•
Connect the button backlight for equipment heating – refer to Electrical Installation.
•
Fill the roof and the fill the gap with waterproof cement to prevent water from
getting into the box (see Fig.).
•
Water must not flow in along or around the cables.
Flush Mounting
Use the installation instructions included in the flush mounting box delivery.
Anti-Vandal Mounting
Use the installation instructions included in the Anti-Vandal mask delivery.
6.3.
Buttons Labels – Insertion, Replacement
Instructions
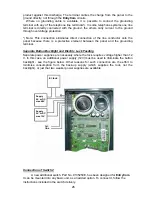
1. Remove the
EntryCom
metal cover. To do this,
use a hexagonal key, unscrew the screw as
shown in the figure and take the cover off.
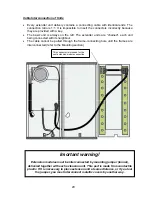
2. Remove the name plates as shown in the figure
using, e.g., a screw driver.
3. Remove the name plate inserts as shown
in the figure.
4. Insert the labels printed on foil (see later).
5. Replace the name plate inserts.
6. Put the name plates back in the depression and click into position. The name plates
keep the matt foil steady.
7. Replace and screw on the metal cover.
Note: You can remove the name plates even without removing the metal cover however damage, if any,
incurred as result of this, is not covered by the warranty.
Summary of Contents for EntryCom
Page 1: ...2N EntryCom Door Entry System User and Service Manual Version 2 0 ...
Page 22: ...22 ...
Page 33: ...33 ...
Page 43: ......


