2N TELEKOMUNIKACE a.s., www.2n.cz
115/377
7.
8.
9.
10.
Insert the audio unit in the hole and put the cables in at the same time. Leave a
small cable reserve inside keeping the excessive cables under the audio unit
bottom.
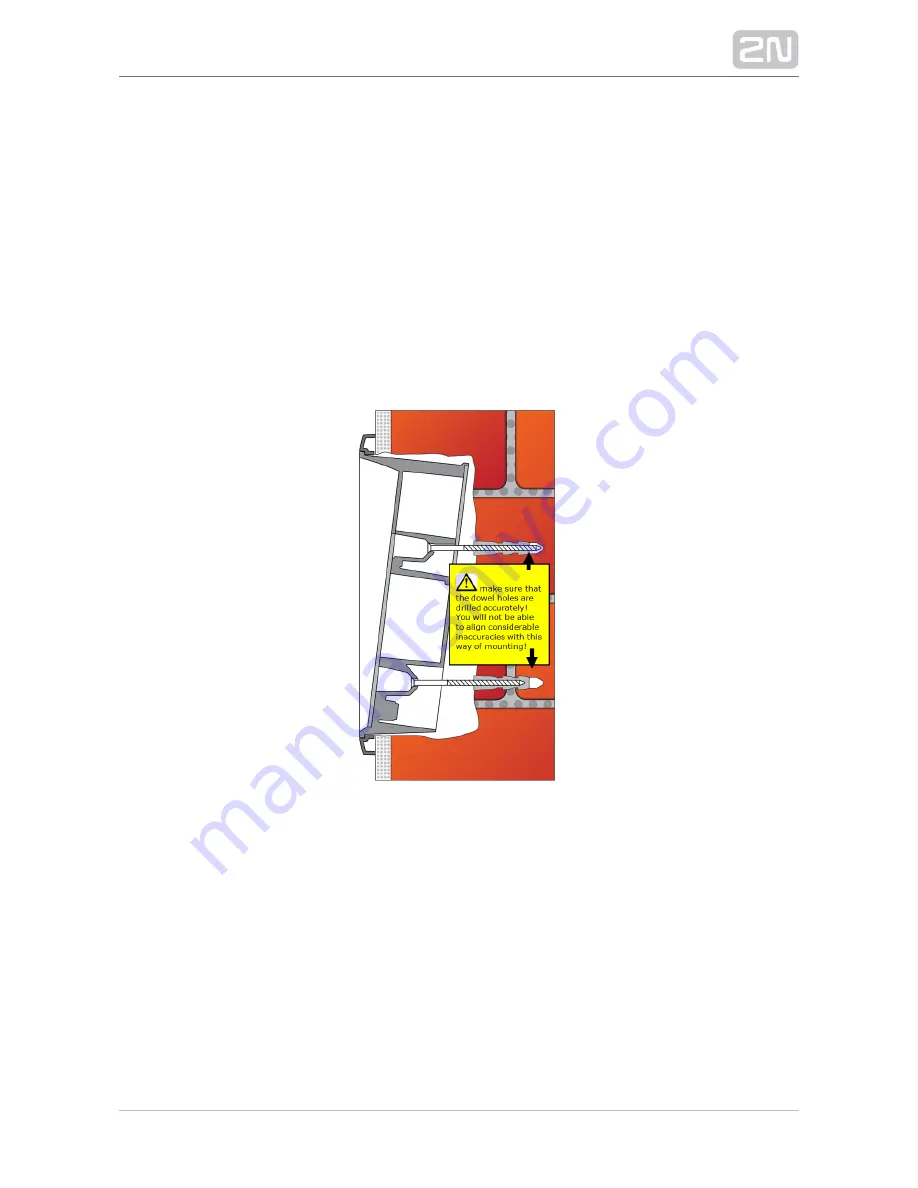
Insert the screw in the plugs in the holes on both the audio unit sides. Tighten all
the screws carefully. Caution: the screw tightening sequence may affect the
audio unit position.
Seal the frame against the wall if necessary with some silicon or other cement.
Although unnecessary for the audio unit function, the sealing helps protect the
wall against dampening due to water leakage.
Do not complete the mounting procedure until you have connected the audio
unit electrically – refer to
Electric Installation.
Summary of Contents for Lift8
Page 1: ...www 2n cz 2N Lift8 Communicator for lifts User Manual Firmware Version 2 3 1 ...
Page 28: ...2N TELEKOMUNIKACE a s www 2n cz 28 377 Indication Elements ...
Page 40: ...2N TELEKOMUNIKACE a s www 2n cz 40 377 Examples of Connection ...
Page 70: ...2N TELEKOMUNIKACE a s www 2n cz 70 377 ...
Page 95: ...2N TELEKOMUNIKACE a s www 2n cz 95 377 ...
Page 136: ...2N TELEKOMUNIKACE a s www 2n cz 136 377 User name Admin Password 2n ...
Page 202: ...2N TELEKOMUNIKACE a s www 2n cz 202 377 Connection two cabin lift ...
Page 210: ...2N TELEKOMUNIKACE a s www 2n cz 210 377 ...


