


Configuring Wireless Network
25
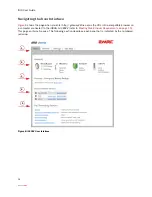
3.
Click the
Enable
checkbox next to the access point you want to enable.
4.
Select the channel (radio frequency band) the access point uses for your wireless network.
5.
Select the power level for your wireless connection from the
Power
drop-down list. The default is
400 mW.
6.
Click
Save
.
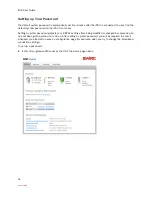
Setting up the Wireless Network Name
If you are in a densely populated area, or if you regularly connect to more than one wireless network (such
as one at work and one at home), it is good practice to give your wireless network a unique name, which
makes it easy to identify when you select the wireless network to which to connect. The default is
2WIREXXX, where XXX represents the last three digits of the serial number on the first access point that
was connected (for example, 2WIRE954).
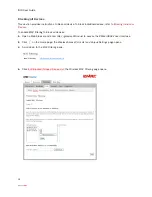
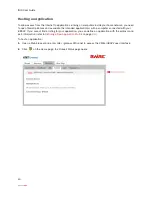
1.
Open a Web browser and enter
http://gateway.2Wire.net
to access the 2Wire i3802V user interface.
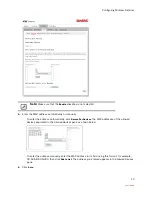
2.
Click
on the
Home
page; the
Wireless Access Point List and Unique Settings
page opens (
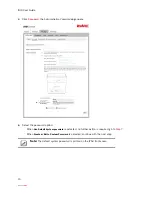
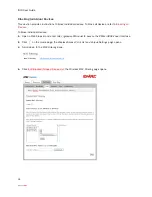
3.
Enter a name assigned to your wireless network in the
Network Name (SSID)
field.
This name appears next to
on the
Home
page.
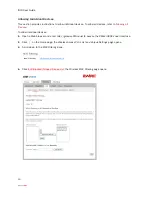
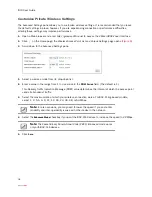
4.
Enable or disable the broadcast of the SSID over the wireless network by selecting or deselecting the
checkbox.
Enabled is the default setting, which means that your SSID is visible to anyone who is scanning for a
network to which to connect.
Deselect the
Enable
checkbox to help secure your wireless network by not announcing its presence.
5.
Click
Save
.
Note:
If you have only one access point, that access point is enabled by
default.
Note:
It is best to select
Auto
because a channel is automatically selected
to minimize interference.
Note:
If you add a PC or device later, the wireless client will be unable to
scan and connect to your wireless network when the SSID broadcast is
disabled. You will need to manually add a wireless profile in the client device
to connect to the wireless network instead of selecting the SSID name from
a typical scan list.
Summary of Contents for i38HG
Page 1: ...Release 1 0 iNID User Guide ...
Page 12: ...iNID User Guide 8 ...
Page 26: ...iNID User Guide 22 ...
Page 42: ...iNID User Guide 38 ...
Page 72: ...iNID User Guide 68 ...
Page 82: ...iNID User Guide 78 ...
Page 104: ...iNID User Guide 100 ...
Page 108: ...iNID User Guide 104 ...


