background image

3

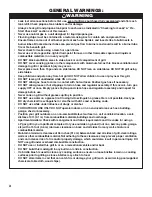
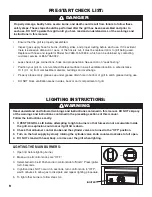
WARNING

• 

Leak test all connections before fi rst use, even if grill was purchased fully assembled and after each 
tank refi ll. Check propane tank rubber seal for damage.

• 

Always check grill and propane tank prior to each use as indicated in “Checking for Leaks” & “Pre-
Start Check List” sections of this manual.

• 

Never use natural gas in a unit designed for liquid propane gas.

• 

Flavoring chips must be contained in a metal smoking box to contain ash and prevent fi res.

• Ensure 

fl ames come out of all burner ports at each use. Spiders and insects like to build nests in 

burner tubes. Blocked burner tubes can prevent gas fl ow to burners and could result in a burner tube 
fi re or fi re beneath grill.

• 

Never check for leaks using a match or open fl ame.

• 

Never use or store gasoline, lighter fl uid, paint thinner, or other fl ammable vapors and liquids or 
combustible materials in or near your grill.

• 

DO NOT block ventilation areas in sides, back or cart compartment of grill.

• 

DO NOT cover cooking grates or other components with aluminum foil, as this blocks ventilation and 
damage to grill or personal injury may occur. 

• 

Never place more than 15 pounds on side tables. DO NOT lean on side tables. DO NOT lift grill using 
side tables.

• 

Keep children and pets away from hot grill. DO NOT allow children to use or play near this grill.

• 

DO NOT leave grill unattended while ON or in use.

• 

DO NOT allow gas hose to come in contact with hot surfaces. Redirect gas hose if necessary.

• 

DO NOT allow grease or hot drippings to fall on hose and regulator assembly. If this occurs, turn gas 
supply OFF at once. Empty grease tray/cup and clean hose and regulator assembly and inspect for 
damage before use.

• 

Never cook on grill without grease cup/tray in position.

• 

DO NOT use water on a grease fi re. Closing lid to extinguish a grease fi re is not possible. Use type 
BC dry chemical fi re extinguisher or smother with dirt, sand or baking soda.

• 

DO NOT use while under infl uence of drugs or alcohol.

• 

FOR OUTDOOR USE ONLY. DO NOT operate indoors or in an enclosed area such as a building, 
garage, shed or breezeway.

• 

Position your grill outdoors on a non-combustible level surface in a well ventilated location, a safe 
distance 10 ft. (3.1 m) from combustible materials, buildings and overhangs.

• 

Apartment dwellers: Check with management and follow requirements and fi re codes for using a
LP gas grill in your apartment complex. Only use outside on ground (not on a balcony, patio, garage, 
etc) with a 15 foot (4.6 m) minimum clearance on back and all sides from any wall, structure or 
combustible material.

• 

Maintain a minimum clearance of 36 inches (91 cm) between back and all sides of grill, deck railings, 
walls or other combustible material. Not adhering to these clearances may prevent proper ventilation 
and can increase risk of a fi re and/or property damage, which could also result in personal injury. DO 
NOT use grill under overhead combustible construction.

• 

DO NOT use or install this grill in or on a recreational vehicle and/or boat.

• 

DO NOT build this model grill in any built-in or slide in construction.

• 

If a bristle brush is used to clean any cooking surfaces, ensure no loose bristles remain on cooking 
surfaces prior to grilling as loose bristles may attach to food.

• 

DO NOT store items in cart that can catch fi re or damage your grill (such as swimming pool supplies/
chemicals, table cloth, wood chips).

GENERAL WARNINGS:

Summary of Contents for GAS7480BS

Page 1: ...DEATH OR PROPERTY DAMAGE SE PUEDE PRODUCIR UNA EXPLOSIÓN PELIGROSA SI SE HACE CASO OMISO A ESTAS ADVERTENCIAS E INSTRUCCIONES LEA Y SIGA TODAS LAS ADVERTENCIAS E INSTRUCCIONES EN ESTE MANUAL PARA EVITAR LESIONES PERSONALES INCLUSO LA MUERTE O LOS DAÑOS MATERIALES NOTICE TO INSTALLER LEAVE THESE INSTRUCTIONS WITH GRILL OWNER FOR FUTURE REFERENCE AVISO PARA EL INSTALADOR ENTREGUE ESTAS INSTRUCCIONES...

Page 2: ...1 Shut off gas to the appliance 2 Extinguish any open flame 3 Open lid 4 If odor continues keep away from the appliance and immediately call your gas supplier or your fire department 1 Do not store or use gasoline or other flammable liquids or vapors in the vicinity of this or any other appliance 2 An LP cylinder not connected for use shall not be stored in the vicinity of this or any other applia...

Page 3: ... Be alert to the possibility of serious bodily injury if the instructions are not followed Be sure to read and carefully follow all of the messages CAUTION Indicates a potentially hazardous situation which if not avoided may result in minor or moderate injury TABLE OF CONTENTS CALIFORNIA PROPOSITION 65 WARNING WARNING This product can expose you to chemicals including carbon monoxide which are kno...

Page 4: ...e tray cup and clean hose and regulator assembly and inspect for damage before use Never cook on grill without grease cup tray in position DO NOT use water on a grease fire Closing lid to extinguish a grease fire is not possible Use type BC dry chemical fire extinguisher or smother with dirt sand or baking soda DO NOT use while under influence of drugs or alcohol FOR OUTDOOR USE ONLY DO NOT operat...

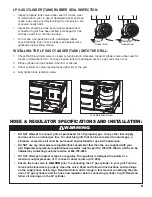
Page 5: ...s not in use Handle the tank with care Always secure the cylinder in an upright position Never connect an unregulated LP gas cylinder to your grill DO NOT expose LP gas cylinders to excessive heat or ignition sources DO NOT store a spare LP gas cylinder under or near your grill Allow only qualified LP gas dealers to fill or repair your LP gas cylinder DO NOT allow the cylinder to be filled beyond ...

Page 6: ...tion device OPD This grill is designed to fit Worthington Manchester or SMPC brand 20 lb 9 1 kg cylinders Other brand DOT cylinders may fit this grill if cylinder has similar dimensions of top and bottom rings The installation of this appliance must be in accordance with All applicable local codes or in the absence of local codes either National Fuel Gas Code ANSI Z223 1 NFPA 54 Natural Gas and Pr...

Page 7: ...l Damaged Rubber Seal HOSE REGULATOR SPECIFICATIONS AND INSTALLATION DO NOT attempt to connect grill as purchased for LP propane gas to any other fuel supply source such as a natural gas line For dual fuel grills that can be converted to natural gas a 3 Embers conversion kit must be purchased and installed for use with natural gas DO NOT use any other pressure regulator hose assembly other than th...

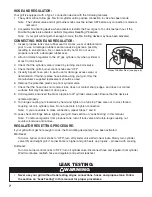
Page 8: ...ove the protective plastic cap from cylinder valve 7 Check that the hose does not contain kinks does not contact sharp edges and does not contact surfaces that may become hot during use 8 Hold regulator and insert the brass nipple into LP cylinder valve outlet Ensure that the device is centered properly 9 Turn large coupling nut clockwise by hand and tighten to a full stop Take care not to cross t...

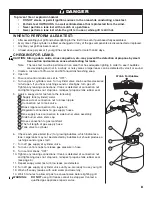
Page 9: ...n If you hear a rushing sound or smell gas turn gas off Tighten any leaking connections If leak is detected at connection nut and tightening does not stop leak reinspect propane tank rubber seal 5 Apply a soapy water mixture to the following Supply tank cylinder weld Back side of connection nut to brass nipple Connection nut to tank valve Brass nipple connection into regulator Regulator connection...

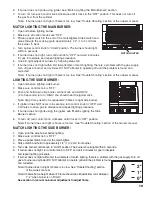
Page 10: ... 155 7480 0 which can be obtained by contacting customer service at 855 735 9922 Leak check all gas connections hose and propane tank See section on Leak Testing Position your grill on a non combustible level surface in a well ventilated location a safe distance 10 ft 3 1 m from combustible materials buildings and overhangs Properly place empty grease cup under grease drain hole in bottom of grill...

Page 11: ...urner control knob and SLOWLY 2 to 3 seconds turn to HIGH You should hear the igniter click Note Step 3 may need to be repeated 2 3 times to light side burner 4 If ignition does NOT occur in 5 seconds turn control knob to OFF wait 5 minutes to allow gas to dissipate and repeat lighting procedure 5 If burner does not ignite using the igniter see Match Lighting the Side Burner section 6 To turn off ...

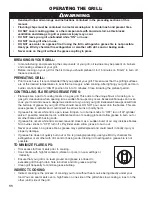
Page 12: ...n flare ups may occur Excessive flare ups can over cook your food and cause a dangerous situation for you and your grill Excessive flare ups result from the build up of grease in your grill If this should occur DO NOT pour water onto the flames This can cause grease to splatter and could result in serious burns or bodily harm If grease fire occurs while lid is open leave lid open turn burner knobs...

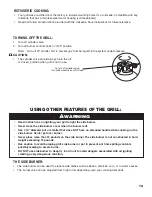
Page 13: ...ions for future reference Read instructions on lighting your grill to light the side burner Never close the side burner cover when the burner is lit Use a 10 diameter pot or smaller that does NOT have an extended handle when cooking on the side burner Center pot over burner Never place more than 15 pounds on the side burner The side burner is not constructed to hold weight exceeding 15 pounds Use ...

Page 14: ...require the use of an abrasive plastic cleaning pad Use only in direction of brushed finish to avoid damage Do not use abrasive pad on areas with graphics Car wax may help protect the exterior finish of your grill Porcelain surfaces Because of glass like composition most residue can be wiped away with a solution of baking soda and water or specially formulated cleaner Use non abrasive scouring pow...

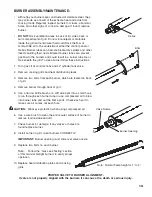
Page 15: ... distribution plates 3 Remove two bolts from each burner which are located in back of grill 4 Remove burner through back of grill 5 Use a narrow bottle brush or a stiff wire bent into a small hook to run through each burner tube or use compressed air to blow into burner tube and out the flame ports Check each port to make sure air comes out each hole CAUTION Wear eye protection when using compress...

Page 16: ...o burners and could result in a burner tube fire or fire beneath grill See Burner Assembly Maintenance under Proper Care and Maintenance If storing grill outdoors cover grill with a grill cover for protection from the weather Never move a grill when hot or in use Make sure that cylinder valve is closed and burner knobs are in the off position DO NOT store a spare LP gas cylinder filled or empty un...

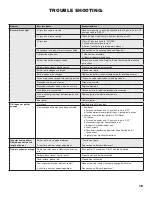
Page 17: ...cted Reconnect wire or replace electrode wire assembly Wire is shorting sparking between ignitor and electrode Replace ignitor wire electrode assembly Bad ignitor Replace ignitor Grill does not get hot enough Out of gas Replace or refill LP gas tank Flow limiting device may have been activated 1 Mini Reset a Turn control knobs and LP gas tank valve to OFF b Wait one minute and relight grill per Li...

Page 18: ...roper Care and Maintenance instructions GRILL COOKING TIPS CLEANLINESS Always wash hands thoroughly with soap and hot water prior to handling food and after handling raw meat uncooked poultry or seafood When using a platter to carry raw meat uncooked poultry or seafood to grill make sure to wash platter thoroughly with soap and hot water before placing cooked foods back on platter or use different...

Page 19: ... 10 12 Note Screws needed for assembly are pre installed and will need to be loosened partially and or removed to assemble grill 13 1 Rejilla para Calentar 3 Rejilla para Cocinar de Acero Inoxidable 4 Placas Térmicas de Acero Inoxidable 1 Mango de la Bandeja de Grasa 1 Rejilla de Cocción de Quemador Lateral 1 Recipiente para Grasa 4 Bateries AA 2 Manija del cajón 1 Manija de puerta LISTA DE PARTES...

Page 20: ...19 1 9 2 11 3 5 6 12 4 8 7 10 13 15 14 ...

Page 21: ...20 Remove 3 screws Attach parts and tighten screws Step 1 Remove 3 screws Attach parts and tighten screws Step 2 SIDE BURNER TABLE LEFT SIDE FRONT PANEL LEFT SIDE TABLE SIDE BURNER FRONT PANEL ...

Page 22: ...21 Step 4a Remove 6 screws from HANDLES Install 3 HANDLES Step 3 HANDLE HANDLE HANDLE Remove screws Remove screws Loosen screws Remove 4 screws Loosen 4 screws from each side 3 4 turns do not remove ...

Page 23: ...22 Install side tables using key holes Tighten 4 screws on each side Step 4b Install 2 screws and tighten removed from step 4a Step 5a SIDE BURNER TABLE LEFT SIDE TABLE ...

Page 24: ...23 Step 6 Install 2 screws and tighten removed from step 4a Step 5b CLIP SIDE BURNER Remove CLIP Remove SIDE BURNER ...

Page 25: ...n screws Loosen 2 screws on side burner valve Attach SIDE BURNER VALVE and tighten 2 screws Install SIDE BURNER Make sure BURNER VENTURI fits over VALVE NOZZLE Install SIDE BURNER KNOB SIDE BURNER KNOB BURNER VENTURI VALVE NOZZLE SIDE BURNER ...

Page 26: ...25 Install 3 AA batteries for LED knobs Step 10 Install CLIP Install ELECTRODE WIRE to ELECTRODE Install LED WIRING Install IGNITOR WIRING Step 9 LED WIRING CLIP ELECTRODE IGNITOR WIRING ELECTRODE WIRE ...

Page 27: ...26 Install SIDE BURNER GRATE Step 11 SIDE BURNER GRATE Step 12 IGNITOR CAP Remove IGNITOR CAP Insert AA BATTERY Install IGNITOR CAP IGNITOR CAP AA BATTERY ...

Page 28: ...13 WARMING RACK COOKING GRATES HEAT TENTS Install HEAT TENTS Install COOKING GRATES Install WARMING RACK GREASE TRAY HANDLE GREASE CUP 27 Step 14 Remove 2 screws Install GREASE TRAY HANDLE Install GREASE CUP ...

Page 29: ...28 Model GAS7480BS Assembled ...

Page 30: ...a 3 Abra la tapa 4 Si el olor persiste subsistencia lejos de la aplicación y llame de inmediato a su proveedor de gas o a los bomberos PELIGRO IMPORTANTES ADVERTENCIAS DE SEGURIDAD a NO guarde un cilindro de gas de propano líquido de reserva debajo o cerca de este artefacto b Nunca llene el cilindro más de 80 c Si la información en a y b no se sigue exactamente ae puede producir un incendio y caus...

Page 31: ...iones e Instalación del Regulador y la Manguera 34 35 Pruebas de Detección de Fugas 35 36 Lista de Comprobación Previa al Arranque 37 Instrucciones de Encendido 37 38 Funcionamiento de la Parrilla 39 40 Utilizando Otras Funciones de la Parrilla 40 Cuidado y Mantenimiento Adecuados 41 42 Transporte y Almacenamiento 43 Solución de Problemas 44 45 Sugerencias para Cocinar con la Parrilla 46 Instrucci...

Page 32: ...n otra dirección NO permita que caiga grasa o que gotee material caliente sobre el conjunto del regulador y la manguera Si ocurre esto cierre el suministro de gas de inmediato Antes de usar vacíe el depósito la batea para la grasa limpie el conjunto del regulador y la manguera e inspeccione si hay daños Nunca cocine en la parrilla sin el depósito o la batea para la grasa en su lugar NO use agua pa...

Page 33: ... válvula del tanque de propano en busca de fisuras desgaste o signos de deterioro Un sello de caucho dañado puede causar una fuga de gas lo que posiblemente derive en una explosión un incendio o lesiones corporales graves Cuando no use la parrilla cierre la válvula del cilindro Manipule el tanque con cuidado Siempre asegure el cilindro en posición vertical Nunca conecte a la parrilla un cilindro d...

Page 34: ... de protección contra sobrecarga OPD registrado y un dispositivo de conexión del cilindro compatible con la conexión para artefactos de cocina para exteriores El cilindro debe estar equipado con Una válvula de cierre con una salida de válvula del cilindro de gas Tipo 1 Una válvula Tipo 1 que evite que el gas circule hasta que se establezca un sello positivo Un sistema para la extracción de vapor U...

Page 35: ... Caucho Dañado ESPECIFICACIONES E INSTALACIÓN DEL REGULADOR Y LA MANGUERA NO intente conectar el asador a ninguna otra fuente de suministro de combustible como una línea de gas natural ya que se compró para gas LP propano Para parrillas de doble combustible que pueden ser convertidas a gas natural un juego de conversión The Boltz Group debe ser adquirido e instalado para uso con gas natural Por fa...

Page 36: ...ilindro 7 Verifique que la manguera no tenga dobleces y que no esté en contacto con bordes filosos y con superficies que puedan calentarse durante el uso 8 Sostenga el regulador e introduzca la boquilla de bronce en la salida de la válvula del cilindro de gas LP Cerciórese de que el dispositivo esté centrado adecuadamente 9 Gire la tuerca de acoplamiento grande manualmente y ajústela por completo ...

Page 37: ... las mangueras de suministro de gas Conexión de la manguera de suministro de gas al conjunto de la válvula de la quemador lateral Tapa del vástago de la válvula de la quemador lateral Conexión de la manguera al múltiple de gas El largo completo de la manguera de suministro de gas Válvula del tanque al cilindro 6 Verifique cada lugar enumerado A J para detectar la formación de burbujas que indiquen...

Page 38: ...TRUCCIONES DE ENCENDIDO Lea entienda y siga todas las advertencias y las instrucciones incluidas en este manual NO omita ninguna instrucción ni advertencia contenida en las secciones precedentes de este manual Siga las instrucciones con exactitud 1 ABRA LA TAPA DE LA PARRILLA antes de intentar encender un quemador para que no se acumule humo en el interior de la parrilla Si la tapa está cerrada po...

Page 39: ...or NO se enciende en 5 segundos gire la perilla de control a la posición APAGADO espere 5 minutos para que se disipe el gas y repita el procedimiento de encendido 5 Si el quemador no enciende usando el encendedor mire la sección de Encendido de la Quemador Lateral con Fósforos 6 Para apagar gire cada perilla de control en sentido horario hasta que se trabe en la posición APAGADO Nota Si el quemado...

Page 40: ...tapa dado que pueden generarse llamaradas repentinas Un exceso de llamaradas puede recocer la comida y causar una situación peligrosa para usted y para la parrilla Las llamaradas excesivas ocurren como consecuencia de la acumulación de grasa en la parrilla De ocurrir esto NO vierta agua sobre las llamas Esto puede causar salpicaduras de grasa que pueden conllevar quemaduras o daños corporales grav...

Page 41: ...al o la olla para evitar que se derrame el contenido de la olla lo que posiblemente cause quemaduras graves NO use el quemador lateral para freír comida en aceite a fin de evitar los peligros asociados con la ignición de aceite lo que puede crear una situación muy peligrosa APAGADO DE LA PARRILLA 1 Cierre la válvula del cilindro 2 Coloque todas las perillas de control de los quemadores en la posic...

Page 42: ...ariencia de la parrilla lávelas con un detergente suave y agua tibia jabonosa y séquelas con un paño suave después de cada uso Es posible que para los depósitos de grasa pegada se necesite una esponja abrasiva de plástico Úsela solo en la dirección del acabado pulido para evitar daños No use la esponja abrasiva en las áreas con gráficos Para proteger el acabado exterior de la parrilla puede usar c...

Page 43: ...e encuentra en la parte posterior de la parrilla 4 Retirar el quemador a través posterior de la parrilla 5 Use un cepillo para botella angosto o un alambre duro doblado en un gancho pequeño para pasarlo a través del tubo de cada quemador o sople aire comprimido dentro del tubo de cada quemador en los puertos de las llamas Inspeccione cada puerto para asegurarse de que el aire salga por cada orific...

Page 44: ...usar un incendio en el tubo del quemador o debajo de la parrilla Consulte el apartado Conjunto de los Quemadores Mantenimiento de la sección Cuidado y Mantenimiento Adecuados Si almacena la parrilla en exteriores cúbrala con una cubierta para parrillas para protegerla de la intemperie 43 Nunca mueva una parrilla cuando está caliente o cuando se usa Asegúrese de que la válvula del cilindro esté cer...

Page 45: ...do o el electrodo con alcohol rectificado El electrodo y los quemadores están húmedos Séquelos con un paño El electrodo está rajado o está roto chispas en la rajadura Reemplace el electrodo Hay un cable flojo o desconectado Vuelva a conectar el cable o reemplace el conjunto del cable electrodo Hay un cable en cortocircuito chisporroteo entre el dispositivo de encendido y el electrodo Reemplace el ...

Page 46: ...nto de Restablecimiento del Regulador Se forman llamaradas Acumulación de grasa Limpie todas las piezas de la parrilla según las instrucciones incluidas en la sección Cuidado y Mantenimiento Adecuados Exceso de grasa en la carne Quítele la grasa a la carne antes de cocinarla Temperatura de cocción excesiva Ajuste baje la temperatura de cocción Se generan incendios de grasa Hay grasa atascada por a...

Page 47: ...e pollo cruda en alimentos que han sido cocidos y están listos para ser servidos ASAR A LA TEMPERATURA ADECUADA Use un termómetro para carne para asegurarse de que la comida haya alcanzado una temperatura interna segura El Departamento de Agricultura de los Estados Unidos recomienda que se alcance las siguientes temperaturas mínimas para los siguientes alimentos SUGERENCIAS ÚTILES Si precoces la c...

Page 48: ...ARY FROM STATE TO STATE WARRANTY The Boltz Group garantiza al comprador original que la Parrilla A Gas de 4 Quemadores de 3 Embers está libre de defectos de materiales o mano de obra La Vida los quemadores de acero inoxidable Cinco años en todas las piezas de acero inoxidable restantes Tres años en válvulas armazón envoltura carro encendedor rejillas de cocinar y piezas relacionadas Las obligacion...

Reviews: