background image

360 SERIES  

ASSEMBLY MANUAL

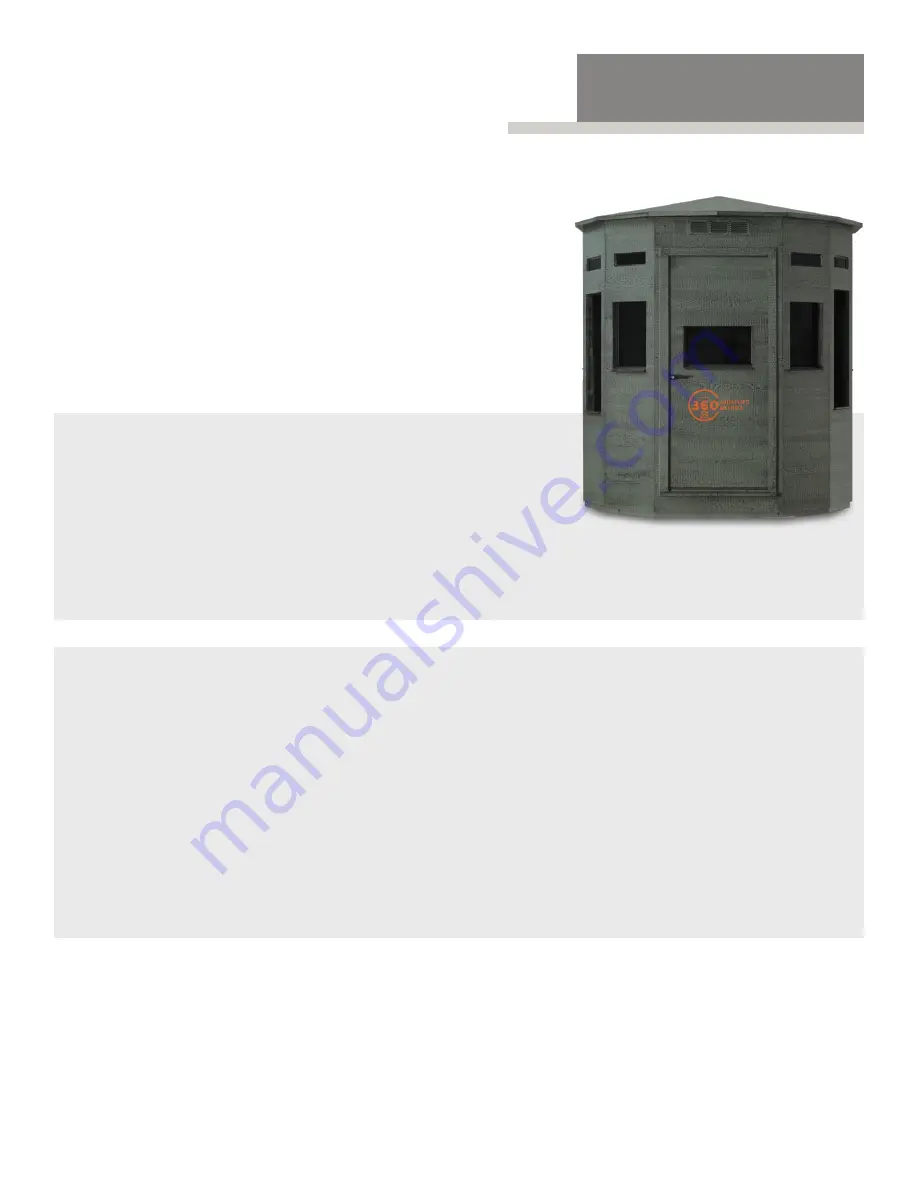
Follow this guide to assemble a series 360 Hunting Blind 
from start to finish.

If you purchased a tower stand with your blind, please  
refer to that assembly guide to assemble the tower first, the 
come back to finish the setup of the blind on the fully  
assembled tower stand.

INTRODUCTION

SUPPLIES NEEDED

PARTS LIST

•  T-50 construction stapler 
•  Utility knife
•  Impact Driver
•  Caulk gun
•  Level
•  Flat bar or prybar
•  4 - 8” – 12” Pressure Treated 4 X 4s

360 PRO

•  1 floor
•  1 floor carpet
•  8 wall panels with  

standard windows 

•  4 wall panels with  

archery windows 

•  1 door panel
•  1 roof
•  Caulk
•  1 touch up kit
•  1 set of keys

360 STANDARD

•  1 floor
•  1 floor carpet 
•  12 wall panels 
•  1 door panel 
•  1 roof
•  Caulk
•  1 touch up kit 
•  1 set of keys

360 PRO XL

•  1 floor
•  1 floor carpet
•  8 wall panels with  

standard windows 

•  6 wall panels with  

archery windows 

•  1 door panel
•  1 roof
•  Caulk
•  1 touch up kit
•  1 set of keys

At no time shall 360 Hunting Blinds be liable for any accidents due to normal or improper use of blinds or tower stands.
We recommend that you follow standard safety procedures when entering and exiting the blind, or climbing or decending the 

ladder.
Always use a gear rope to raise and lower your equipment into the blind.
Always use the handrail with both hands when climbing the ladder.
Never use the door handle to pull yourself onto the platform or stabalize your entry and exit.

SAFETY DISCLAIMER

Summary of Contents for 360 Series

Page 1: ...ASSEMBLY MANUAL 360 SERIES 2022 EDITION...

Page 2: ...ouch up kit 1 set of keys 360 STANDARD 1 floor 1 floor carpet 12 wall panels 1 door panel 1 roof Caulk 1 touch up kit 1 set of keys 360 PRO XL 1 floor 1 floor carpet 8 wall panels with standard window...

Page 3: ...working out the wrinkles and continually aligning the edges while going along If some carpet overhangs past the edge of the oor use a utility knife to trim the carpet so it is no lon ger overhanging I...

Page 4: ...to the first Re member the better the seal the longer the blind will last CAULK PANEL EDGE STEP 3 Set the first panel into place Have one person hold the top of the panel while another person aligns t...

Page 5: ...Start at the top of the panel align the tops and outsides of the panels to make sure they are even Work the panels to align the outside edges and fasten the panels together with a screw at the top Th...

Page 6: ...back out of the way caulk and install the final wall panel INSTALL THE LAST PANEL STEP 7 Lift the roof to the top of the blind and rest it on top ofthe walls Balance it on the back walls of the blind...

Page 7: ...e blind aligning the panel joints with the joints in the roof Use plenty of screws to make sure the roof can t come off FASTEN THE ROOF STEP 9 With the roof and wall panels in place it s time to insta...

Page 8: ...during setup Any unpainted siding has more risk of rot than painted siding so be particular when painting TOUCH UP STEP 11 If there are wrinkles in the carpet use a at bar or prybar to lift the wall p...

Reviews: