


8
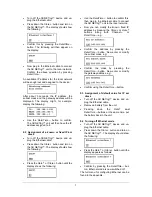
9.5 Entering an IP address into 3BNET-
lab™
•
Run 3BNET
lab
™.
•
Set up a new data entry in “Measurement
lab”.
After the window with the new data entry has
opened, proceed as follows:
•
Click the button to the right of
Device port
.
•
An entry box will open into which you
should enter the IP address that has been
determined.
10. 3B NETdata transfer software
Data stored in the 3B NET
log™
memory can
be retrieved and saved as text files with the
help of the 3B NET
data
software. In addition,
the software also provides the capability to set
modes of measurement and measurement
parameters.
Note:
Only one interface 3B NETlog™
may be connected to the computer
when using the software 3B NETdata.
10.1 Installation of the driver
Before installing the 3B NET
lab
™ software it is
necessary to install a USB driver. Proceed as
described in 7.1.
10.2 Software installation
•
Run the installation program "start.exe" as
administrator and follow the instructions on
the screen.
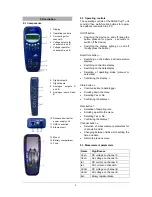
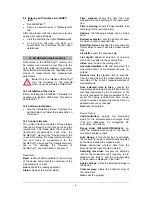
10.3 Control elements
The control interface consists of three dialogs
that can be brought to the front by clicking the
relevant tab. The “Read Data” tab is used for
transferring measurement data from the
3B NET
log
™
memory, the “Device Set-up” tab
is used for setting the measurement parame-
ters and mode of measurement for the
3B NET
log
™ device and the “Update firmware”
tab is for updating the firmware of
3B NET
log
™, see description in chapter 11.
Read Data
Read:
reads all data available in the memory
of the device and presents an overview of the
measurements in a list.
Abort:
aborts the reading operation.
Status:
displays the current status.
Time elapsed:
shows the time that has
elapsed since the beginning of the read opera-
tion.
Time remaining:
shows the approximate time
remaining for the read operation.
Options:
the following settings can be made
here:
Decimal separator:
sets the decimal separa-
tor which is used in exported files.
Date/Time format:
specifies the time and date
format which is used in exported measurement
files.
List (left):
shows the acquired data.
List (right):
additional selection of columns
which can be added to the exported files.
Index:
serial number, beginning with 1.
Absolute date/time:
date and time when the
measurement/set of measurements was re-
corded.
Relative time [s]:
elapsed time in seconds,
from the beginning of the measurement to the
recording of the current measurement/set of
measurements.
Save selected data to files:
converts the
measurements selected in the left-hand list into
text files (separated by tab characters). A file
name is requested for each measurement. The
preset file names include date, time, meas-
urement values and sampling rate and can be
adopted without any changes.
Quit
exits the program.
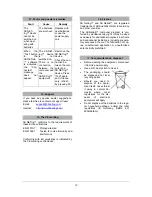
Device Set-up
Vdc/Vac/(Idc/Iac):
selects the measuring
mode for the aforementioned analogue input
(Vdc: DC voltage/Vac: AC voltage/Idc: DC
current/Iac: AC current).
Range slider (200mV-20V/200mA-2A):
se-
lects the measurement range for the above-
mentioned analogue input.
Auto Range:
if this control box is activated,
the measuring range is automatically adjusted
by the device during the measurement.
Store:
determines whether data from the
aforementioned input should be stored.
Sampling rate slider:
this sets the sampling
rate for the measurements. Frequency is dis-
played in the field f=, and the corresponding
cycle duration is displayed in the field T=.
Apply settings:
writes the selected settings to
the device.
Clear memory:
clears the entire memory of
the instrument.
Quit:
exits the program.
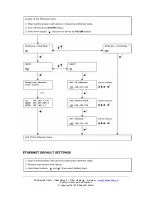
Summary of Contents for 3B Netlog 1000009
Page 12: ......


