background image

6

7-S

LOT

 C

HASSIS

 F

AN

 T

RAY

 R

EMOVAL


AND

 R

EPLACEMENT

 G

UIDE

The fans begin rotating the moment that you power on the chassis or 
that you insert the fan tray into a powered-on chassis.

8

Visually inspect all installed fans to verify that each is turning without 
interruption. If a fan is not running, shut the power off and remove 
and reinsert the fan tray.

Operating Guidelines

Follow these operating guidelines for the CoreBuilder 9000 fans:

If one fan in the fan tray fails, replace the fan tray as soon as 
possible.

Do not leave the fan tray partially out of the fan tray slot. Make 
certain the fan tray is fully inserted into the slot.

CAUTION: 

The


CoreBuilder 9000 Enterprise Switch 7-slot chassis sends 

a fan fault message (known as a trap) and can continue to run if one 
fan fails in the fan tray. Replace the fan tray as soon as possible if one 
fan fails in the fan tray. If one fan in the fan tray fails and the 
temperature is 45 °C (113 °F) or greater, a trap message alerts you to 
replace the fan tray immediately.

Locating 3Com

User Documentation

The 

CoreBuilder 9000 Enterprise Switch Getting Started Guide 

is 

available in Adobe Acrobat Portable Document Format (PDF) format on 
the 3Com Documentation CD-ROM that comes with the product.

The CD-ROM also contains:

Additional CoreBuilder 9000 documentation in Adobe Acrobat 
format

Adobe Acrobat Reader and Reader installation instructions

If you have difficulty installing the Acrobat Reader, use an Internet 
browser to download the Reader from the Adobe home page at 

http://www.Adobe.com

.

You can view additional 3Com technical documentation on the 3Com 
home page at 

http://www.3com.com

Click 

Support

 and look under 

Documents and Software

.

Summary of Contents for CoreBuilder 9000

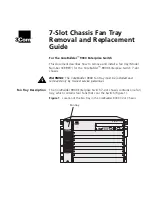
Page 1: ...nterprise Switch 7 slot chassis WARNING The CoreBuilder 9000 fan tray must be installed and removed only by trained service personnel Fan Tray Description The CoreBuilder 9000 Enterprise Switch 7 slot...

Page 2: ...e if needed Removing a Fan Tray To remove a fan tray from the CoreBuilder 9000 chassis follow these steps 1 Face the front of the chassis and using a flat blade screwdriver loosen the two spring loade...

Page 3: ...structions in this section to unpack and install a new fan tray Unpacking To unpack a fan tray 1 Open the shipping box and remove the fan tray 2 Inspect the fan tray for damage If the fan tray or its...

Page 4: ...9000 chassis while the power is on To install a new fan tray 1 Grasp the handle on the fan tray and then face the front of the chassis 2 Locate the connector on the fan tray Figure 4 Figure 4 Fan Tra...

Page 5: ...nward or you can damage the connectors If necessary remove and reinsert the fan tray ensuring that the connectors are properly aligned 6 Verify that the fan tray is flush with the front of the chassis...

Page 6: ...d can continue to run if one fan fails in the fan tray Replace the fan tray as soon as possible if one fan fails in the fan tray If one fan in the fan tray fails and the temperature is 45 C 113 F or g...

Page 7: ......

Page 8: ......

Page 9: ......

Page 10: ...roducts will be uninterrupted or error free or that all defects in the software products will be corrected For any third party products listed in the 3Com software product documentation or specificati...

Page 11: ...OR CONDITIONS OF MERCHANTABILITY FITNESS FOR A PARTICULAR PURPOSE AND SATISFACTORY QUALITY 3COM NEITHER ASSUMES NOR AUTHORIZES ANY OTHER PERSON TO ASSUME FOR IT ANY OTHER LIABILITY IN CONNECTION WITH...

Page 12: ...ition of any kind either implied or expressed including but not limited to the implied warranties terms or conditions of merchantability satisfactory quality and fitness for a particular purpose 3Com...

Reviews: