6-4
C
HAPTER
6: W
INDOWS
3.
X
T
ROUBLESHOOTING
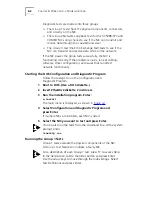
Starting the Group 2 Test
Follow these steps to run the Group 2 test on either the
3C509B-TPC or 3C509B-COMBO NIC:
1
Connect the loopback plug to the round BNC connector on
the NIC.
2
Start the Configuration and Diagnostic Program,
as described in
“Starting the DOS Configuration and
Diagnostic Program
” earlier in this chapter.
3
From the
Test
menu, select
Test Setup
.
4
Enable the Group 2 test. Select
OK
and press Enter.
5
Go to the Run Tests dialog box to start the tests.
6
After the test is completed:
a
Exit the Configuration and Diagnostic Program.
b
Remove the loopback plug.
Running the Group 3 Test
The Group 3 test is the Echo Exchange Test. It tests to see
if the NIC can transmit and receive data while connected to
the network. If you have successfully run the Group 1 and
Group 2 tests, a failure in the Group 3 test usually indicates
a cabling, hub, or network problem.
CAUTION:
Do not use an active network to run the Group 3 test.
To run the Group 3 test on the network, you need a second PC to
serve as an echo server, and it must have a 3Com NIC installed.
The echo server receives packets from and echoes packets back to
the NIC being tested. The diagnostic program provided with the
NIC supports the 3C509B echo server diagnostic program.
Setting Up an Echo Server
Follow these steps to set up an echo server:
1
Insert the
EtherDisk
diskette for the echo server NIC in
drive A of the echo server.
2
Start the diagnostic program on the echo server.
The diagnostic program that you use is dictated by the NIC that is
installed in the echo server. See
Table 6-1
. At the DOS prompt,
enter the diagnostic program name for the associated NIC.
Summary of Contents for III ISA
Page 12: ......
Page 22: ......
Page 54: ......
Page 64: ......
Page 84: ......
Page 100: ......
Page 105: ...NOTES...
Page 106: ...NOTES...
Page 107: ...NOTES...
Page 108: ...NOTES...
Page 109: ...NOTES...
Page 110: ...NOTES...


