


154
A
PPENDIX
C: S
YNTAX
C
ONVENTIONS
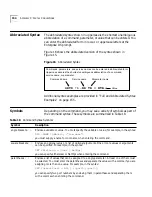
Abbreviated Syntax
The abbreviated syntax shown in uppercase is the shortest unambiguous
abbreviation of a command, parameter, or value that can be entered. You
can enter the abbreviated form in lower- or uppercase letters at the
Enterprise OS prompt.
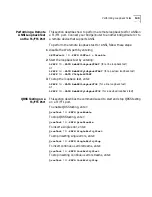
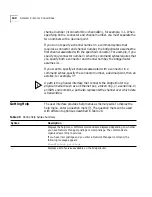
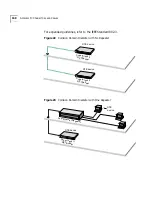
Figure 16 shows the abbreviated version of the syntax shown in
Figure 15.
Figure 16
Abbreviated Syntax
Additional syntax examples are provided in “Full and Abbreviated Syntax
Examples” on page 155.
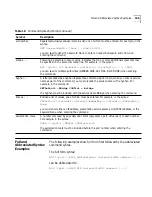
Symbols
Depending on the command, you may see a variety of symbols as part of
the command syntax. These symbols are summarized in Table 18.
SETD !1 -BR TB = NTB
Command name
Service name
Commands, parameters, and service names can be entered in abbreviated form.
Uppercase denotes the shortest unambiguous abbreviation of a command,
service name, or parameter.
Parameter name
Value
Table 18
Command Syntax Symbols
Symbol
Description
angle brackets
< >
Enclose a variable or value. You must specify the variable or value; for example, in the syntax:
ADD -SNMP COMmunity <“com.name”>
you must supply a name for com.name when entering the command.
square brackets
[ ]
Enclose an optional value or a list of optional arguments. One or more values or arguments
can be specified. For example, in the syntax:
SET PRIvilege = [User | NetMgr]
you can specify either User or NetMgr when entering the command.
parentheses
( )
Enclose a list of values that can be assigned to a single parameter. At least one of them must
be selected. You must enter the parentheses and separate the values with a comma if you are
assigning more than one value. For example, in the syntax:
SET CurrentPorts = ALL | (<port>[,<port>])
you can specify two port numbers by enclosing them in parentheses and separating them
with a comma when entering the command.
Summary of Contents for NETBuilder SI
Page 6: ......
Page 22: ...22 CHAPTER 1 FEATURES AND SPECIFICATIONS...
Page 28: ...28 CHAPTER 2 USING THE BRIDGE ROUTER IN YOUR NETWORK...
Page 40: ...40 CHAPTER 3 INSTALLING THE HARDWARE...
Page 52: ...52 CHAPTER 4 INSTALLING OR REMOVING AN INTERFACE MODULE...
Page 78: ...78 CHAPTER 6 BASIC CONFIGURATION OF PORTS AND PATHS...
Page 100: ...100 CHAPTER 7 ADVANCED CONFIGURATION OF PORTS AND PATHS...
Page 120: ...120 CHAPTER 9 CUSTOMIZING YOUR SOFTWARE...
Page 150: ...150 APPENDIX A TROUBLESHOOTING...
Page 162: ...162 APPENDIX C SYNTAX CONVENTIONS...
Page 196: ...196 APPENDIX E PROVISIONING YOUR ISDN LINE...
Page 202: ......
Page 210: ...210 INDEX...
Page 212: ......


