118
C
HAPTER
5: U
SING
RF A
UTO
-T
UNING
WITH
M
ODELLING
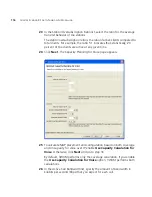
The profiles available depend on the Mobility Domain you selected in
step 31. The profile you select applies to all radios associated with the
coverage area. If you type the name of a radio profile that does not
already exist, 3WXM creates it.
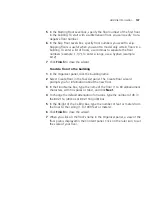
33
In the Wiring Closet list, select the wiring closet that contains the WX
switch or switches to be connected to the shared MAPs.
If the MAPs will be directly connected to WX switches, a wiring closet is
required. If all the MAPs in the coverage area will be indirectly connected
to WX switches through the network, a wiring closet is not required.
34
In the Redundant Wiring Closet list, select the wiring closet that will
provide redundant connection to the MAPs. This is required for directly
connected MAPs, if you require the MAPs to have redundant
connections. Otherwise, this is not required.
35
Click
Finish
to complete the wizard and create the coverage area. The
coverage area is now displayed on your floor.
Add MAPs
Add your direct MAPs or distributed MAPs to your network.
To add direct MAPs or distributed MAPs to your network
1
If you have not already done so, create a wiring closet and associate your
WX switches to the closet. For more information, see “Create a Wiring
Closet” on page 110.
2
Go to “Create Your MAPs” on page 101 for information about adding
direct MAPs or distributed MAPs to your network. Once created, MAPs
can be associated with a coverage area and added to the floor plan.
Associate MAPs to
the Coverage Area
Associate both your distributed MAPs and direct MAPs to a coverage area
on the floor.
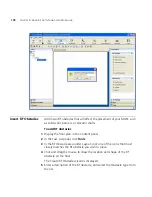
To associate MAPs to the coverage area
1
Select the RF Planning tool bar option.
2
In the Content panel, display the floor plan where the MAPs are to be
installed.
3
In the Organizer panel, click on
Coverage Areas
.
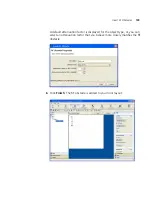
4
Right-click the Coverage Area to which the MAPs are to be associated,
and select Edit Properties from the menu. The Coverage Area Properties
dialog for the selected coverage area appears.
Summary of Contents for OfficeConnect WX2200
Page 8: ......
Page 28: ...28 CHAPTER 1 GETTING STARTED...
Page 50: ...50 CHAPTER 2 PLANNING AND MANAGING YOUR WIRELESS NETWORK WITH 3WXM...
Page 88: ...88 CHAPTER 3 CONFIGURING WIRELESS SERVICES 9 Click Next Select WPA and deselect Static WEP...
Page 132: ...132 CHAPTER 6 USING RF PLANNING 5 When you are satisfied with the results click Finish...
Page 154: ...154 CHAPTER 6 USING RF PLANNING...
Page 178: ...178 CHAPTER 7 MANAGING AND MONITORING YOUR NETWORK...
Page 198: ...198 APPENDIX A OBTAINING SUPPORT FOR YOUR 3COM PRODUCTS...
Page 204: ...204 INDEX...


