


120
C
HAPTER
5: C
ONFIGURING
THE
R
OUTER
5
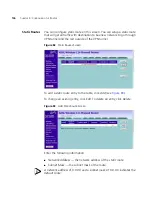
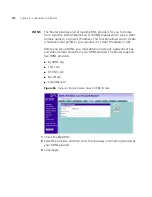
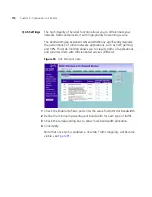
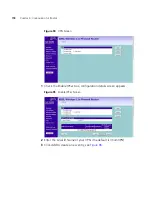
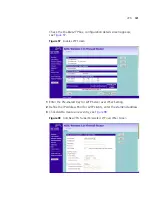
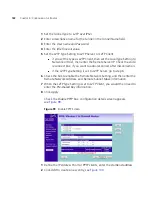
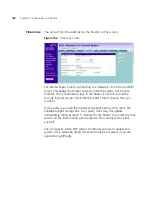
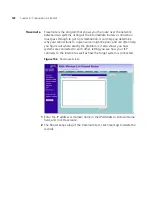
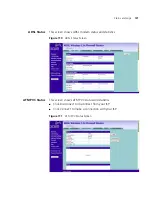
Select the
Local Party ID
, and then enter the ID, Network Address and
Subnet Mask of the Local Secure Group. The network address of the local
secure group is usually the network address of the local network.
6
From the
Key Management
drop-down menu, select either
IKE Main
Mode
or
IKE Aggressive Mode
.
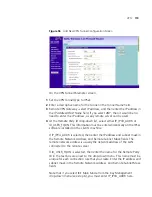
7
SA (Security Association) attribute - select the option to use for SA
attribute.
8
In the
Pre-shared Key
field, enter the password for the connection. This
must be unique for each connection rule that you create.
9
Select
MD5
, or
SHA1
from the
Authentication Algorithm
drop-down
menu. Both ends of the connection must use the same value.
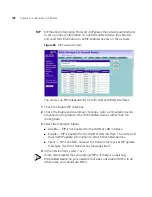
10
Select
DES
,
3DES
,
Null
,
AES-128
,
AES-192
, or
AES-256
from the
Encrypt
Algorithm
drop-down menu. Both ends of the connection must use the
same value.
11
Enter the Key lifetime, in seconds. The default is 3600 seconds. The value
must be at least 300 seconds.
12
PFS - Perfect Forward Secrecy, check this box, then the Diffie-Hellman
Group options become available. The use o PFS is optional, enabling PFS
will add another layer of encryption security.
13
Diffie-Hellman Group - select the group to use for Diffie-Hellman key
exchange.
14
Check the
IKE Keep Alive
box to enable this function. The time value is
the number of seconds that the router waits between sending IKE
keepalive packets.
15
Click
Apply
.
Summary of Contents for WL-603
Page 8: ......
Page 12: ...10 ABOUT THIS GUIDE...
Page 22: ...20 CHAPTER 1 INTRODUCING THE ROUTER...
Page 34: ...32 CHAPTER 3 SETTING UP YOUR COMPUTERS...
Page 146: ...144 CHAPTER 6 TROUBLESHOOTING...
Page 161: ...159...
Page 166: ...164 APPENDIX E OBTAINING SUPPORT FOR YOUR 3COM PRODUCTS...
Page 180: ...178...


