3D Prototyping X1
48
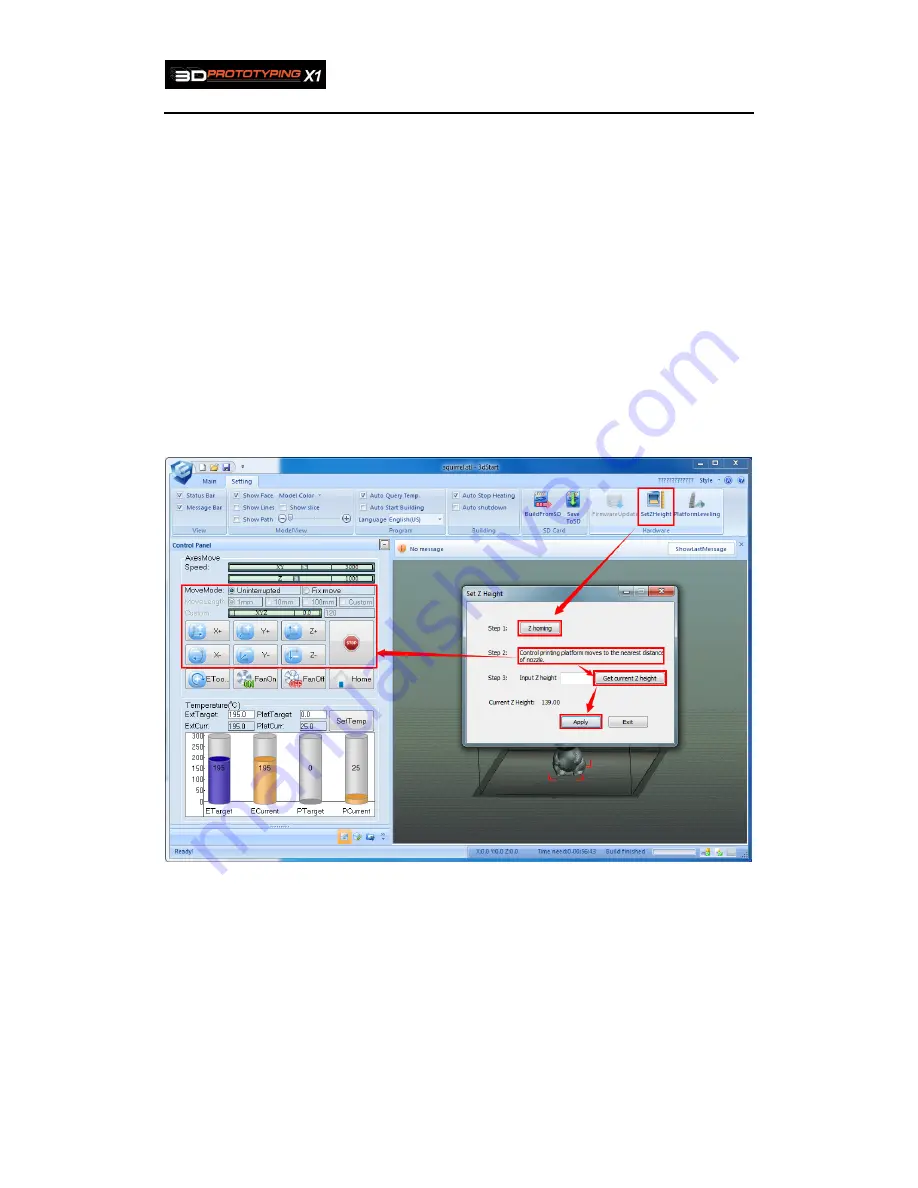
6.4. set Z axis Height
Note
:
this setting can be only operated on online status
。
1
、
“setting”->“set height”, the below dialog box will pop up
2
、
click “Z homing”
3
、
first choose “Uninterrupted”, click Z+ will make the platform move fast, and then
choose “Fix move”1mm to make slight movement, making the platform moving close
to the nozzle until they meet each other.
4
、
Click “Get current Z height ”to get the current Z axis height
5
、
Click “apply” to finish the settings.
As the figure shows
:
figure4.2.3
TIP :You may need to set Z height when models are not adhearing to the platform
properly, or are distorted.
Summary of Contents for X1
Page 1: ...3D Prototyping X1 3D Printer User Manual V1 3 ...
Page 9: ...3D Prototyping X1 7 figure3 1 1 3 figure3 1 1 4 ...
Page 12: ...3D Prototyping X1 10 figure3 1 2 3 4 Click install starting installation figure3 1 2 4 ...
Page 33: ...3D Prototyping X1 31 figure4 3 8 ...
Page 35: ...3D Prototyping X1 33 figure4 6 2 Ready figure4 6 3 Buiding ...
Page 48: ...3D Prototyping X1 46 figure6 2 4 figure6 2 5 ...


