


9
7 . Lift the cardboard piece from the foam package and remove the foam package . This
package includes your power cord, Cube Stick glue and the jet wiper . (Fig . 7)
Fig . 9
Fig . 7
Fig . 8
Fig . 10
Fig . 11
Fig . 12
8 . Remove print pad from CubeX . (Fig . 8)
9 . Using the 4 x 100 hex screwdriver (located in tool kit), remove plexiglass Z-Axis
guard by unbolting the 4 screws holding it in place and remove plexiglass and bolts .
(Fig . 9)
10 . To power on, plug the power cord into the power supply located underneath the
printer base . Lift the right side of the printer to gain access to the power supply . (Fig .
10)
11 . The LED on the control panel should light up indicating the printer has power .
Remove the “Warning” label from the touchscreen . (Fig . 11)
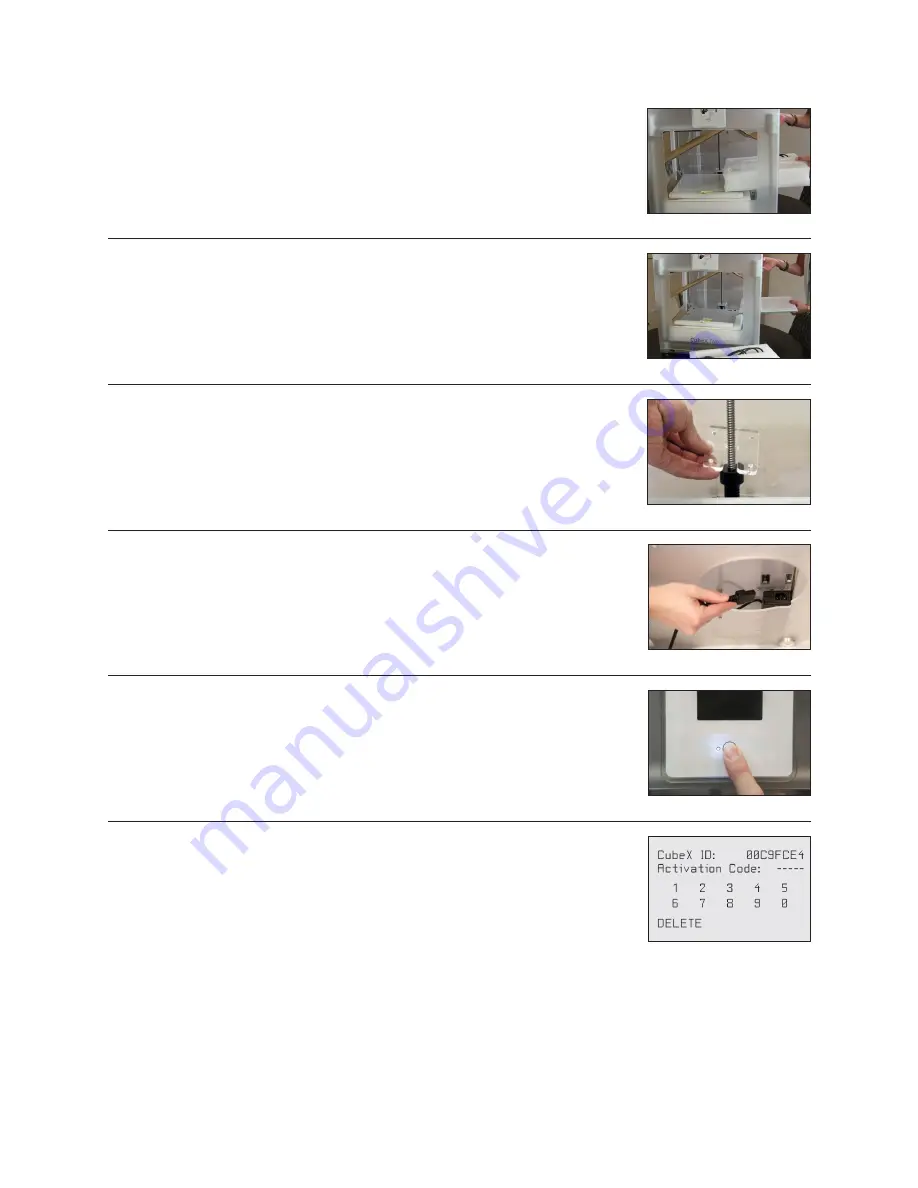
12 . Press the Control button, the CubeX Activation Screen will appear . You will need to
register and activate your CubeX to unlock the printer . (Fig . 12)


