background image

4

3D Systems, Inc.

6

   FEATURES

BUILD MODES

The ProJet 5500X 3D Production System features three build modes to meet a variety of model making applications.

The High Defi nition (HD) 

Mode allows the user rapid model making capability 

on a full platform.  This mode produces high quality parts for concept models, 
verifi cation designs and patterns for casting.  The build area in HD mode is:

568.579  x  381  x  299.72 mm,  (22.385  x  15  x  11.8 inches), (x,y,z).

The Ultra High Defi nition (UHD) 

Mode allows the users to build extremely 

high resolution parts with exceptional surface fi nish and superior accuracy.     
The build area in UHD mode is:

568.579  x  381  x  299.72 mm,  (22.385  x  15  x  11.8 inches), (x,y,z).

PART STACKING AND NESTING

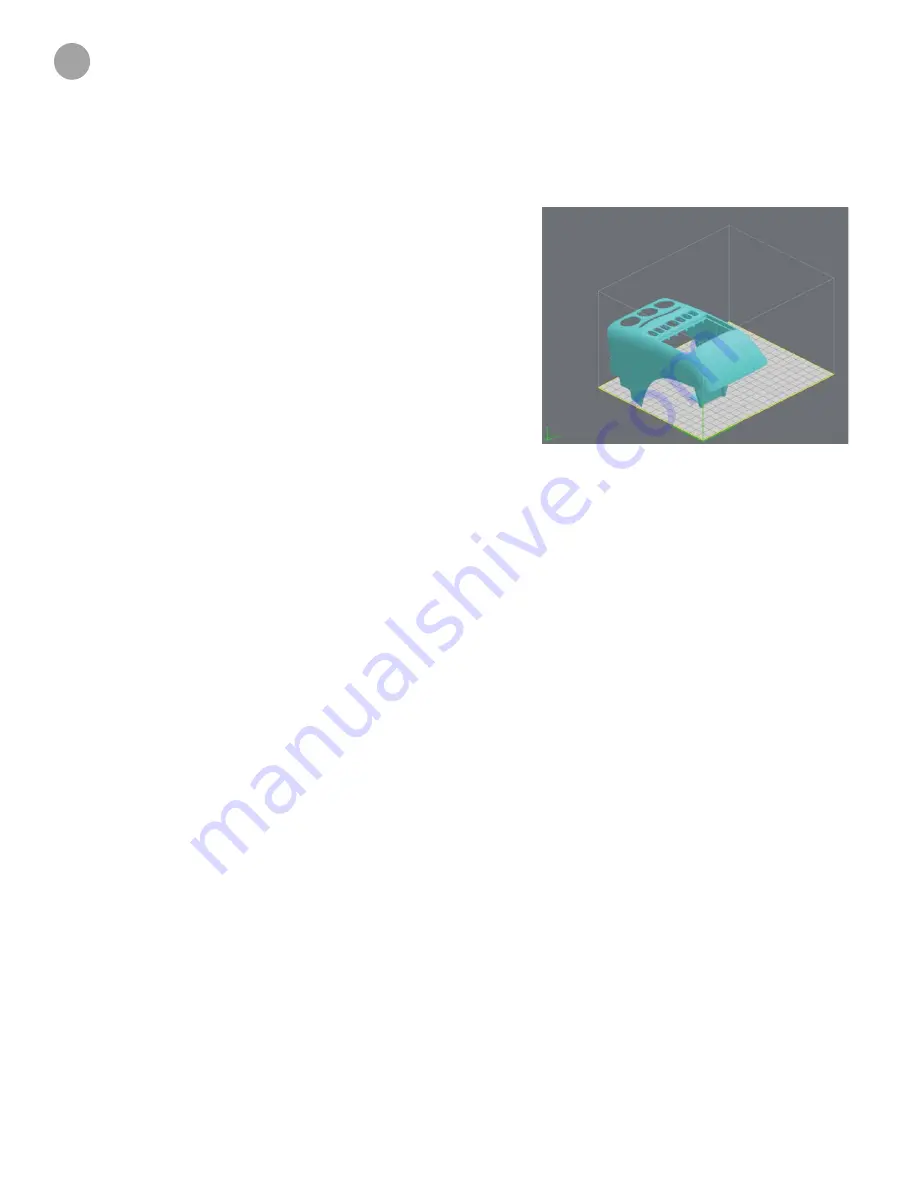
The ProJet 5500X 3D Production System features part stacking and nesting capability in both build modes.

• 

Stacking:

 The user can utilize the entire build volume 

by stacking parts vertically in the z-direction to fi ll up the 
entire build envelop with parts. The user can control the 
space between layers to minimize support material usage 
and build time. Hours can be saved by stacking parts and 
submitting single, long builds overnight and weekends

• 

Nesting 

capability allows parts to be placed within the 

boundaries of one another but not overlapping the part 
structure itself. 

TWO MATERIALS FOR PART BUILDING

The ProJet 5500X provides the simultaneous use of two build materials along with a support material. The 3D printer system has a total of four 
material delivery modules, (MDM).  Each MDM holds two bottles of material.  This provides for a total of four bottles of support material and four 
bottles of part material.

Support material is loaded into both MDMs located on the left side of the machine, for a total of four bottles.  All bottles of support material must 
be the same type.

Part material is loaded into the MDMs located on the right side of the machine.  The upper MDM is designated MDM “A” and the lower MDM is 
designated MDM “B”.  Two bottles of part material A are placed into MDM “A” and two bottles of part material B are placed into MDM “B”.  

The following part materials are available for the ProJet 5500X:

• VisiJet® CR-CL, Composite Rigid Clear

• VisiJet® CR-WT, Composite Rigid White

• VisiJet® CF-BK, Composite Flexible Black

For support material, the ProJet 5500X uses VisiJet S500.

The High Defi nition High Speed (HDS) 

Mode allows the user to print up to 

50% faster than HD mode without loss of resolution. This mode prints in a single 
material (either the rigid or elastomeric plastic) and produces the same quality 
parts as HD mode. The build area in HDS mode is:

568.579  x  381  x  299.72 mm,  (22.385  x  15  x  11.8 inches), (x,y,z).

Summary of Contents for ProJet 5500X

Page 1: ...ProJet 5500X 3D Professional Printer User Guide Original Instructions ...

Page 2: ...roJet 5500X Printer 12 ProJet 5500X Software 14 Touchscreen Control Panel 15 Status Screen 17 Settings Screen 18 Print Screen 20 Materials Screen 21 Tools Screen 22 10 PROJET 5500X STARTUP AND DEMO BUILD 24 Power the 3D printer system On 24 Material Delivery Modules MDM and Material Bottles 25 Install Material Bottles 25 Install Waste Bags in the Waste Drawers 26 Install Print platform 26 Demo pri...

Page 3: ...NG 55 Communication Errors 55 Head Maintenance Station Errors 55 Material Feed and Waste System Errors 55 Thermal Shutdown 55 Material Quality Guarantee Errors 56 Material Waste Errors 56 Motion System Errors 56 UV Subsystem Errors 57 Vacuum Regulator Errors 57 Power Outage 57 16 FINISHING 58 17 OTHER DOCUMENTS 58 18 SERVICE AND SUPPORT 58 19 FREQUENTLY ASKED QUESTIONS FAQ 59 20 GLOSSARY OF TERMS ...

Page 4: ...t and demo builds to the 3D printer system from your computer Also refer to your online help for software instructions Operations Describes loading and running the 3D printer system start and stop print jobs monitor and control print jobs unload build parts and dispose of waste material Error Messages Defines error messages you may see on the touchscreen and provides the action to take to correct ...

Page 5: ...is available through common enclosure access methods including use of common tools and removal of covers Note Changes or modifications to this equipment not specifically approved by 3D Systems may void the user s authority to operate this equipment LIMITATIONS OF WARRANTY AND LIABILITY This information is provided by 3D Systems for the convenience of its customers It is believed to be reliable but...

Page 6: ...ead this guide prior to handling VisiJet materials or operating the 3D printer system The safety sections inform you how to handle the material properly and avoid damage and injury when operating the 3D printer system For more detailed material safety information refer to the VisiJet Post Processing Guide on 3DS Central System Requirements Provides electrical requirements prior to plugging in your...

Page 7: ...undaries of one another but not overlapping the part structure itself TWO MATERIALS FOR PART BUILDING The ProJet 5500X provides the simultaneous use of two build materials along with a support material The 3D printer system has a total of four material delivery modules MDM Each MDM holds two bottles of material This provides for a total of four bottles of support material and four bottles of part ...

Page 8: ... cool before touching Access panels are for service only and should be opened only by certified service personnel or trained maintenance personnel HARMFUL IRRITANT WARNING Indicates that skin or eye irritation could result while exposed to a chemical composition CAUTION Indicates the possibility of loss of data or damage to equipment WARNING Indicates the possibility of injury or death to personne...

Page 9: ...m service tasks Certification may occur at different levels and service providers should only perform tasks they are authorized and certified to complete Do not ignore warning signs posted during 3D printer system service operations If an error message appears on the touchscreen refer to Error Messages on page 52 before resuming operation To prevent potential skin irritation and sensitization due ...

Page 10: ...nical Support Hot line 3D Systems assumes no liability or responsibility for proper disposal of uncured part material Proper disposal of uncured material is the sole responsibility of the user HEALTH HAZARD IRRITANT CAUTION Uncured 5500X VisiJet part material is a sensitizer Skin or eye irritation could occur when exposed to the chemical composition of the material Any chemical may exert harmful e...

Page 11: ...ecommends wearing a thermal liner with a nitrile glove worn over the liner The thermal liner must be capable of withstanding temperatures up to 90 degrees C Eye protection In the event of a leak or spill of uncured part material wear safety glasses with side shields to provide eye protection Respiratory protection Because of the 3D printer system s built in engineering controls respiratory protect...

Page 12: ...ystem and contact 3D Systems Technical Support for a service visit to determine and repair the source of leakage Small spills of uncured liquid part material can be cleaned up using disposable towels non reusable rags or absorbing materials such as sawdust clay diatomaceous earth or activated charcoal If spilled material is hot liquid wait until cools and gels before wiping up After wiping up the ...

Page 13: ...ottle if the expiration date has expired for support material or more than one year past the expiration date for part material NOTE When storing material bottles that have been used but still have materials in them do not place the bottles on their side stand bottles in the upright position Also in the case where used bottles with materials are removed from the MDM and are still warm it must be st...

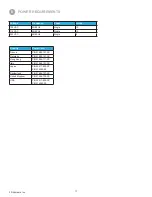
Page 14: ... 240 VAC 50 60 Hz Single 8 11 Country Power Cord France P N 21684 101 XX Germany P N 21684 101 XX Hong Kong P N 21684 111 XX Italy P N 21684 101 XX Japan P N 23417 802 XX P N 316262 00 Switzerland P N 21684 107 XX United Kingdom P N 21684 105 XX USA P N 23417 802 XX P N 316262 00 8 POWER REQUIREMENTS ...

Page 15: ...he part material used to build parts is an ultraviolet UV curable material After a layer of material is deposited in the build chamber the part is exposed to a UV flash lamp The UV energy is absorbed by the material converting the liquid build material to a solid polymer When the build is complete the part consisting of two part materials is adhered to the print platform by means of the support ma...

Page 16: ...e located on the right side of the machine The ProJet 5500X allows for the simultaneous use of two different part materials Build Chamber The figure below shows the ProJet 5500X with the build chamber door open The user will access the build chamber to install a print platform before each build and to remove the completed parts at the completion of a build The build chamber door is equipped with a...

Page 17: ...unctionality that is provided at the touchscreen located on the 3D printer system itself Client Manager Client Manager is a software package that is used to manipulate the STL files that are subsequently sent to the ProJet 5500X as print jobs Print jobs cannot be submitted locally at the 3D printer system itself and must be submitted through Client Manager PROJET 5500X SOFTWARE ...

Page 18: ...d press this key to delete the print job from the print queue Copy Select a print job and press this key to duplicate the print job The duplicate will appear in the print queue Move to Top Select a print job and press this key to move the print job to the first position in the print queue Move Up Select a print job and press this key to move the print job up one position in the print queue Move Do...

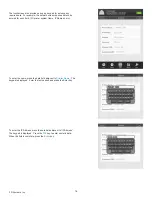
Page 19: ...ach field 3D printer system Name IP Address etc To enter the name press the data field adjacent to Printer Name The keypad is displayed Enter the text needed and press the Enter key To enter the IP Address press the data field adjacent to IP Address The keypad is displayed Press the 123 key to enter numeric data When the field is complete press the Enter key ...

Page 20: ...how long the job will take to print Print Start Time stamp when the print started below the print start a sub line with show the elapsed print time Estimated Print End Time stamp when the print will end below the print end a sub line will show the remaining print time Progress Bar Indicates the amount of progress when warming up or the amount of progress when printing Message Displays a 3D printer...

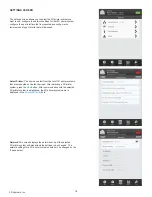
Page 21: ...he user can select from the list of 3D printer systems that are presented on the touchscreen After selecting a 3D printer system press the Use button After communication with the selected 3D printer system is established the 3D printer system name is displayed in the Current Printer field Network This screen displays the network set up of the selected 3D printer system and also allows the settings...

Page 22: ...ceive alerts or sliding to Off to stop alerts Machine E mail Provides the e mail server set up of the 3D printer system that is currently being used Admin Email Admin of the network can control email alerts by sliding the On Off button to avoid notification of various 3D printer system states Send a Test Email After network and email setup is completed a test email can be sent to your email to ens...

Page 23: ...this key to duplicate the print job The duplicate will appear in the print queue Move to Top Select a print job and press this key to move the print job to the first position in the print queue Move Up Select a print job and press this key to move the print job up one position in the print queue Move Down Select a print job and press this key to move the print job down one position in the print qu...

Page 24: ... printer system s four Material Delivery Modules MDM and provides information for each material bottle position within the MDM Touch the screen to select a particular bottle and Information for that bottle is displayed in the support material or part material message boxes ...

Page 25: ...d mode test a print and perform a demo print TOOLS SCREEN This screen will provide diagnostic information about the 3D printer system Printer Info provides information about the control software version Print3D software version 3D printer system type and its address ...

Page 26: ...m or to restart the 3D printer system software Material Changeout Wizard If a material swap is needed the Material Changeover Wizard purges the old material out of the 3D printer system Printer Usage Provides 3D printer system usage information in hours minutes and seconds Also indicates the amount of part and build material that have been used ...

Page 27: ...ou with all of the basic 3D printer system operations needed to build parts on the ProJet 5500X and provides a functional shakedown for a new installation It is strongly recommenced that you complete this section before moving on to larger more sophisticated builds POWER THE 3D PRINTER SYSTEM ON 1 Place the power switch on the rear of the 3D printer system to the ON position 2 Wait approximately 2...

Page 28: ...reviously stated only two MDM are loaded with material for the Demo print Subsequent print jobs will require all MDMs to be fully loaded with both support and part material MATERIAL DELIVERY MODULES MDM AND MATERIAL BOTTLES The 3D printer system has a total of four material delivery modules MDM Each MDM holds two bottles of material This provides for a total of four bottles of support material and...

Page 29: ...ositioned in front of the rear brackets 5 Slide the platform toward the rear of the 3D printer system until it is firmly pressed against the rear brackets Press down on the platform at the points indicated to make certain the platform is seated onto the Z carriage 6 Close the front door and press the Start key on the touchscreen to bring the 3D printer system online INSTALL WASTE BAGS IN THE WASTE...

Page 30: ...ics 3 Press Demo Print 4 Select the mode HD or UHD for the Demo Print 5 The system displays PLATFORM EMPTY DOOR CLOSED Y N 6 Make certain the platform is empty the door is closed and press YES 7 The 3D printer system starts the demo print job 8 The demo print will take approximately three hours ...

Page 31: ...from the 3D printer system EMPTY WASTE DRAWERS Personal protection equipment is required before opening waste drawer Follow all material handling and disposal guidelines Always follow Global Health and Safety guidelines and local regulations regarding handling and disposal of regulated materials Keep disposal records if local law requires CAUTION Wear protective gloves and sleeves before removing ...

Page 32: ...de contact 3D Systems Technical Support Mode Time Standby 15 min Conserve 25 min Initial Power Up 120 min 3D PRINTER SYSTEM SHUTDOWN AND POWER OFF NOTE Before shutdown and power off verify that there is no need to build parts again soon CAUTION Switching off or disconnecting the 3D printer system power without performing the following shutdown procedure can damage the 3D printer system Always perf...

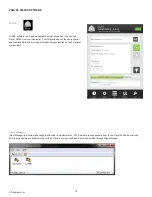
Page 33: ...ging print jobs through the 3D Modeling Client Software All software described in this section is installed on your system at the same time the 5500X is installed at your location 1 From the Start menu select All Programs 3D Systems 3D Modeling Accelerator Client Manager 2 The Client Manager software will start and display on your screen as shown ...

Page 34: ...Jet 5500X printer and click OK 3 If you do not know the IP address you can display the IP address of your ProJet 5500X by pressing Settings Network on the touchscreen 4 The client software prompts for a 3D printer system name For example enter the name my 5500X and click OK 5 After the 3D printer system is added Client Manager will display an icon with the 3D printer system name ...

Page 35: ...o open the Submit dialog box 3 Click Select Files on the Submit dialog box This opens a browser and allows you to select the directory which contains your stl files 4 For this example browse to the following directory C Program Files x86 3D Systems 3D Modeling Accelerator Samples 5 Select the stl file Sample1 6 The Submit screen will appear as shown 7 Click the Submit button 8 The print job will a...

Page 36: ...7 The second instance of the print is displayed with an _s indicating the job has been saved and can be printed at a later time 8 To print the saved print job click on the print job to highlight it and then click Confirm The screen will again appear as in the previous step Press the Start key on the touchscreen to start the print job 9 The saved print job indicated by the _s will remain in the pri...

Page 37: ...user needs additional time to determine which print job s should be printed first 1 Follow steps 1 through 6 of the procedure Select an STL File and Submit a Print job 2 On the Submit screen click Preparation Only then click Submit 3 The print job will appear in my 5500X Info as shown The print job is presented with a Job status of Needs Confirm 4 To print the print job right click on the print jo...

Page 38: ...stage of printing The ProJet Accelerator Client Software has features built in to allow a user to compensate for the natural shrinkage of the material and also fine tune the accuracy of a part The VisiJet Matrial Shrink Compensation Tools see 3DS Central are provided for this purpose The kit includes instructions a worksheet two STL files and will explain the process for entering shrink compensati...

Page 39: ...splay PAUSE ACKNOWLEDGED until the 3D printer system has completed printing the current layer 4 After the current layer is complete the message bar will display PRINT PAUSED 5 The message bar will also display AUTO RESUME 05 00 indicating that the 3D printer system will automatically resume printing in five minutes 6 The user may also manually restart the print job by pressing the Start key 12 OPE...

Page 40: ...message bar will display ABORT ACKNOWLEDGE 4 The Start key will return to green and the Abort key will return to red The message bar will display FINISHING PRINT 5 The 3D printer system will continue multiple curing cycles so the user will not be exposed to uncured material when removing the print The 3D printer system will continue to display FINISHING PRINT during the curing cycles ...

Page 41: ... is limited to the following conditions It can only be used from Print History It can be used to repeat the print job that is currently printing It can be used to repeat most recently completed print job if the 3D printer system is still idle and has not started building again 1 From the Status screen tool bar press Prints 2 From the Prints screen press Print History 3 The last completed print job...

Page 42: ...b job_name 6 Press Yes 7 The 3D printer system will place the print job at the top of the print queue as the next print job to be built 8 The touchscreen returns to the Status screen and displays PLATFORM EMPTY DOOR CLOSED Y N 9 Make certain the platform is empty the door is closed and press YES ...

Page 43: ...OB 1 From the Status screen tool bar press Prints 2 The Print Queue screen is displayed 3 On the Print Queue screen press Edit 4 Select the print job you want to copy A check mark will appear beside the print job 5 Press the copy icon ...

Page 44: ...ob 7 The print job is placed at the end of the print queue with Copy as a designator 8 If you need to position the copied print job to a different position in the print queue 9 Press Edit 10 Select the print job 11 Use the arrow keys to move the print job to a different position in the print queue ...

Page 45: ...B 1 From the Status screen tool bar press Prints 2 The Print Queue screen is displayed 3 On the Print Queue screen press Edit 4 Select the print job you want to delete A check mark will appear beside the print job 5 Press the delete icon ...

Page 46: ...43 3D Systems Inc Delete a Print job continued 6 Press Yes to the displayed message Delete selected job 7 The print job is deleted from the print queue ...

Page 47: ... any other solvent in this 3D printer system will damage the printhead The material change procedure will take approximately 30 minutes to execute and consume a combined total of approximately 800 grams of old and new material 1 From the Status screen tool bar press Tools 2 Select Material Changeout Wizard 3 Press the Start key to begin the material changeover 4 Press Yes to the displayed message ...

Page 48: ...tle Tighten the cap on the bottle Store the bottle in an upright position in the original carton Do not place the bottle on its side 8 Press Yes to the displayed message Caution Do not install new material cartridges at this time Doing so will flood the system with material and cause damage to the MDM 9 Make certain the Head Maintenance Station waste bag the waste bag on the left is empty and pres...

Page 49: ...er door is closed and press Yes to the displayed message 11 Make certain waste bags are empty both waste drawers are closed and press Yes to the displayed message 12 The screen will appear as shown after the 3D printer system has cleared all material from the fluid system ...

Page 50: ... cycle the following message is displayed WARNING THE MDM HOLDER AND MOLTEN MATERIAL WILL BE HOT AVOID TOUCHING THE SIDES OF THE HOLDER DURING THE CLEANING PROCESS WEAR PROTECTIVE HEAT RESISTANT GLOVES PROTECTIVE SLEEVES AND GOGGLES DISPOSE OF THE MATERIAL ACCORDING TO ALL LOCAL STATE AND FEDERAL REGULATORY GUIDELINES 15 Clean each MDM holder thoroughly ...

Page 51: ...ttles into the upper MDM 17 Press Yes to the displayed message 18 After a 30 minute warm up the 3D printer system is ready to print 19 Although the screen will display a progress bar for Test Print the 3D printer system will not perform a test print ...

Page 52: ...opening waste drawer Follow all material handling and disposal guidelines Always follow Global Health and Safety guidelines and local regulations regarding handling and disposal of regulated materials Keep disposal records if local law requires WARNING WEAR PROTECTIVE HEAT RESISTANT GLOVES PROTECTIVE SLEEVES AND GOGGLES BEFORE REMOVING ANY WASTE MATERIAL BE CAREFUL NOT TO SPILL DROP OR EXPOSE OTHE...

Page 53: ... lint free cloth to absorb the material in the MDM holder 3 Using a long tool such as tongs remove the saturated cloth from the holder and place in a waste bag Continue to clean the holder until all material is removed 4 After the holder is clean ensure there is no debris or lint left inside of holder 5 Dispose of waste material and all clothes that were used according to your local codes CHANGING...

Page 54: ...screwdriver to loosen the screws on the bracket and remove bracket 6 Remove the carbon filter 7 Install the new carbon filter 8 Install bracket to secure filter and tighten screws 9 Replace the cover panel 10 Close the build chamber door ...

Page 55: ...slot is 3 or less NONE NOT BUILDING The 3D printer system is ready to build Press Start to build ProJet X X month dd yyyy TIME XX XX XX When 3D printer system is initially powered up the latest version of firmware is briefly displayed NONE MATERIAL MESSAGES Use the following messages to help manage print jobs before during and after building The causes and actions to take to various messages are d...

Page 56: ... 3D printer system is paused Press PAUSE to continue ABORT to cancel CYCLE POWER TO CONTINUE A severe error occurred The 3D printer system cannot recover from it and must be switched off Cycle power to the 3D printer system If the error message occurs again contact your Certified 3D Systems Service Provider DONE REMOVE BUILD The 3D printer system completed building the current job Remove the platf...

Page 57: ...inter system cool down is complete 3D printer system is ready for power off Wait for OK TO POWER OFF message then switch power off at the 3D printer system s rear panel NOTE Before you switch power off verify you will not need to build parts again soon It can take several hours for the 3D printer system to warm up after you switch power back on STANDBY The 3D printer system is in energy saver mode...

Page 58: ...E XX XX XX A communication error occurred Cycle power to the 3D printer system If this does not restore communication contact your Certified 3D Systems Service Provider HEAD MAINTENANCE STATION ERRORS MESSAGE CAUSE ACTION HMS ERROR Recovery An error occurred during printhead maintenance cleaning the printhead before beginning a build Cycle power to the 3D printer system If error message occurs aga...

Page 59: ...en If error message occurs again contact your Certi fied 3D Systems Service Provider MATERIAL WASTE ERRORS MESSAGE CAUSE ACTION RT_ERROR drain tank not responding Fault detected in control circuitry Cycle power to the 3D printer system If error message occurs again contact your Certified 3D Systems Service Provider RT_ERROR Drain tank Position error Fault detected in control circuitry Cycle power ...

Page 60: ...matically start when power is restored This prevents 3D printer system damage due to power flickers and surges 2 When power is restored and stable switch 3D printer system power ON located on the rear panel If power outage occurs and is restored before anyone can take action the 3D printer system will recover as follows 1 The 3D printer system advances through warming stages until reaching the req...

Page 61: ...m parts and clean parts 16 FINISHING For information questions or comments about the ProJet 5500X VisiJet materials or request service please contact your Certified 3D Systems Service Provider 3D Systems Inc 333 Three D Systems Circle Rock Hill SC 29730 USA tel 803 326 3900 email moreinfo 3dsystems com www 3dsystems com NYSE DDD Customer Support Hotline U S A 800 793 3669 Asia Pacific 852 29 23 50...

Page 62: ...e 3D printing process work The 3D printer system builds functional 3D prints from the bottom up one layer at a time STL files are imported into the 3D printer system where the files are sliced and any necessary support structures are created The materials are fed into the 3D printer system from material bottles and accurately deposited in layers upon the print platform After completion of the buil...

Page 63: ... produce 3D prints on stereolithography machines or other 3D printing systems It is a triangular representation of a three dimensional object The surface of the object is broken into a logical series of triangles These triangles represent the surface of the object How do I export an STL file from my 3D CAD program Most CAD software offers STL file conversion add ins under the Save As or export fun...

Page 64: ...ds an encrypted RFID tag on the cartridge to communicate parameters and ensure optimum build quality Modeling the 3D printer system uses materials and a print platform to create three dimensional plastic prototype prints Touchscreen is used to display print job status menu options and command prompts for the 3D printer system Post Curing Finishing is the final process to remove support material fr...

Page 65: ...tion of the machine La description de la machine Machine type Usiner le type Serial Number Numéro de série Applicable EC Directives Les Directives applicables de CE Applicable Harmonized EC Standards Les Normes de CET Harmonisé applicables Manufactured in USA for 3D Systems Inc Fabriqué dans l USA pour 3D Systèmes Inc Company Name Nom de compagnie __________________________ ______________________ ...

Page 66: ...3D Systems Inc 333 Three D Systems Circle Rock Hill SC 29730 www 3dsystems com 2014 3D Systems Inc All rights reserved pn 318154 00 Rev E ...

Reviews: