


3D Systems, Inc.
17
p/n 76-D020 Rev. A
PREPARING A PRINT JOB USING 3D SPRINT
3D Sprint is 3D Systems’ exclusive software for importing CAD data and preparing it for printing . 3D Sprint can be used either
on the ProX 6100 or remotely connected from your workstation or off-line at a stand-alone workstation (Virtual Printer) . The 3D
Sprint application contains extensive help with further details pertaining to the operation of the software .
To prepare a print job on the ProX 6100, you will need to do the following:
•
Run Sinter
•
Launch 3D Sprint
•
Import files (“parts”) to your print job. 3D Sprint supports most standard file formats including .3dsprint, STL, OBJ, CTL, PLY,
BPZ and IGES
•
Repair files, if needed (automated)
•
Orient and position parts in build volume
•
Set specific “build” and “part” parameters for your site.
•
Quality check (optional)
•
Run Build Time and Material required estimate .(optional)
•
Save the 3D Sprint file or output the print job for processing
Each procedure is summarized below
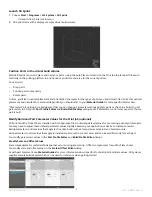
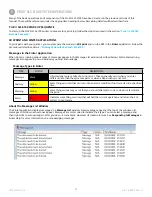
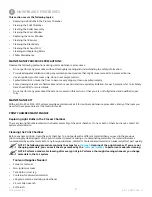
RUN SINTER APPLICATION
1 . Start the Sinter application: from the Windows task bar; choose Start > Programs > SLS System > Sinter, then . . .
•
The Sinter application window opens .
•
The RealMonitor utility starts, appearing as a RealMonitor button in the Windows taskbar . Sinter icons will remain grayed-
out until the DSP is initialized . (Sinter uses DSP to control SLS system heaters and motion, and to communicate with the
laser scanning system .)
2 . When you see the DSP button in the taskbar, the Sinter application is ready to start a print . However, you must prepare the
chamber before printing the parts .
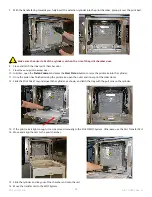
Preparing the Print Chamber
The following steps are a suggested guideline for preparing the system to print parts .
1 . Check to see if the MQC is in Full Cycle mode and that there is enough powder in the blended bin for the print .
2 . Close and latch the inner print chamber door and close the outer door . All interlocks must be engaged to move the piston
or roller .
3 . If the piston is not homed, go to Sinter > ManOps > Piston Control and select Home Piston .
4 . If the roller has not been homed, press the Roller button on the toolbar, then press the Home Limit button in the dialog box
to home the roller .
5 . Press the Inert button on the toolbar and select the Enable toggle option to activate the inerting process .
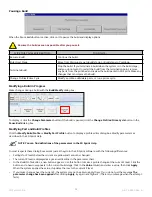
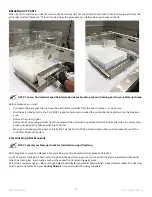
6 . Press the Add Powder button on the toolbar to create level print bed:
While the machine is inerting, begin leveling powder . Set the
Layer Thickness
to 0 .0 . Specify the number of cycles, normally 2
at a minimum, in the
Layer Cycle Count
field press the
Add Layer
button to begin leveling .
7 . Once the powder has been leveled, and if the next build has not yet been set-up, open 3D Sprint, complete the build prepa-
ration process, and close 3D Sprint .


