


3D Systems, Inc.
37
p/n 76-D020 Rev. A
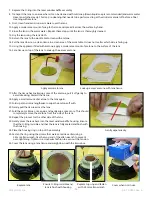
Replacing the Laser Window
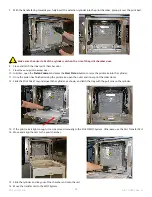
Once the laser window and print chamber have been cleaned, you must reinstall the laser window .
1 .
Remove the red laser window baffle plug.
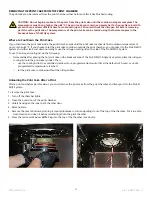
2 . Insert the laser window into the recess at the top of the print chamber with the warning label facing slightly to the left . This
will be so that when you tighten it, the label will be facing forwards .
3 . Rotate the laser clockwise ¼-turn to tighten it into the print chamber .
Rotate laser window so label faces forward
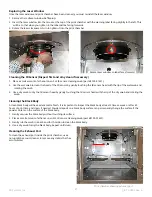
Print chamber showing exhaust port
Cleaning the IR Sensor (Inspect first and olny clean if necessary)
1 . Place a small amount of ethanol on an SLS IR sensor cleaning swab (part #4100-01431) .
2 . Use the wet swab to clean the head of the IR sensor by gently touching the IR sensor head with the tip of the wet swab and
rotating the swab .
3 . Use a dry swab to dry the IR sensor head by gently touching the IR sensor head with the tip of the dry swab and rotating the
swab .
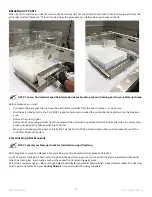
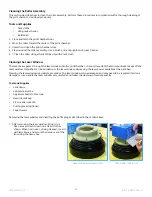
Cleaning the Black Body
A clean black body will have a dark matte finish. It is important to inspect the black body at least 3 times a week or after 40
hours of print time and clean, if needed . Powder deposit on a black body surface can permanently change the surface if the
powder sinters on the surface of the black body .
1 . Gently vacuum the black body without touching its surface .
2 . Place a small amount of ethanol on an SLS IR sensor cleaning swab (part #4100-01431) .
3 . Gently rub the swab in a back-and-forth motion to clean the black body .
4 . Use a dry swab to dry the black body . Repeat until clean .
Cleaning the Exhaust Port
To clean the exhaust port inside the print chamber, use a
non-ignition vacuum cleaner to remove any debris that has
accumulated .


