ZPrinter
®
350 / ZPrinter
®
450 User Manual
ZPrinter 350 and ZPrinter 450 Overview
4
All Rights Reserved
10/31/12
1.4 How 3D Printing Works
The 3D Printing System is based on the Massachusetts Institute of Technology's patented 3DP
®
Technol-
ogy (3D Printing). The 3D Printing process requires:
•
A 3D Printer
•
Importing a solid 3D modeling file into the ZPrint Software
•
Setting up your files to print in the ZPrint/ZEdit Software
•
Printing, powder removal, and drying the part
•
(Optional) Applying post-processing materials to the printed part
To start, the ZPrint Software takes a three-dimensional design file, (ZPrint is compatible with most 3D mod-
eling software files) and converts it into cross-sections, or layers, that are between 0.0035" - 0.004" (0.089
- 0.102 mm) thick. Before printing, ZPrint evaluates the part geometry and checks if there are enough
materials in the printer to print the number of layers required to build the part. If there are, the printer then
prints each layer, one after the other, from the bottom of the part to the top. If not, ZPrint will prompt you to
add powder, to add binder, or to change a print head before it will start the print job.
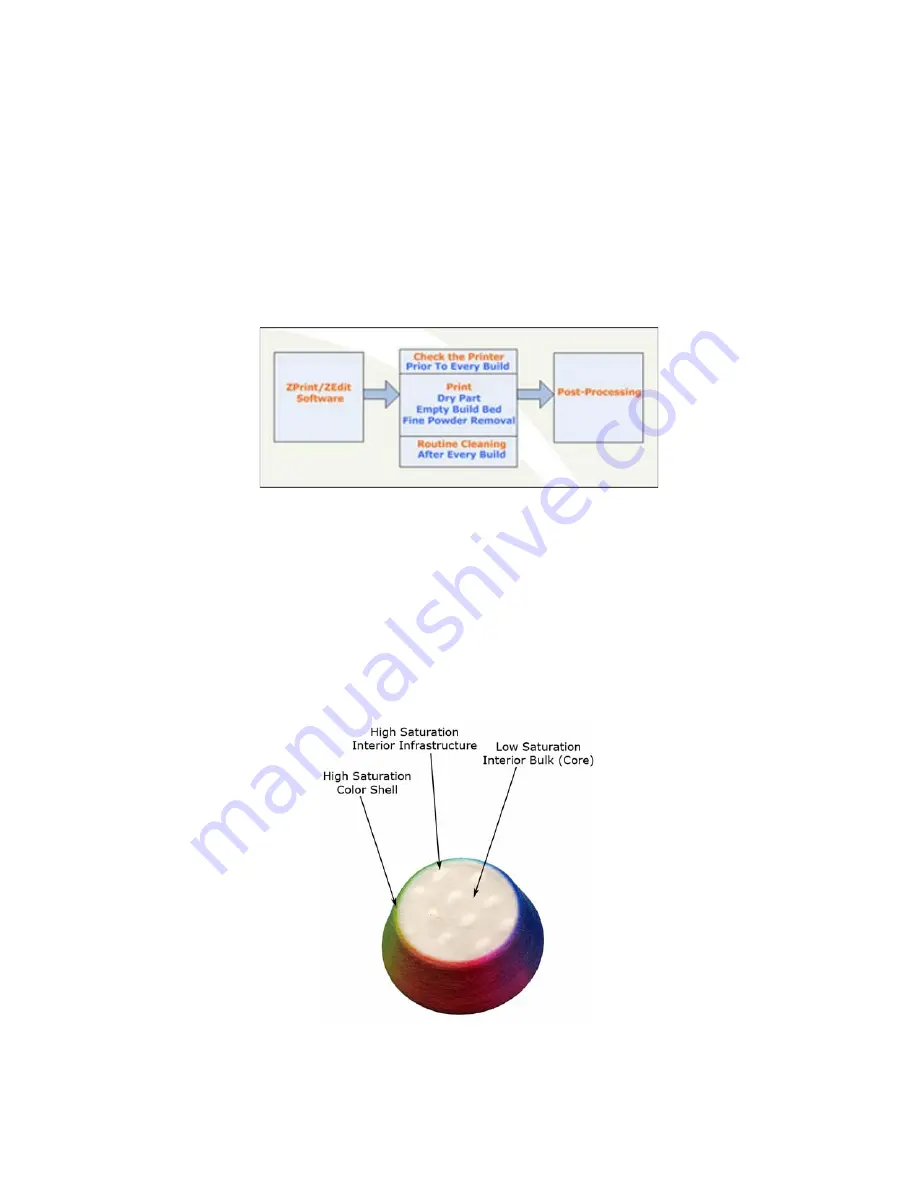
During printing, binder is first applied with a higher saturation to the edges of the part, creating a strong
“shell” for the part exterior. Next, an infrastructure that works like strong scaffolding is created for the part
walls, which are also built with a higher saturation of binder for added strength. The remaining interior
areas are printed with a lower binder saturation, which gives the part its stability.
When the part is finished printing, the user empties the Build Bed of most of the excess powder around the
part by vacuuming with the integrated vacuum system. This returns the powder to the Feeder for reuse.


