10
www.3dtender.com
Inflation :
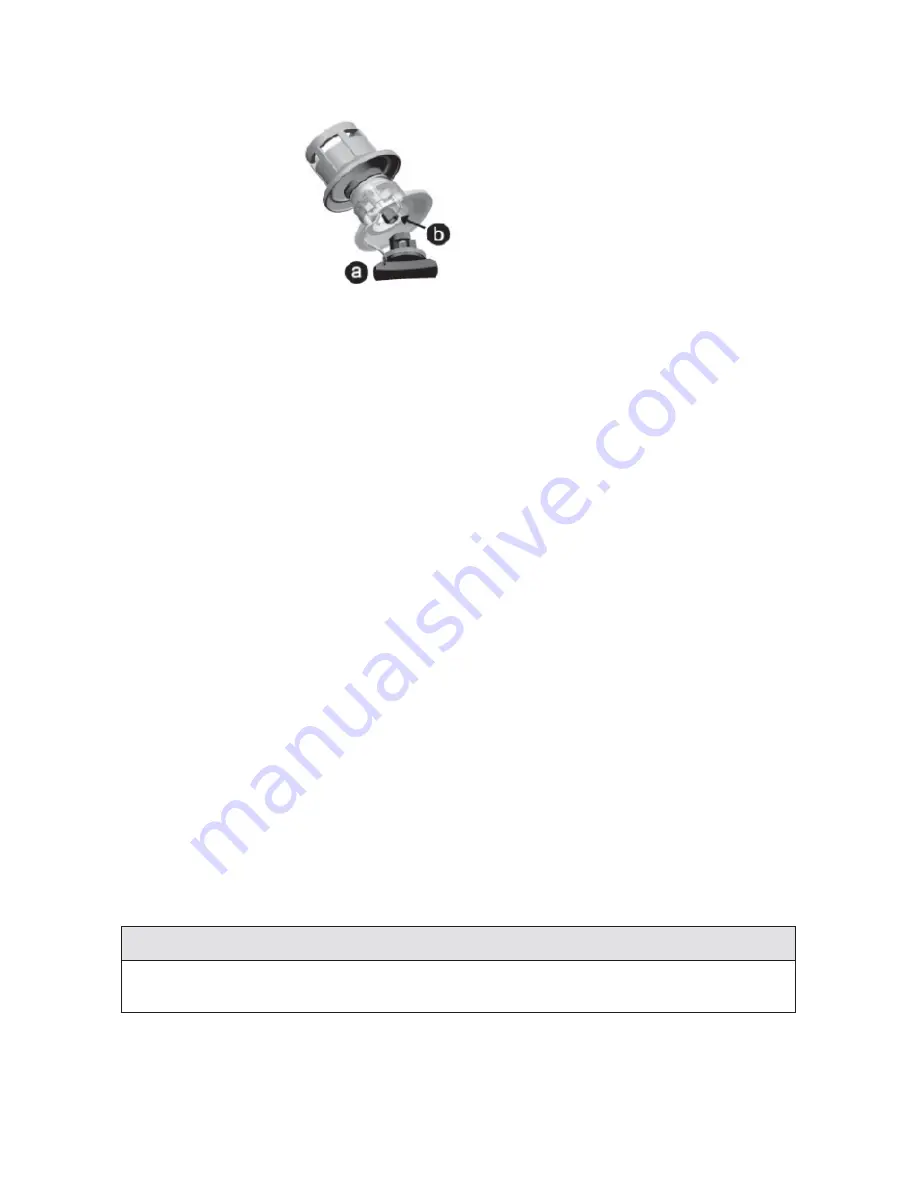
a - Valve cap
b - Plunger
To inflate the chamber, first unscrew the valve cap by turning a quarter of a turn counterclock-
wise. Check that the plunger in the center of the valve is closed (upper position) . If open (spring
compressed, down postion) push the plunger down and rotate to the closed position.
Connect the air pump to the valve, rotate the connector into the valve to lock it and start inflat-
ing.
Inflate each chamber in turn, do not inflate a chamber completely then move on to the next
one. Start with the rear chambers. repeat procedure until all chambers are evenly inflated to
the recommended working pressure. Use air gauge to measure the tube pressure. If yoi do not
have any gauge, firmy press the tube with one finger, if it goes down by about 10mm, the tube
pressure is correct.
Inflatable boats can be dameged by extreme internal air pressure. Such pressure can be caused
by temperature differences. A boat properly inflated in the morning may become dangerously
over pressurized as the day warm up. The internal pressure can multiply many times as the sur-
face temperature increases and under such conditions, seams can separate and bonded materi-
als can delaminated. Avoid subjecting your inflatable to such conditions by relieving pressure in
all chambers of your boat as the day heats up or before leaving the boat exposed to hot midday
sun. It is highly recommended that the boat be stored in the shade or under cover when it is not
being used.
Do not use a compressed air source to inflate the tuibe or you may compromise the integrity
of the seams or internal baffle rupture. Seams or baffle rupture due to non respect of inflation
procedure is not covered under the warranty.
Using the boat with under inflated tubes may cause serious damage, including transom cracking.
Caution
Do not use compressed air source to fill the air chambers. Over inflation may result in
seams or diaphragms rupture.


