background image


3DBIZZ UG (haftungsbeschränkt) 

Zur Au 8 | 85256 Vierkirchen | Germany 

info@3dbizz.com

 | 

www.3dbizz.com


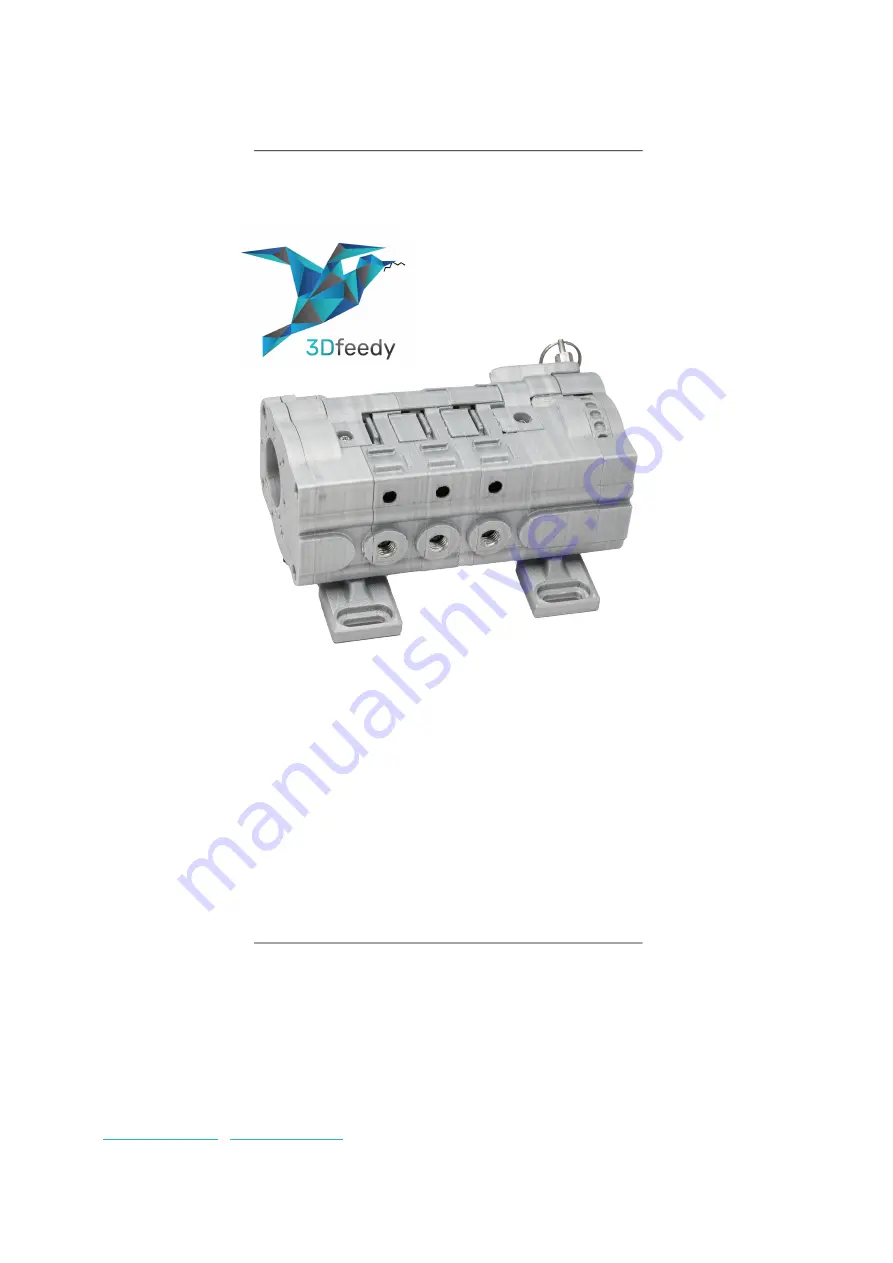
3DFEEDY 

INSTRUCTION MANUAL 

Version 1.0 

April 29, 2021 


Summary of Contents for 3Dfeedy

Page 1: ...3DBIZZ UG haftungsbeschränkt Zur Au 8 85256 Vierkirchen Germany info 3dbizz com www 3dbizz com 3DFEEDY INSTRUCTION MANUAL Version 1 0 April 29 2021 ...

Page 2: ...ve Second Selector Cover 10 4 Remove Third Selector Cover 11 5 Remove Fourth Selector Cover 11 6 Remove Selector Shaft 12 7 Remove Drive Gear Cover 12 ASSEMBLY 3DFEEDY 14 1 Connect Drive Gear to Extruder Drive Motor 14 2 Connect Extruder Drive Motor to Cover of Drive Unit 15 2 1 Connect other Extruder Drive Motor sizes to Drive Unit Cover 15 3 Marriage Connect Extruder Drive Motor to 3Dfeedy 16 3 ...

Page 3: ...eedy to 3D Printer 21 2 Insert PTFE Tubes to 3Dfeedy 21 3 Insert PTFE Tubes to Collector 22 4 Insert PTFE Tube to Collector 22 5 Calibration of the Extruder 23 6 Insert PTFE Tube to Printhead 23 SERVICE AND MAINTENANCE 24 1 Typical Problems 24 2 Cleaning and Maintenance 25 3 Waste Management 25 4 Further Information 25 ...

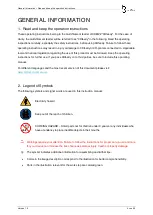
Page 4: ...ss 3Dfeedy on to third parties be sure to include this operating manual For different languages and the most recent version of this document please visit www 3dbizz com manuals 2 Legend of Symbols The following symbols and signal words are used in this instruction manual Electricity hazard Keep out of the reach of children CHOKING HAZARD Small parts not for children under 3 years or any individual...

Page 5: ...edy for purposes other than those for which it is intended failure to observe the safety instructions and warnings as well as the assembly operating maintenance and cleaning instructions contained in this operating manual failure to observe any accident prevention occupational health or safety regulations specific and or generally applicable to the use of 3D printing equipment use of accessories a...

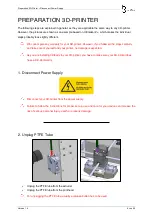
Page 6: ... the steps carefully and take care of yourself and your printer no damage is expected As you are installing 3Dfeedy to your 3D printer you have to make sure your 3D printer does have a CE Conformity 1 Disconnect Power Supply Disconnect your 3D printer from the power supply Failure to follow the instructions for proper set up use and care for your device can increase the risk of serious personal in...

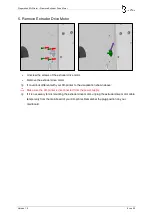
Page 7: ... removed or loosened i It could look different with your 3D printer to the visualization shown above i Sometimes the drive gear already fits to the drive gear of 3Dfeedy e g Ultimaker 2 which makes it unnecessary to change it You can check this by comparing the additional drive gear from the box with the mounted one of your 3D printer If the drive gear is tight fit to the extruder drive motor do n...

Page 8: ...e extruder drive motor i It could look different with your 3D printer to the visualization shown above Make sure the 3D printer is disconnected from the power supply i If it is necessary for dismounting the extruder drive motor unplug the extruder drive motor cable temporarily from the mainboard of your 3D printer Remember the plug position on your mainboard ...

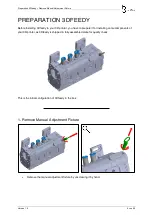
Page 9: ...feedy to your 3D printer you have to prepare it for installing some components of your 3D printer as 3Dfeedy is shipped in fully assembled state for quality check This is the initial configuration of 3Dfeedy in the box 1 Remove Manual Adjustment Fixture Remove the manual adjustment fixture by unscrewing it by hand ...

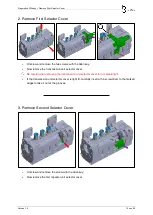
Page 10: ...ission unit selector cover Be careful when removing the transmission unit selector cover for not breaking it If the transmission unit selector cover is tight fit carefully insert a thin screwdriver to the marked edges to take it out of the grooves 3 Remove Second Selector Cover Unscrew and remove the screw with the Allen key Now remove the first repeater unit selector cover ...

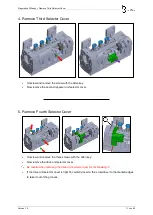
Page 11: ...cond repeater unit selector cover 5 Remove Fourth Selector Cover Unscrew and remove the three screws with the Allen key Now remove the drive unit selector cover Be careful when removing the drive unit selector cover for not breaking it If the drive unit selector cover is tight fit carefully insert a thin screwdriver to the marked edges to take it out of the grooves ...

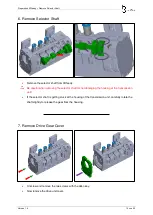
Page 12: ...removing the selector shaft for not damaging the housing at the transmission unit If the selector shaft is getting stuck at the housing of the transmission unit carefully rotate the shaft slightly to release the gear from the housing 7 Remove Drive Gear Cover Unscrew and remove the two screws with the Allen key Now remove the drive unit cover ...

Page 13: ...Preparation 3Dfeedy Remove Drive Gear Cover Version 1 0 13 von 25 The prepared 3Dfeedy for installing the necessary components of your 3D printer looks like following ...

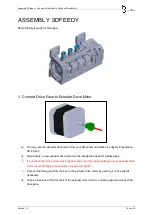
Page 14: ...ation 3D Printer i Alternatively a new extruder drive motor can be bought and used for further steps If a new extruder drive motor was bought make sure it has equal settings to your extruder drive motor for not damaging the mainboard of your 3D printer Connect the drive gear from the box to the extruder drive motor by pushing it on the shaft if necessary i Take a close look at the flat shaft of th...

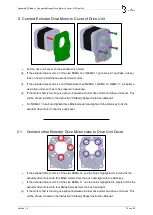
Page 15: ...e shown in detail in the instruction 3Dfeedy Spacer Instruction Manual For NEMA 17 insert and tighten three M3x6 screws hand tight with the Allen key to fix the extruder drive motor to the drive unit cover 2 1 Connect other Extruder Drive Motor sizes to Drive Unit Cover If the extruder drive motor is of the size NEMA 14 use the holes highlighted in red and fix the extruder drive motor with four M3...

Page 16: ... drive motor is of the size NEMA 14 or NEMA 11 follow the steps 3 1 3 1 Marriage Connect other Extruder Drive Motor sizes to 3Dfeedy Connect the extruder drive motor with the drive unit cover to 3Dfeedy Insert and tighten the two M3x6 screws hand tight with the Allen key to fix the extruder drive motor to 3Dfeedy Insert a M3 hexagon nut from the box to the groove i If the steps of the manual 3DFee...

Page 17: ... on the shaft may be slipped and have to be repositioned during insertion Try to rotate the manual adjustment wheel until the selector shaft starts to rotate i Slightly press in the selector shaft at the bearings to avoid it from pushing out i If the selector shaft starts to rotate the selector shaft is correctly oriented i If the selector shaft does not start to rotate and the selector shaft is p...

Page 18: ...nsert Fourth Selector Cover Insert the drive unit selector cover Insert and tighten three M3x6 screws hand tight with the Allen key 6 Insert Third Selector Cover Insert the second repeater unit selector cover Insert and tighten the M3x6 screw hand tight with the Allen key ...

Page 19: ...ert Second Selector Cover Insert the first repeater unit selector cover Insert and tighten the M3x6 screw hand tight with the Allen key 8 Insert First Selector Cover Insert the transmission unit selector cover Insert and tighten two M3x6 screws hand tight with the Allen key ...

Page 20: ...eedy Insert Manual Adjustment Fixture Version 1 0 20 von 25 9 Insert Manual Adjustment Fixture Insert and tighten the manual adjustment fixture hand tight The assembled 3Dfeedy ready to install looks like following ...

Page 21: ...edy is mounted at a sufficient distance from the printhead so that it can move freely and reach any position on the print bed i Additional installation options and geometries will be provided for selected 3D printers i Suggestions for installation options and geometries by the community are very welcome for all the different printer types 2 Insert PTFE Tubes to 3Dfeedy Insert the three long PTFE t...

Page 22: ... 25 3 Insert PTFE Tubes to Collector Insert the second end of the three long PTFE tubes to the tube connectors of the PTFE tube collector from the box 4 Insert PTFE Tube to Collector Insert the short PTFE tube from the box to the tube connector of the PTFE tube collector ...

Page 23: ...mination of the correct value for the E steps for the saving of the settings to your 3D printer as well as for reversing the rotation direction i Although we have used our best efforts to create this document there is a small possibility that your exact configuration is not covered so please let us know and we will give our best to cover those cases as well 6 Insert PTFE Tube to Printhead Insert t...

Page 24: ... Ratio in the Feedy Converter e g to 1 5 and redoing the printing The default Retraction Gear Ratio in original state is 1 4 The filament is getting stuck when retracting it from the printhead and switching to the next filament unit The short PTFE tube is too long which leads to a too short retraction distance before switching the filament unit This can either be solved by reducing the length of t...

Page 25: ... into individual components it is possible to dispose of our 3Dfeedy in a recycling friendly way All plastic parts are made of PLA 4 Further Information For detailed information please visit the following links Feedy Converter www 3dbizz com downloads All manuals multilingual www 3dbizz com manuals All user guides multilingual www 3dbizz com guides FAQs www 3dbizz com PDF version of all manuals an...

Reviews: