3DGence INDUSTRY F340 | 45
version 1.0/07.2017
5. Cut the stretch and pull out the materials and accessories. Put them aside.
6. Remove polystyrene covers from the top and from the corners of the printer.
7. Remove the foil from the printer, then unscrew the 4 securing straps fixed with 3 screws to the ground.
8. 4 people are needed to lift and place the printer at its destined installation site.
9. Remove the protection of the power cord and tighten the power cord output.
If the printer was stored in temperature lower than current room temperature, allow the temperatures to equalize before
turning the printer on.
Printer startup:
1. Make sure that all printer packaging components are removed.
2. Install the cable gland on its thread from the printer side.
3. Lay the power cord to a fused mains socket and plug it in.
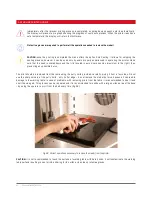
4. Switch the fuse located at the back of the device to ON (fig. 24).
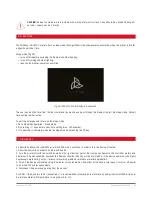
5. Make sure that the emergency stop button is in unlocked position. If the emergency stop button is pressed, rotate it in
the direction shown by the arrows to unlock.
6. To start the printer, press the power switch located at the bottom on the right front of the printer. It will turn the working
area lighting on and will initialize printer display. Once the main printer menu loading is completed, the device is ready
to operation.
1
Fig. 24. Fuse location (1).
Summary of Contents for INDUSTRY F340
Page 1: ...USER MANUAL 3DGence INDUSTRY F340 ...
Page 2: ...2 3DGence INDUSTRY F340 ...
Page 39: ...3DGence INDUSTRY F340 39 version 1 0 07 2017 ...
Page 43: ...3DGence INDUSTRY F340 43 version 1 0 07 2017 ...
Page 86: ...86 3DGence INDUSTRY F340 ...
Page 87: ......


