TMA Grand Master 2.1 – User’s Guide
4 Operating the Main Unit
11. Follow the steps 1-9 if you want to insert additional blocks into other trays. If the cylinder is
at the proper position, it is not necessary to the click the tray ID then the
button.
4.4.4 Removing a block from the main unit
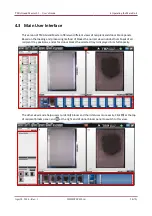
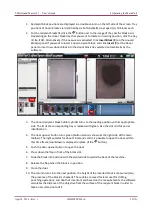
1. Recipient block positions are displayed in a double-column on the left side of the screen.
Donor block tray positions are identified by six buttons (
A-F
). The
Change Blocks
buttons are
responsible for rotation of the donor block holder cylinder.
2. Depending on which donor block tray is needed to be rotated to the block removal position,
click the tray ID (
A-F
). For the recipient blocks click the button next to the image of the
specific block pairs.
3. A donor/recipient block holder column turns to the loading position with its appropriate side.
4. The door opener button turns green. The light pulsates for about 10 seconds and it is possible
to open the door within this time frame (countdown is displayed by a icon at button area).
5. Push the door opener button to open the door.
6. Press down the flap in front of the block slot.
7. Remove the block from its position and release the flap.
8. Close the door.
4.4.5 Removing a PCR cassette from the main unit
Warning!
After removing PCR cassettes, make sure that cores are not clung to the port edges of
the cover plates. Before carefully removing the cover plate of a PCR cassette, gently
tap on it a couple of times to let all the samples fall entirely down to the bottom of
the PCR tubes.
April 8, 2014 – Rev. 1
3DHISTECH Ltd.
30(79)


