TMA Grand Master 2.1 – User’s Guide
5 Using TMA Grand Master
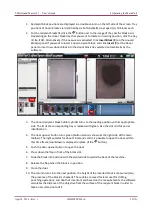
In the new view for recipient blocks, the following options are available for you to choose from
after the block thumbnail image is displayed in the
Unused Block(s)
panel:
•
Click the block image then type in the ID, add
a layout.
•
The block will be moved to the
Recipient
Block(s)
panel if you tick the selection box at
the top right corner of the thumbnail image,
or if you mark a core on a donor block to be
transferred to this recipient block.
•
Click to mark block as cleaning block, then
it is moved to the
Cleaning Block(s)
panel.
•
Click then the tray into which the block
has been loaded will be rotated to the
unloading position.
4. Select a layout for the recipient block:
a) Click the image of the recipient block for which you want to add a layout:
b) Select a pre-defined layout from the
Select
Layout
drop-down list in the Layout Editor
window, then click
Use this layout
. Note, that only those layouts appear on the list which
include spots of same diameter as set for tools.
c) If the necessary layout is not yet created, design one (see section
5.2.1 Creating a Recipient
Block Layout
– step 3 and on).
Important!
A layout assigned to a recipient block can be removed by clicking only if no core is
selected to be transferred, otherwise this button turns inactive. A recipient block
that has an assigned layout with no selected cores can be removed from its slot, and
after recording its image, the representative image of the slot on the interface is
displayed as
Empty
.
April 8, 2014 – Rev. 1
3DHISTECH Ltd.
39(79)


