


29
28
3DISON H700
User Manual V.1
3DISON H700
User Manual V.1
3DSION Metal Clay Printing
1. How to install and use extruder
①
First, open the box and take the metal extruder
out of the box. Release 2 bolts on the base part and
separate the extruder installed in 3DISON H700.
Pull all of the cables out of the PCB and keep the
bunch of nozzles separately.
②
Install the metal extruder by fastening the bolts
with a hex wrench. Connect supplied motor cables
to the motor and PCB.
③ Take the syringe out of the box and insert the
yellow nozzle in the head of the syringe. Insert the
syringe in the installing part of the extruder and
cover it.
NOTE : Check if discharging goes well by pressing
the piston to take about 4~5cm of clay.
④
Turn the biggest gear to the front as shown in the
image so that the belt will be as tight aspossible.
Annex1. Exchanging the Extruder for the Metal Clay Printing
3DSION Metal Clay Printing
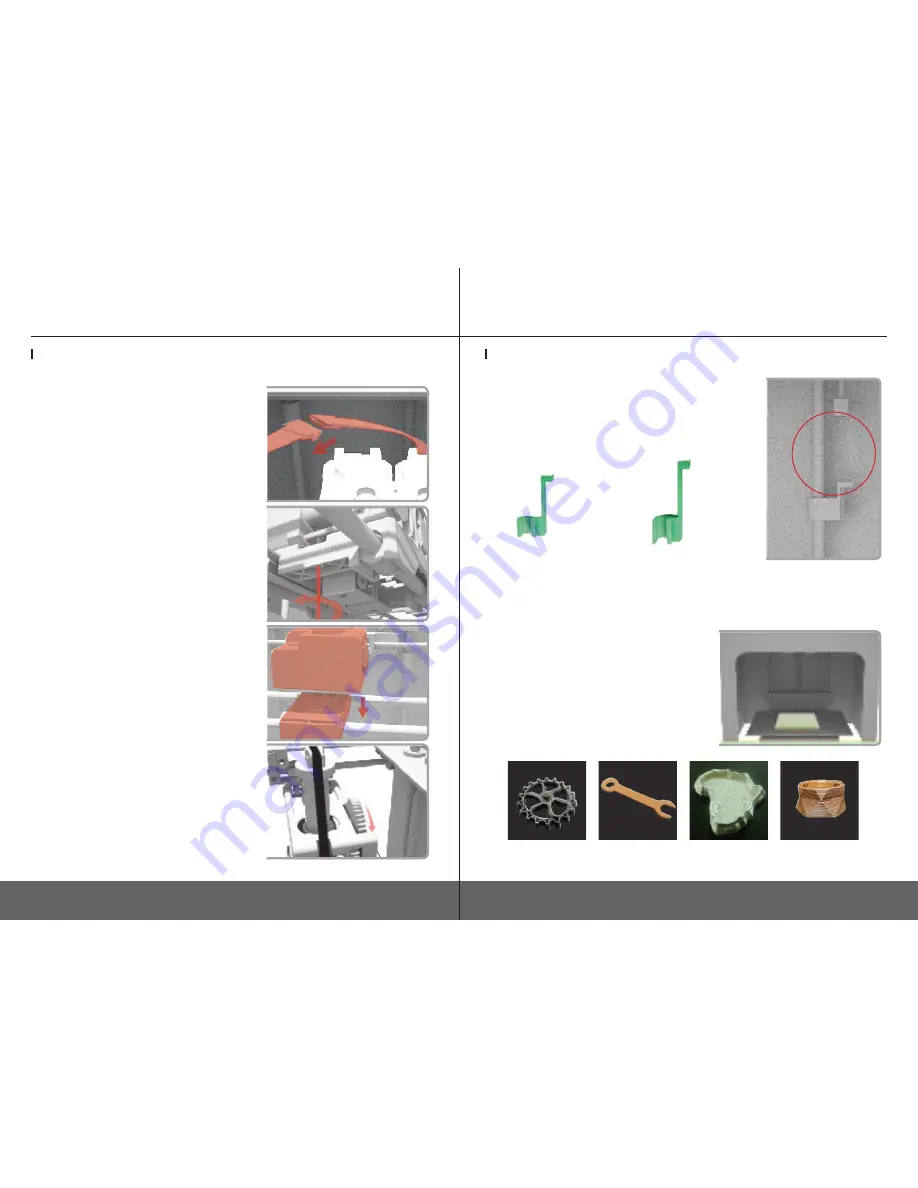
⑤
Attach the Extended Stopper to the lower part of Z
axis to make the printing bed stop at the fixed distance
for metal printing. (Use stopper in the
image1
for 3DISON
Multi and use stopper in the
image2
for 3DISON H700.
They differ in length.)
Image 1
Image 2
⑥
Put the ceramic tile on the bed after save x3g. file
in the SD card. Select file to print and start printing.
NOTE : In case the thickness of layer is out of the
range 0.7~1mm when printing, adjust the thickness
by re-tuning the leveling. Or tighten the bolt (small
set screw in the gear) using a supplied hex wrench
makes thicker layer and releasing the bolt makes
thinner layer.
Steel
Silver
Bronze
Copper
Annex1. Exchanging the Extruder for the Metal Clay Printing


