background image

page

1

... print your plane | www.

3DLabPrint

.com

Fully 3d printable

Mitsubishi A6M2 Zero

scale 1:12, wingspan

1000 mm / 39.4 inch

User Guide

rev. 2021/12

Summary of Contents for Mitsubishi A6M2 Zero

Page 1: ...page 1 print your plane www 3DLabPrint com Fully 3d printable Mitsubishi A6M2 Zero scale 1 12 wingspan 1000 mm 39 4 inch User Guide rev 2021 12 ...

Page 2: ...ne This is not a dream now you can print this HI TECH at home Simply download and print the whole plane or spare parts anytime you need just for a cost of filament only about 12 Extensive hi tech 3d structural reinforcement making the model very rigid while maintaining a lightweight airframe and exact airfoil even it s just a plastic This perfect and exact 3d structure is possible only thanks to a...

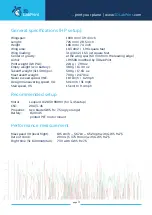
Page 3: ...y weight w o battery 380 g 13 40 oz Takeoff weight 3s 1300 lipo 500 g 17 63 oz Max takeoff weight 700 g 24 70 oz Never exceed speed VNE 110 km h 62 mph Design maneuvering speed VA 50 km h 31 mph Stall speed VS 15 km h 9 4 mph Recommended setup Motor Leopard LC2830 980KV for 3 4S setup ESC 20A 3 4S Propeller two blade GWS 9 x 7 5 ugly orange Battery 1500 4S printed PET motor mount Performance measu...

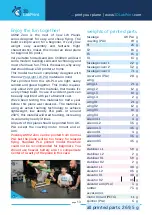
Page 4: ...r based fighter in the world when it was introduced early in World War II combining excellent maneuverability and very long range The Imperial Japanese Navy Air Service also frequently used it as a land based fighter In early combat operations the Zero gained a reputation as a dogfighter 3 achieving an outstanding kill ratio of 12 to 1 but by mid 1942 a combination of new tactics and the introduct...

Page 5: ...s 2 Factory files for Simplify3D slicer contains all the necessary settings to slice the models along with suggested bed layout We re using PRUSA i3 ORIGINAL printers so you may need to adjust the basic printing parameters to match your printer or use these files as a start point for you 3 Printing Guide in our Help Section Apart from this userguide please see the Printing Guide for PrusaSlicer Si...

Page 6: ...page 6 print your plane www 3DLabPrint com 5 Scale markings PDF You could print and cut the PDF in scale from thin self adhesive advertisement foil and place it on the model as needed ...

Page 7: ...page 7 print your plane www 3DLabPrint com Lenght 726 mm 28 5 inch Wing area 18 3 dm2 1 96 square feet A6M2 Zero Centre of Gravity ...

Page 8: ...page 8 print your plane www 3DLabPrint com Wing span 1000 mm 39 4 inch ...

Page 9: ...our email right after the checkout please check your spam folder if not If you are logged in with your account while purchasing the model you will find the download link in your account s Downloads section on our website Please contact support 3dlabprint com if you have trouble getting the files 3 Prepare Gcodes option A Gcodes if your printer is i3 comptatible you can use prepared gcodes directly...

Page 10: ...load the latest 2 4 beta version from the Prusa Slicer GitHub as previous stable version doesn t support the Even Odd slicing mode yet Don t worry it won t interfere with your installed stable version as it lives in a separate workplace Drag and drop the 3mf file to the Prusa Slicer window and open it as a Project It will create a Generic 3DLabPrint printer printing profile and materials Please us...

Page 11: ...on multiplier and temperature for good weight and best possible layer bonding Look at parts weight list for proper multiplier settings As a starting point you can use our predefined CURA or MC slicer setting file see below always adapt it for your printer change build volume filament diameter etc according to your printer Please check our CURA guide on the website for the latest basic profile Plea...

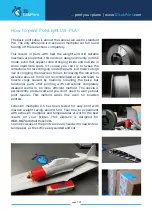
Page 12: ... means about 50 weight reduction on printed parts Please Experiment with temperature and extrusion multiplier 0 60 0 67mm Wall thickness Hotend temperature is very important 220 up to 260 celsius The temperature determines how much the LW PLA foams while printing Cranking up temperature means you can go lower on multiplier as the material will gain on volume Turn OFF cooling fan for better layer a...

Page 13: ...logy to achieve lightweight low density PLA parts At around 230 C this material will start foaming increasing its volume by nearly 3 times All parts of this plane should be printed from LW PLA except the cowling motor mount and el Arm Possibly A6M2 Zero can be printed from normal PLA but the plane will be too heavy for relaxed flying Standard PLA printed model therefore could not be recommended fo...

Page 14: ...e nozzle or throat Increasing the retraction distance above 1 mm is not recommended at all and leads to nozzle clogs caused by foaming Cleaning the hairy but functional parts after printing with retractions completely disabled seems to be more efficient method The nozzle is permanently pressurized and you don t need to worry about print failures This method works fine even for bowden printers Extr...

Page 15: ...prove the rigidity of the wing On a flat surface glue the ailerons L1 L3 and repeat for the right side Use a filament or suitable 0 8mm 1 5mm carbon rod as a hinge for the ailerons Just slide it in there s no need to glue the hinge for easy aileron or servo replacement Wall thickness should be 0 60 0 67 Video guide A6M2 ZERO Wing Assembly you will need CA Glue medium Activator for CA Glue PolyAir ...

Page 16: ...s making a rubber band wing holders No need to glue it for easy replacement Wall thickness should be 0 60 0 67 For fuselage cover arm use a ball pen spring Put it to the part 2 and glue with part 1 together NOTE Don t glue the rudder tailpart yet proceed to the next step for elevator and stabilizer assembly See video guide A6M2 ZERO Fusselage Assembly you will need CA Glue medium Activator for CA ...

Page 17: ... elevator assembly to the stabilizer using the 0 8 1 2 mm carbon rod or steel wire Elevator should move freely controlled by the pushrod and servo Check the functionality of the elevator assembly carefully and finally glue in the rear rudder part Wall thickness should be 0 60 0 67 you will need CA Glue medium viscosity activator 0 8 1 mm steel wire for elevator pushrod Polyair or PLA filament for ...

Page 18: ...ESC battery holder Fix the battery by velcro tape and mount it in the front of the fuselage find the perfect balance and CG position by moving it Mount the motor using 4x M3 screws and nuts to the printed universal motor holder 16 x 19mm For long motors you can flip the holder to the front Glue universal motor mount with motor into the fuselage in right position Video guide A6M2 ZERO Motor Setup y...

Page 19: ...nner guarantees proper cooling of the motor and mount Make sure the battery is positioned properly and secured with wing battery holder if battery moves during flight it can shift the center of gravity backwards and aircraft will become uncontrollable Never set ESC with propeller installed this could be very dangerous 9 Go flying Pre flight check center of gravity is very important move it 5mm for...

Page 20: ...decrease elevator and ailerons deflection to calm down the plane Make sure the battery is well fixed in proper possition If it moves during flight it will cause shifting of CoG aft and will result in uncontrolable flight behavior After gaining some confidence you can balance the plane to the Center of Gravity marks and set Expos to 60 as shown in the video instructions this gains back extra maneuv...

Page 21: ...ny 2830 size motor for 3S Li Pol with weight up to 70g Propeller GWS 9 x 7 5 ugly orange or any 9x6 ESC any 20A 3s Brushless Speed Controler connector XT60 Battery any 1500mAh 3s 140 160g Servos 3x HXT900 or similar 23x12x26 mm Glue CA Glue medium Activator for CA Glue Other 0 75m of 0 8 1 0 mm pushrod wire 4x M3 8mm screws washers velcro tape 4x rubber bands ...

Reviews: