page
40
... print your plane | www.
3DLabPrint
.com
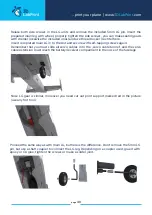
Relase both side screws in the LG units and remove the included 5mm LG pin. Insert the
prepared main leg with wheel, properly tighten the side screws, you can make seating pads
with dremel (likewise the included ones) and use thread locker (Loctite) here.
Insert completed main LG in to the slot and secure with self-tapping screws again.
Remember that you must slide all servo cables in to the „servo cable tunnel“ and the servo
cable extension must reach the battery/receiver comparment in the nose of the fuselage.
:
Nose LG gear is similar, moreover you need cut out print support marked red in the picture
(use any hot tool):
Proceed the same way as with main LG, but here is the difference. Don‘t remove the 5mm LG
pin, but use a shaft coupler to connect the LG leg. Depending on a coupler used, glue it with
epoxy or CA glue, tighten the screws or make a solder joint.


