47
6.4 Cable Cam
Cable Cam creates a smooth shot by flying Solo along a virtual cable between any two points that you specify
initially.
6.4.1
Starting Cable Cam
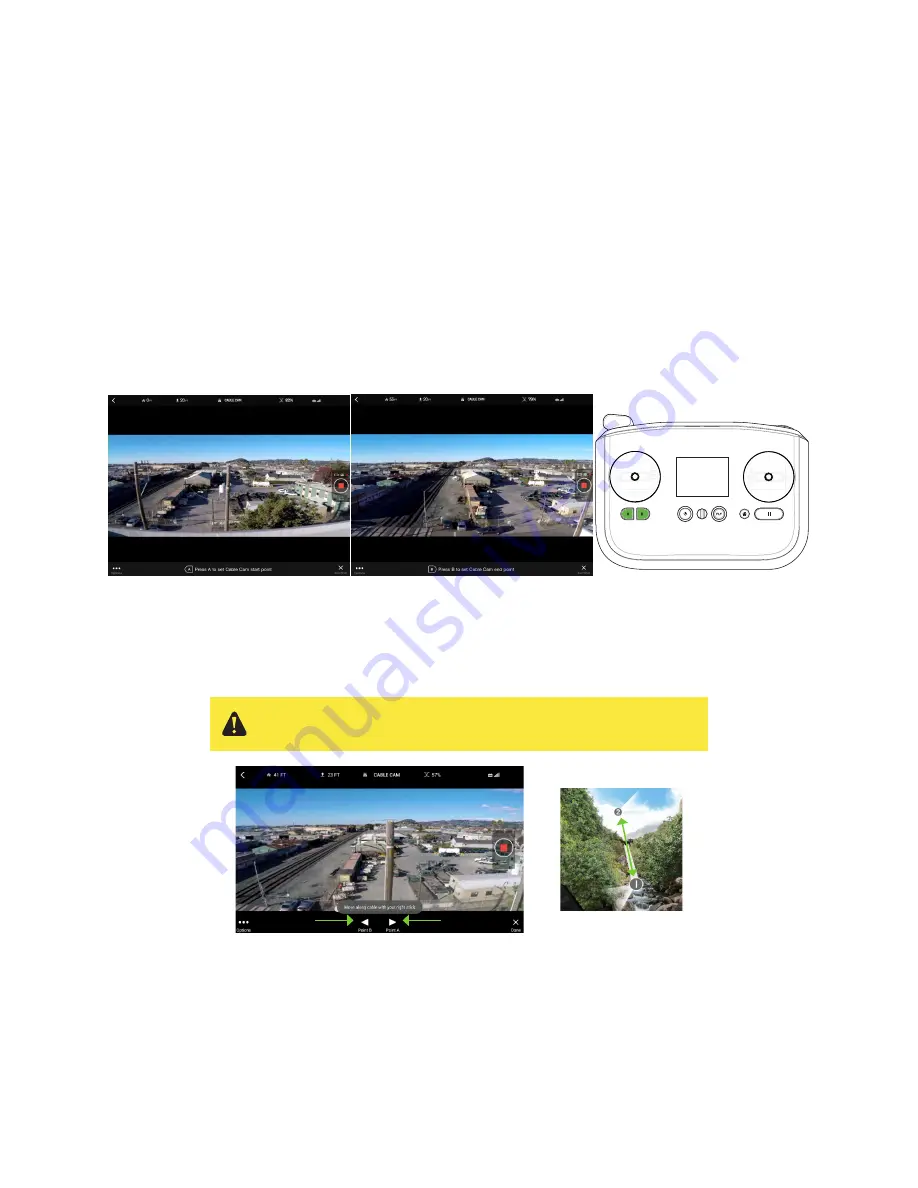
To start Cable Cam, press A on the controller, or select Cable Cam from the Shot List in the App. You’re then
prompted to fly Solo to your first point and save it as the first Cable Cam point by pressing A. Then fly to your
second point and save it by pressing B. For an impressive cinematic effect, try varying the altitude or orientation
between the two points. Also, if you have the Solo 3-Axis Gimbal, try changing the view angle between the
endpoints.
Note
: The Cable Cam endpoints must be at different locations. If you try to set a second endpoint at the same
position as the first, the new endpoint overwrites point A and you’re prompted again for a second point.
Figure 6.4.1.1: App - Cable Cam Setup
6.4.2
Cable Cam Operation
To control Cable Cam through the app, tap the right arrow to move towards point A and tap the left arrow to move
towards point B. Cable Cam’s default cruise speed is set to 9 mph (4 m/s).
Figure 6.4.2.1: App - Cable Cam Controls
To operate Cable Cam using the controller, move the right stick to the left to fly towards point A and to the right to
fly towards point B. To pause at the current location, release the right stick. To look left and right, disable Automatic
Point Camera (see Cable Cam Settings, following) and use the left stick. This overrides the camera temporarily. To
stop Solo at any time, press Pause. To exit to standard flight, press Fly.
Always ensure that there is a clear path between points A and B before
starting Cable Cam.
Summary of Contents for Solo
Page 1: ...User Manual ...
Page 81: ......


