


3M 3x4 in. OS
5
Revision 022508
Description
Part
Number
75 x 00 mm (3 x in.) Hookit™ Pad non-vacuum
2033
75 x 00 mm (3 x in.) Hookit™ Clean Sanding
Pad vacuum
2035
75 x 00 mm (3 x in.) Hookit™ Dust Free Pad
vacuum Europe
2022
3M™ Back-Up Pads
3M back-up pads are perfectly mated for use on the 3M Sander.
Constructed from premium, industrial-quality materials with molded
urethane. Their durability and precise construction are the ideal
complement to the performance of the 3M Sander. See Product
Configuration/Specifications table for the correct replacement pad
for a particular model. The following chart is a sample of products
offered.
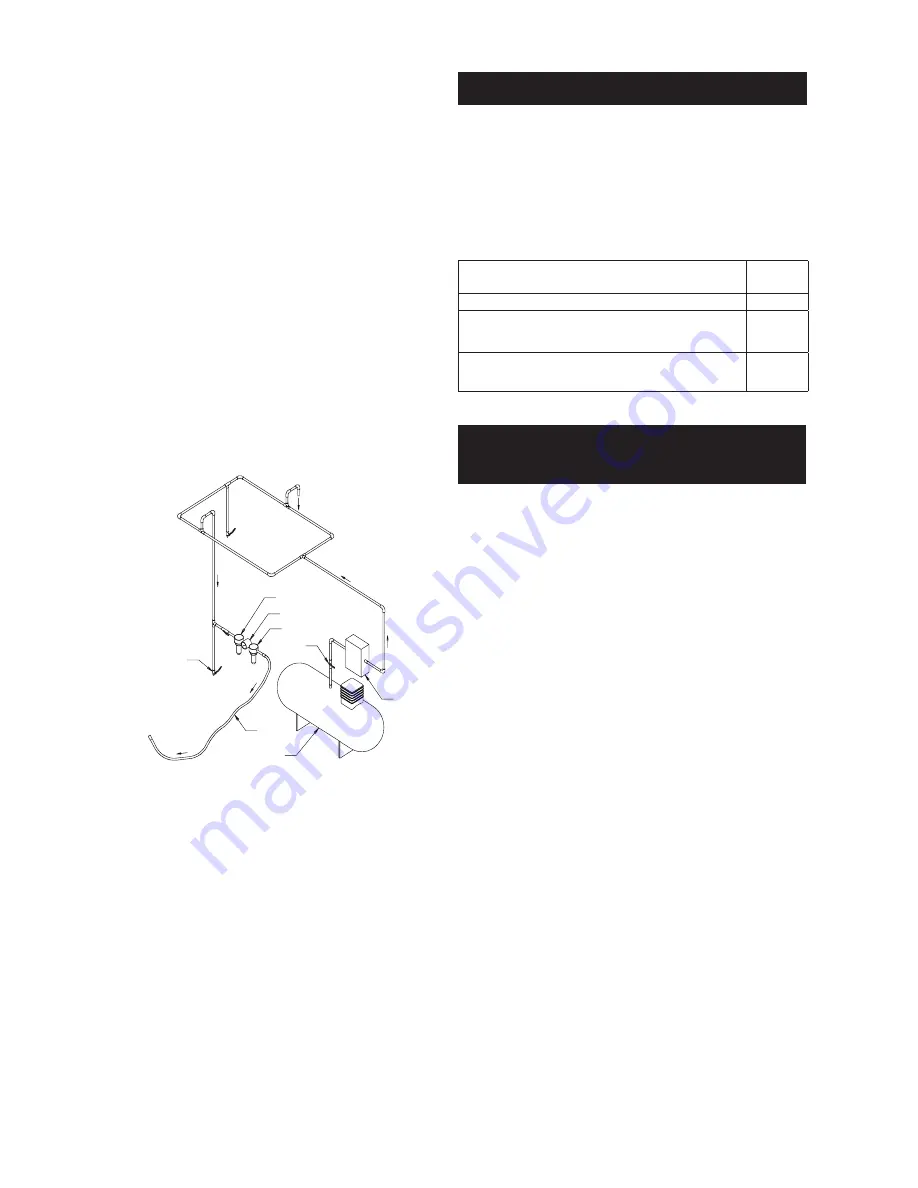
Figure
Closed Loop Pipe System
Sloped in the direction of air flow
Drain Leg
Ball Valve
To Tool Station
Filter
Drain Valve
Regulator
Lubricator
Ball
Valve
Ball Valve
Air Flow
Air Dryer
Air Compressor
and Tank
Air Hose
To Coupler
at or near Tool
Removing and Mounting Back-up
Pad to Orbital Sander
. Disconnect air line from sander.
2. Remove old back-up pad from sander by removing the screws
with the wrench supplied with the tool.
3. Position the new backup pad to align the screws with the
threaded holes and tighten securely.
9. Check hose and fittings regularly for wear. Do not carry
the tool by its hose; always be careful to prevent the tool
from being started when carrying the tool with the air
supply connected.
0. Dust can be highly combustible. Vacuum dust collection
bag should be cleaned or replaced as needed. Cleaning
or replacing of bag also assures optimum performance.
. Do not exceed maximum recommended air pressure.
Use safety equipment as recommended.
2. The tool is not electrically insulated. Do not use where
there is a possibility of contact with live electricity, gas
pipes and/or water pipes.
3. This tool is not protected against hazards inherent in
grinding and cutting operations, and no such acces-
sories should ever be attached.
. Take care to avoid entanglement with the moving parts
of the tool with clothing, ties, hair, cleaning rags or loose
hanging objects. If entangled, stop air supply immedi-
ately to avoid contact with moving tool parts.
5. If the tool appears to malfunction remove from use
immediately and arrange for service and repair.
6. Immediately release the start handle in the event of any
disruption of pressure; do not attempt to re-start until the
disruption has been corrected.


