3.6
Splicing:
a. Attach cable organizer bracket (3M 2196 or
equivalent) to cable.
b. Place trays (3M 2522 or equivalent) and route
buffer tubes and fibers into the proper tray
following the instruction sheet.
c. Splice and test fibers per manufacturer's
instructions.
3.7
Protective Shell Assembly:
a. Remove plastic vinyl tape from cable sheaths.
b. Mark each cable 11" (279 mm) from the center
of the splice. At each location, wrap Foam
Tape around each cable. Taper sealant ends at
start and finish of wraps to prevent leakage.
See illustration for number of wraps.
Note:
If external ground is required, embed the
ground wire within the Foam Tape Collar
wraps.
Foam Tape Wraps
Cable Diameter
Required
.4" - .5" (10-13 mm)
2
.5" - .8" (13-20 mm)
1
.8" - 1.0" (20-25 mm)
0
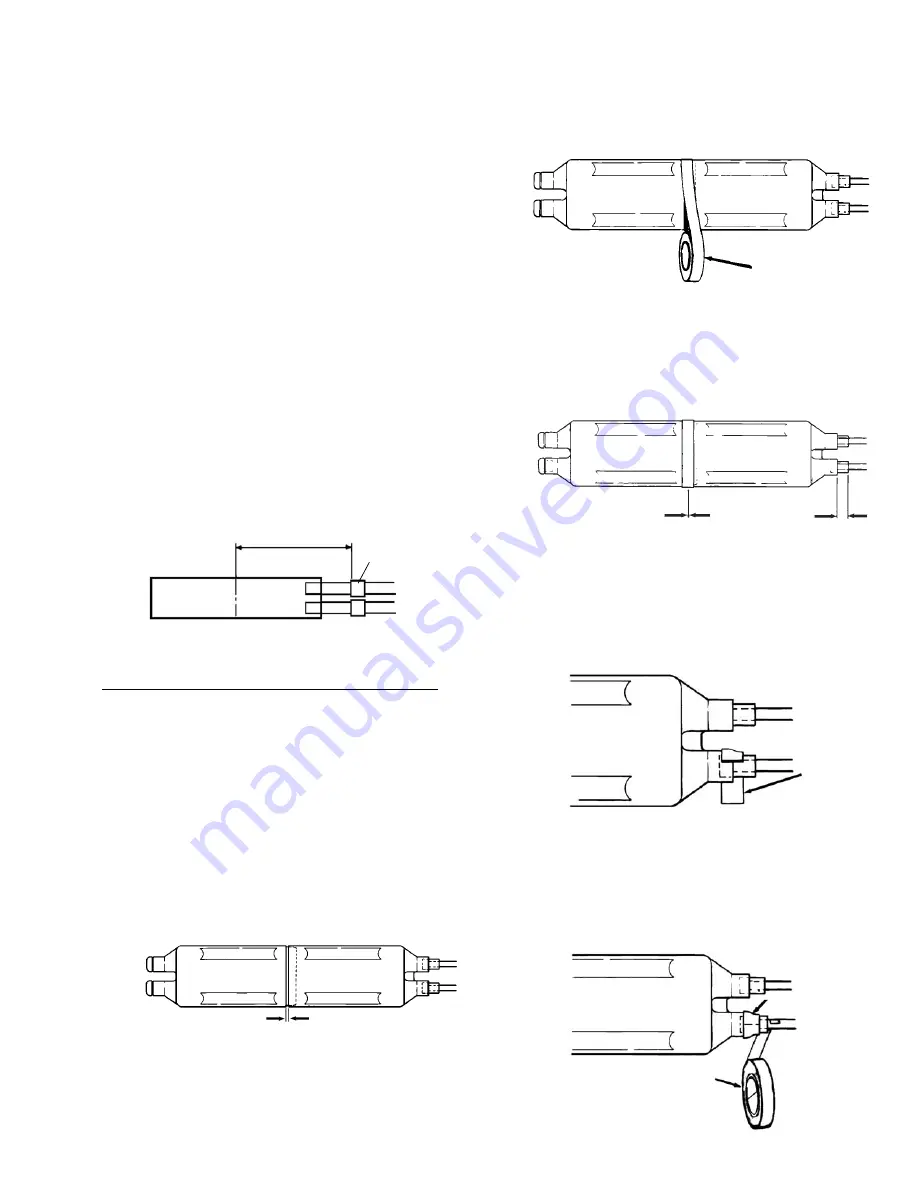
c. Slide protective shell halves over splice area
and sheath collars (and external ground lead,
if applicable.) Push shell together until it
snaps into place. A 0.2" (5 mm) wide gap is
present when halves are correctly assembled.
d. Wrap center seam with foam tape and press
into place. Butt ends and trim excess.
e. Center shell, leaving approximately 1" (25 mm)
of Foam Tape exposed at each end.
f. Wrap 1 layer of Foam Tape at each shell port.
Center the tape on the protective shell port rim.
g. Completely overwrap Foam Tape with 2 half-
lap layers of highly stretched 3/4" (19 mm)
DR Tape white side out. Start DR Tape 1/2"
(13 mm) outside Foam Tape and continue to
taper of port.
11" (279 mm)
B Sealing Tape
0.2" (5 mm)
Gap
Foam Tape
3/4" (19 mm) DR Tape
1 Layer of
Foam Tape
11.5" (292 mm)
11.5" (292 mm)
1" (5 mm)
1 Wrap Foam Tape


