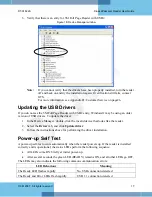
Kiosk ePassport Reader User Guide
DT-01822A
© 3M 2007 All rights reserved.
18
Note:
The reader will not transfer document images over a USB 1.1 host connection.
However, RFID chip reading (ePassport option only) and any USB 1.1
peripherals attached to the reader will function over a USB 1.1 host connection.
Testing Reading and Communication
This test determines if the reader is functioning properly.
1.
Start the test application from the
3M Sales Demo
shortcut created during software
installation.
2.
Verify that the green LED (READY) is on and the test application indicates
Ready to
Scan
. (The reader is ready to accept documents).
3.
Select the test card DS-00031 (ePassport) or DS-00034 (Full Page) supplied with the
reader.
Note:
Readers with the ePassport option are supplied with test card DS-00031
containing OCR data as well as a programmed contactless chip. Readers
without the ePassport option are supplied with test card DS-00034 containing
only OCR data.
4.
Place the test card face down on the document tray, aligned with the left guide.
5.
Push the card to the back of the document window until it stops.
Note:
Do not move the document during the scanning process.
6.
Observe the LEDs during the scanning procedure.
•
The READY LED turns off and the amber LED (BUSY) turns on.
•
The amber LED (BUSY) remains on while the reader scans and processes the data.
•
The green LED (OK) turns on, indicating a successful read.
•
The READY LED turns on, indicating that the reader is ready to scan another
document.
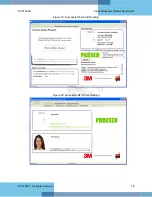
The data from the test card is sent to the host computer and the results displayed on the PC
screen.
7.
For readers equipped with the ePassport option, select the
Security Features
tab, then
select
RFID Check
. The data stored on the contactless chip is displayed along with a
confirmation that it matches the printed MRZ data.
Summary of Contents for Kiosk ePassport Reader PV35-02 Series
Page 8: ......


