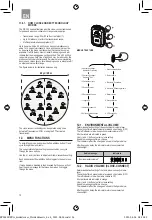
16
12.10. AUTOMATIC POWER OFF
The SCU can be set for automatic power off if no activity is
detected within the set time.
Available options: Off, 2 hours and 8 hours.
Use (+) button to alter setting.
Audio messages report each option when cycling through the
options.
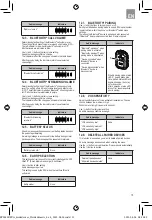
Audio message
Indicators
Audio messages:
“Off”
“2 hours”
“8 hours”
An audio message is given
when the SCU performs
automatic power off:
“Automatic power off”,
followed by a series of short
tones for 10 seconds, then
the unit is switched off.
Animation from outside LEDs
to inside for the duration of
the power-down.
12.11. LANGUAGE
Use this menu to alter the language for audio messages.
Use (+) button to navigate through available languages.
As you cycle through the languages, they will automatically be
applied to all audio prompts.
Audio message
Indicators
Language/Langue/Idioma/
Sprache
None
English
Francais
Español
Deutsch
None
12.12. RESET DEFAULT MENU
You will be given the option to reset default menu (audio prompt).
Use the (+) button to accept deletion. Device reboots automatically.
Use the (-) button to decline.
Audio message
Indicators
“Reset default menu”
None
12.13. SOFTWARE VERSION
An audio prompt will provide the software version.
12.14. CALIBRATION STATUS
An audio prompt will provide the number of months until the 90-day
mark, then provide the number of days until a new calibrated
headset is needed. After 2 years, the audio prompt will then say
“headset calibration expired.” Additionally, an audio reminder is
provided when a fit test is performed beginning at 90 days prior to
expiration and repeated at intervals thereafter until a new calibrated
headset is connected to the SCU and your system is powered on
for the first time.
If the headset has expired, the audio prompt for a successful fit test
will say, “PAR value + eartip type + calibration expired.” You can
also check the status of the calibrated headset via the PIC-100
Connected App.
NOTE
: You may be required to replace your calibrated headset
sooner than 2 years if the headset is damaged and/or the
earpieces are unable to pass the daily check.
12.15. ADVANCED SETTINGS:
BLUETOOTH
®
CALL
Access to the advanced settings options are enabled by your
program administrator. To access the advanced settings menu,
enter the menu by quick pressing the Power/Menu button. Press the
Power/Menu button until you reach the “Battery Status” menu
option. Press the (-) button 10 times. An audio prompt will state,
“Advanced Setting Active.” (The advanced settings menu will return
to being disabled when the SCU is powered off.) Pressing the menu
button will allow you access to the Advanced Settings - Bluetooth
®
Call ON/OFF. The default setting for Bluetooth
®
Call is ON.
12.16. ADVANCED SETTINGS:
BLUETOOTH
®
STREAMING
Once you have activated the Advanced Settings as described
above in 12.15., Pressing the menu button will allow you access to
the Advanced Settings - Bluetooth
®
Streaming ON/OFF. The default
setting for Bluetooth
®
Streaming is OFF.
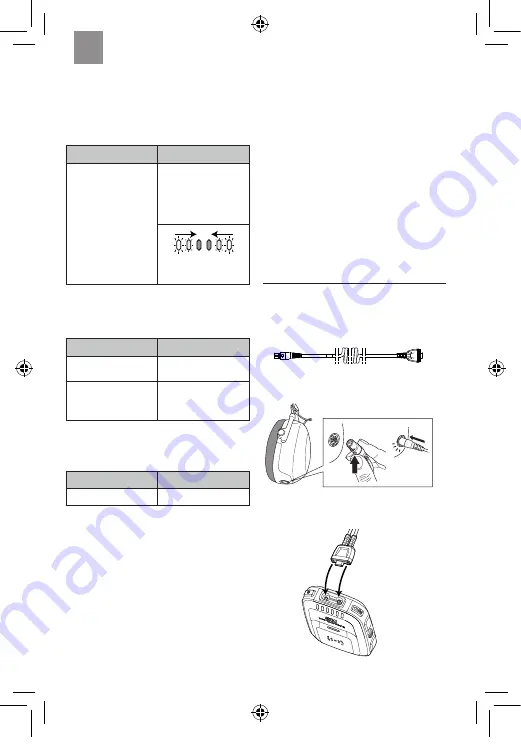
13. FLX2 OPERATION EXPLAINED
The 3M™ PELTOR™ FLX2 Cable to PIC-100 headset, FLX2-214,
fits 3M
TM
PELTOR
TM
CH-3 FLX2 Headset with built-in PTT (-111
models). This is available as an accessory (see Section 17.) and
allows for the connection between the PIC-100 SCU and a 3M
PELTOR headset for an over-the-ear alternative to the in-ear
headset.
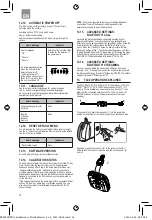
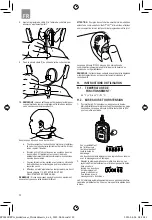
To connect, firmly insert the connector (1) into the receptacle
located on the bottom of the left earcup until you feel/hear a click.
Align and connect the connector (2) to the socket in the SCU.
Observe that the connector must be inserted so the keys fit, (a)
and (b).
1
2
1
a
b
2
EN
FP3881REVA_6sidedcover_32sidedinserts_4 x 6_2022-08-24.indd 16
FP3881REVA_6sidedcover_32sidedinserts_4 x 6_2022-08-24.indd 16
2022-08-24 08:30:29
2022-08-24 08:30:29

