


13
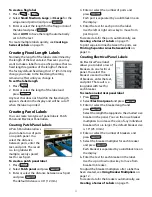
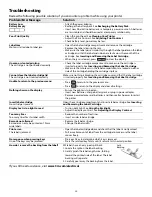
Creating Module Labels
A Module label allows you
to label a row of fuses of
varying widths. You set the
width of a fuse and the
number of fuses, enter the
text for each fuse, and print.
You can use fuse multipliers
to adjust the width of
individual modules as necessary.
To create a module label
1. Press
+ .
2. Enter or select the fuse length and
press .
Select the length that applies to the smallest size
fuse in the module. You can then use fuse
multipliers to increase the size of any individual
modules that are larger. The default fuse length
is 1.0” (25.4 mm).
3. Enter or select the number of modules and
press .
4. Enter the fuse multiplier for each module and
press .
Each fuse is separated by a solid black line on
the display.
5. Enter the text for each module.
Use the left or right arrow key to move from
module to module.
To adjust the fuse multipliers after a label has been
created, see
Using Fuse Multipliers
.
To create the data for the modules automatically,
see
Creating a Series of Labels
on page 15.
Using Fuse Multipliers
Fuse multipliers allow you to adjust the size of
individual fuse modules within a module type label.
To adjust the size of an individual module
1. Create a Module label as described in
Creating
Module Labels
.
2. Press
.
3. Select
Current label config.
and press
.
4. Select
Fuse multipliers
and press
.
5. Use the up and down arrow keys to select the
module number to adjust and press
.
6. Select the multiplier for that module.
7. Press
and then
Done (OK)
to return
to the label.
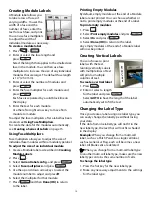
Printing Empty Modules
By default, empty modules at the end of a Module
label are not printed. You can choose whether or
not to print empty modules at the end of a label.
To print empty modules
1. Press .
2. Select
Print empty modules
and press
.
3. Select
On
and press
.
4. Select
Done (OK)
to return to the label.
Any empty modules at the end of a Module label
will now be printed.
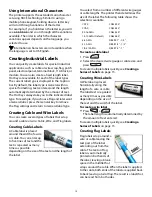
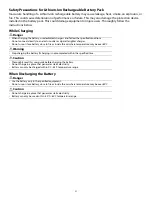
Creating Vertical Labels
You can choose to print
labels with the text
running vertically. Labels
with multiple lines of text
will print as multiple
columns of text.
To create a vertical label
1. Press .
2. Enter or select a length
for the label and press
.
Select
AUTO
to have the length of the label
automatically set to fit the text.
Changing the Label Type
Once you create a label using one label type, you
can easily change the label type without losing
your data.
If the data from one label type will not fit in the
new label type, the text that will not fit is shaded
in the display.
Example:
When you change from a multi-cell
label, such as a Patch Panel, to a single cell label,
such as General or Flag, each cell becomes a new
label. All blank cells are deleted.
When you change from a multi-cell label type
to another multi-cell label type, make sure the new
label type contains the same number of cells.
To change the label type
1. Press the hot key for the new label type.
2. Make any necessary adjustments to the settings
for the label type.
T
F
I
H
S
Summary of Contents for PL200
Page 1: ...Portable Labeler PL200 User Guide...
Page 22: ...22...


