background image

VOL-TX

6

Remote LAN Wakeup

Remote LAN Wakeup capability is a key feature of a centrally managed PC environment. This technology enables 
networked PCs to be “woken up” from a sleep or powered-off state so they can be managed from a central location, at 
any time of the day or night.

To employ Remote LAN Wakeup, three elements are required:

• Desktop management software that can send a “wake-up” frame to a PC.
• A Wake On LAN enabled PC motherboard that can supply low-level auxiliary power to a network card when the 

PC is powered off. The PC must be either PCI 2.1 or PCI 2.2 compliant.

• A Wake On LAN network card that can recognize a wake-up frame and signal the PC to power up.

A Wake On LAN enabled PC is never completely powered off, it maintains a low-level auxiliary power supply to the 
motherboard. The three-wire Wake On LAN cable provides one line for the network card auxiliary power and one 
line for the card wake-up signal, the other line is ground. Even if the PC is powered off, the network card is always 
active and monitoring the network. When a wake-up frame is detected, the card signals the motherboard to power up 
the PC. With the PC powered on, maintenance and other support tasks can be performed.

Instructions for Using the WOL (Wake On LAN) Features:

The VOL-TX NIC

s WOL functionality is DISABLED by default. To enable WOL, the following steps 

must be taken:

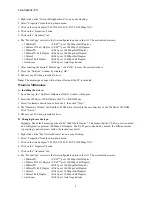
• Navigate to the “Network Properties” of the NIC, then select the “Advanced” tab.
• From the list of available configurable options, choose “PME.”
• Select the PME option and change it to “ENABLED” (it is DISABLED by default).
• From the list of available configurable options, locate “Wake On Magic Packet.” 

• “Wake On Magic Packet” is ENABLED by default. Leave it enabled if this is the desired wake up event.

• From the list of available configurable options, locate “Wake On PING.”

• ENABLE “Wake on PING” if this is the desired wake up event. 

• From the list of available configurable options, locate “Wake On Link.”

• ENABLE “Wake On Link” if this is the desired wake up event. 

• Reboot your PC for any changes to take effect. 
• If your PC is PCI 2.1 compliant, you must use the 3-wire WOL cable (included with your 3M NIC). Both ends of 

the cable are identical. Plug one end of the cable into the 3-pin slot on the NIC and the other end into a similar 
looking 3-pin slot on your PC’s motherboard.

• If your PC is PCI 2.2 compliant, the WOL cable is not needed. 

Note:

Power off your PC and unplug the power cable prior to connecting the cable.

Summary of Contents for Volition VOL-N100VF+TX

Page 1: ...VOL N100VF TX VF 45 TM RJ 45 Wake On LAN Fast Ethernet Adapter User Guide TM VolitionTM Network Solutions ...

Page 2: ...a type 4 Windows 2000 5 A Installing the driver 5 B Changing the media type 5 For Further Customization 5 Remote LAN Wakeup 6 Instructions for Using the WOL Wake On LAN Features 6 Using 3M NIC Diagnostics 7 Getting Started 7 Instructions for Running the Internal Tests 7 Instructions for Running the Network Test 8 Planned Drivers 8 Troubleshooting 8 PCI Compatibility 8 Known Resolutions for Common ...

Page 3: ... 2 0 standard The following WOL features are supported Wake On Magic Packet Wake On Ping Wake On Link Package Checklist The 3M VOL N100VF TX package includes One 3M VOL N100VF TX PCI WOL NIC One Wake On LAN cable One 3M Driver CD ROM Immediately inform your dealer in the event of any incorrect missing or damaged parts If possible please retain the carton and original packing materials in case ther...

Page 4: ...elect an unused PCI bus master slot and remove its protective bracket 3 Carefully insert the card and press until all the edge connectors are firmly seated inside the slot Then screw the card s bracket securely into the PC s chassis LED Status Description LNK Solid Green Indicates a valid network connection Off Indicates no valid network connection Act Flashing Amber Indicates incoming and outgoin...

Page 5: ...position to ensure that it is properly seated The maximum cable lengths are given in the table below NIC Driver Installation and Configuration Windows 98 A Installing the driver 1 Upon boot up the Add New Hardware Wizard window will appear 2 Insert the 3M Driver CD ROM into the PC s CD ROM drive and click Next 3 Select Search for the best driver for your device then click Next 4 Select CD ROM driv...

Page 6: ... the 3M Driver CD ROM into the PC s CD ROM drive 3 Select Automatic Search for a better driver then click Next 4 The Hardware Wizard will find the 3M NIC driver located in the root directory of the 3M Driver CD ROM Click Finish 5 Reboot your PC when prompted to do so B Changing the media type Defaults The default media type should be 100FX Full_Duplex This means that the VF 45TM port is enabled an...

Page 7: ...ired please follow the instructions below 1 Right click on the My Network Places icon on your Desktop 2 Select Properties from the drop down menu 3 Right click on Local Area Connection x note the x is a number that will vary depending on how many NICs are were installed in the PC 4 Select Properties from the pull down menu 5 Confirm that the adapter listed is 3M VOL N100VF TX PCI 100Mbps NIC 6 Cli...

Page 8: ...e PC With the PC powered on maintenance and other support tasks can be performed Instructions for Using the WOL Wake On LAN Features The VOL N100VF TX NIC s WOL functionality is DISABLED by default To enable WOL the following steps must be taken Navigate to the Network Properties of the NIC then select the Advanced tab From the list of available configurable options choose PME Select the PME optio...

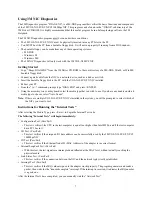
Page 9: ...If you have any doubts on which media type to choose select Auto Sense Note If there are multiple VOL N100VF TX NICs installed in the system you will be prompted to select which of the NICs you want to test Instructions for Running the Internal Tests After selecting the Media Type press Enter to begin the Internal Test suite The following Internal Tests will begin immediately Configuration Test Pa...

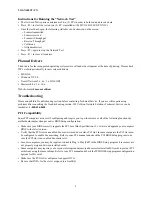
Page 10: ...Solutions Technical Service can be reached at 1 800 426 8688 PCI Compatibility Some PCI computers are not self configuring and require you to perform some or all of the following functions by motherboard jumper changes and or BIOS Setup configuration Make sure your BIOS correctly supports the PCI Local Bus Specification v2 1 or later and upgrade your computer BIOS to the latest version Verify that...

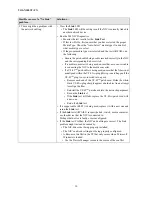
Page 11: ...Media Type of the NIC and the NIC s link partner may not match For example The NIC may be configured for 100Mbps and the corresponding switch port may be configured for 10Mbps Ensure the media types on the NIC and the NIC s link partner are the same If the NIC is connected to a media convertor be sure that the NIC is not using the AutoSense Media Type the Auto Negotiation signals cannot pass throu...

Page 12: ... happen if the VF 45TM plug is over inserted into a port Remove each end of the VF 45TM patch cord Strike the white black VF 45TM plug sharply against a hard object in an attempt to realign the fiber Reinstall the VF 45TM patch cord into the network equipment Re run the Link test If the Link test still fails replace the VF 45TM patch cord with a new one Rerun the Link test If a copper cable RJ 45 ...

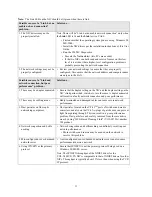
Page 13: ...NIC s link partner hub switch etc are the same A duplex mismatch will result in a faulty network connection and poor performance 2 There may be cabling issues Badly terminated and damaged cables can cause severe network performance 3 Dust particles on fiber optic networking equipment Dust particles located on the VF 45TM ports of switches and media converters and also on the VF 45TM plugs of patch...

Page 14: ...adio or television reception which can be determined by turning the equipment off and on the user is encouraged to try to correct the interference by one or more of the following measures Reorient or relocate the receiving antenna Increase the distance between the equipment and receiver Connect the equipment into an outlet on a circuit different from the one which the receiver is connected to Cons...

Page 15: ... C 4 149 F Storage Humidity 10 90 noncondensing Standards Conformance IEEE 802 3 IEEE 802 3u IEEE 802 3x PCI bus V 2 2 ACPI On Now PC 98 PC99 Wired for Management 2 0 Certification CE Mark EN50081 1 EN55022 Class B EN50082 1 EN 61000 3 2 3 EN 61000 4 2 3 4 5 6 8 11 Emissions FCC Class B CISPR Class B Safety UL U S and Canada Software Drivers Released Microsoft drivers Windows 98 ME 2000 Under Deve...

Page 16: ...ARRANTIES INCLUDING BUT NOT LIMITED TO ANY IMPLIED WARRANTY OF MERCHANTABILITY OR FITNESS FOR A PARTICULAR PURPOSE If this product is defective within the warranty period stated above your exclusive remedy shall be at 3M s option to replace or repair the 3M product or refund the purchase price of the 3M product Except where prohibited by law 3M will not be liable for any loss or damage arising fro...

Reviews: