background image

Driver Installation Under Windows

www.3ware.com 

33

1

Click the 

Next

 button and respond to the questions the Wizard displays 

using the default selections. 

2

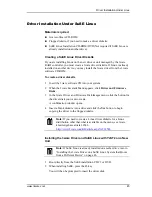
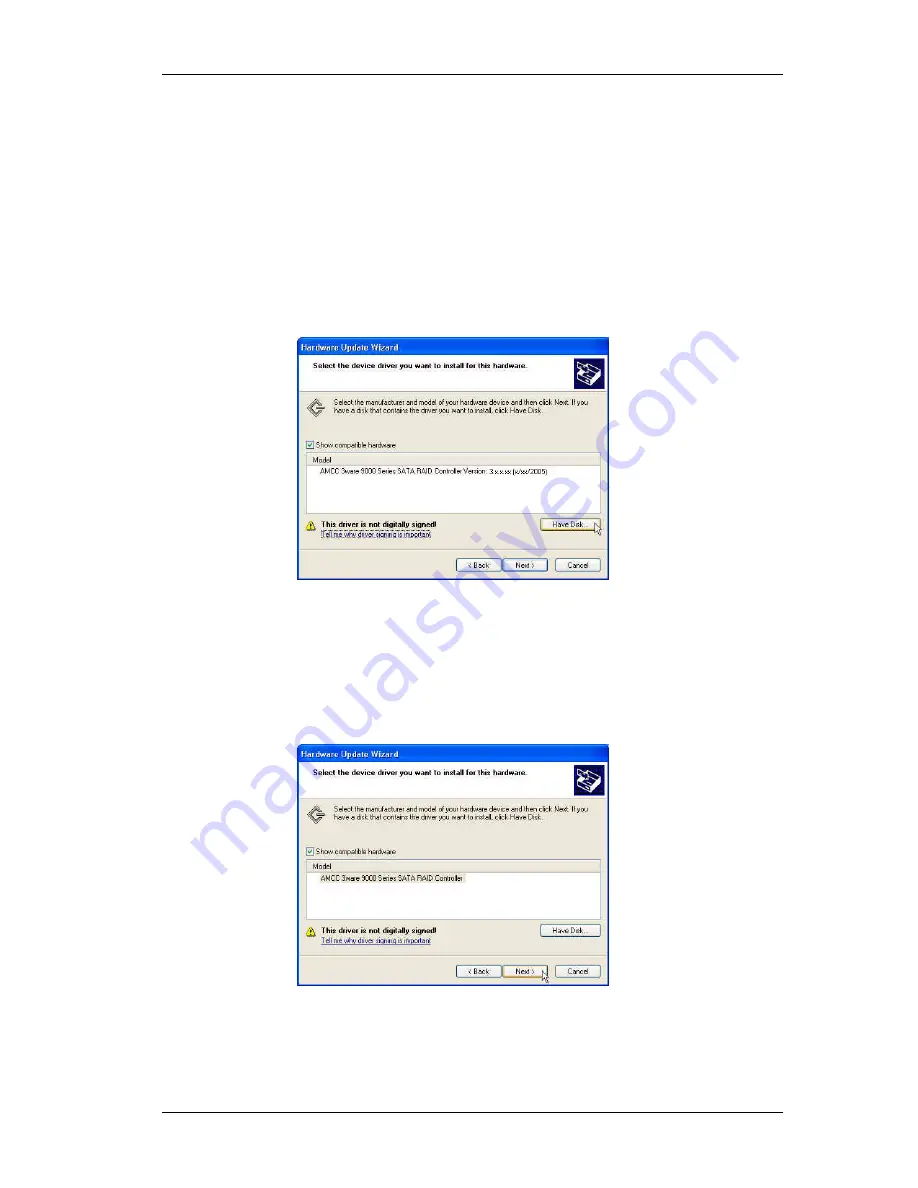
When the Wizard prompts you to select a device driver, click Have Disk, 

and then indicate that it is on the CD or floppy. 

3

If the “Digital Signature Not Found” message appears, click 

Yes

 to 

continue the installation.

4

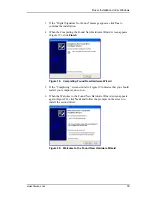
When the Completing the Found New Hardware Wizard screen appears 

(Figure 15), click 

Finish

.

Figure 15.   Completing Found New Hardware Wizard

5

If the “Completing” screen similar to Figure 15 indicates that you should 

restart your computer, do so now. 

6

When the Install Hardware Device Drivers screen appears (Figure 16), 

click 

Next

 and follow the prompts on the screen to install the second 

driver.

Figure 16.   Install Hardware Device Drivers

Summary of Contents for 9550SXU-16ML - Sata Rohs

Page 1: ...3ware Serial ATA RAID Controller Supports the 9550SX Models PN 720 0126 02 November 2005 User Guide...

Page 2: ...215 Moffett Park Drive Sunnyvale CA 94089 Trademarks 3ware Escalade and 3DM are all registered trademarks of AMCC The 3ware logo 3BM StorSwitch TwinStor and R5 Fusion are all trademarks of AMCC All ot...

Page 3: ...ves as JBODs 26 Checking the Motherboard Boot Sequence 26 What Next 27 Chapter 4 Driver Installation 29 Driver Installation Under Windows 30 Materials Required 30 Creating a 3ware Driver Diskette 31 I...

Page 4: ...ng Remote Access 81 Setting the Incoming Port 82 Setting the Frequency of Page Refreshes 82 3DM 2 Reference 83 Controller Summary Page 83 Controller Details Page 85 Unit Information Page 86 Unit Detai...

Page 5: ...rom One Controller to Another 156 Unlocking Drives Configured on a 9500S Controller 157 Moving Units from an 8000 Controller to a 9000 Controller 157 Moving Legacy JBOD Units to a 9000 Controller 158...

Page 6: ...nder FreeBSD 205 Updating the Firmware Under Linux and FreeBSD 206 Viewing Battery Information 207 Testing Battery Capacity 208 Chapter 11 Troubleshooting 211 Before Contacting Customer Support 211 Pr...

Page 7: ...re s Command Line Interface CLI The CLI is described in a separate manual available from the 3ware software CD and from 3ware s website 3ware 9000 Series Serial ATA RAID Controller CLI Guide Basic inf...

Page 8: ...ives 8 Configuring Units Describes how to configure new units and spares change existing configurations and set unit policies 9 Maintaining Units Describes how to check unit and drive status review al...

Page 9: ...ng 3DM current controller is used to refer to the controller which is currently selected in this drop down list Unit refers to one or more disks configured through 3ware to be treated by the operating...

Page 10: ...viii 3ware 9550SX Serial ATA RAID Controller User Guide...

Page 11: ...to Use on page 8 Product Features The 3ware 9000 Series Serial ATA family includes 9500S 4LP 9500S 8 9500S 8MI 9500S 12 9500S 12MI 9550SX 4LP 9550SX 8LP 9550SX 12 and 9550SX 12MI 9550SX 16ML Features...

Page 12: ...e level detail to display at power up System Requirements 3ware RAID controllers require the following A workstation class or server class motherboard which meets the following criteria PCI slots that...

Page 13: ...BSD 32 bit and 64 bit x86 Other Requirements Adequate air flow and cooling Adequate power supply for drives 3DM 2 3ware Disk Manager displays information in a browser It requires the following Interne...

Page 14: ...g across disks allows data to be written and accessed on more than one drive at the same time Striping combines each drive s capacity into one large volume Striped disk arrays achieve highest transfer...

Page 15: ...Disk Manager 3DM 2 Requires a minimum of two drives When drives are configured in a striped disk array see Figure 1 large files are distributed across the multiple disks using RAID 0 techniques Stripe...

Page 16: ...formance by distinguishing between random and sequential read requests For the sequential requests generated when accessing large files both drives are used with the heads simultaneously reading alter...

Page 17: ...rive failures without data loss For example in a twelve drive RAID 10 array up to six drives can fail half of each mirrored pair and the array will continue to function Please note that if both halves...

Page 18: ...l precautions are taken to prevent system hangs and data loss Hot Spare A single drive available online so that a redundant array can be automatically rebuilt in case of drive failure For additional i...

Page 19: ...are for single disk 6 or more RAID 50 Depending on the number of drives a RAID 50 may contain from 2 to 4 subunits For example with 12 drives possible RAID 50 configurations include 2 subunits of 6 3...

Page 20: ...ides the available unit capacity into multiple chunks of 2 TB or smaller that can be addressed by the operating systems as separate volumes The carve size is adjustable from 1024 to 2048 default throu...

Page 21: ...and administration of the controller and associated drives 3DM supports hot spare and hot swap for redundant units 3DM can be used locally on the system that contains the 9000 or remotely on a system...

Page 22: ...120 Verification and Media Scans The verify task verifies all redundant units and checks for media errors on single disks spares JBODS and RAID 0 unit members If the disk drive is part of a redundant...

Page 23: ...see Setting the StorSave Profile for a Unit on page 139 Drive Locate When the I2C port on the controller has been connected to a chassis with a Chassis Control Unit CCU you can issue drive locate com...

Page 24: ...Chapter 1 Introducing the 3ware 9000 Series Controller 14 3ware 9550SX Serial ATA RAID Controller User Guide...
Page 25: ...ownload it from the 3ware website at http www 3ware com support userdocs asp Configure the RAID Unit and Drives You may want to review the information under Understanding RAID Concepts and Levels on p...

Page 26: ...f features to help you manage and maintain the controller and your configured units The default settings for these features allow you to begin using your newly configured units right away You can revi...

Page 27: ...ersion of 3BM not 3BM 2 Staggered Method ATA 6 3BM Unit Level Settings Write Cache Enabled 3BM 3DM CLI Auto Verify Disabled 3DM CLI Continue on Source Error During Rebuild Disabled 3BM 3DM CLI Queuing...

Page 28: ...Chapter 2 Getting Started with Your 3ware RAID Controller 18 3ware 9550SX Serial ATA RAID Controller User Guide...

Page 29: ...the number of drives attached For more information see Determining What RAID Level to Use on page 8 Basic Steps for Creating a Unit The process of configuring your RAID units includes these main step...

Page 30: ...one 9000 series controller in your system a screen lists the available boards See Figure 6 In this case highlight the board with which you want to work and press Enter Figure 6 3ware Controller Board...

Page 31: ...disk unit 1 Select the drives to be included by highlighting each one and pressing Enter to select it When you select a drive an asterisk appears next to it in the left most column see Figure 8 You ma...

Page 32: ...ble RAID levels for the number of drives you selected Figure 10 List of Configuration Choices for Four Drives 3 Use the arrow keys to highlight the desired RAID configuration and press Enter For infor...

Page 33: ...ss Enter to see the available options 3 Use the arrow keys to select the option you want and press Enter to choose it For details about these parameters see Enabling and Disabling the Unit Write Cache...

Page 34: ...you are finished configuring units press F8 to save the changes and exit 3BM A warning message asks you to confirm that all existing data on the drives will be deleted Figure 12 Confirmation Message w...

Page 35: ...the unit is fully optimal Data remains intact when initialization is done in the operating system For complete information about initialization of RAID units see About Initialization on page 169 Speci...

Page 36: ...oard Boot Sequence Using your computer s Setup utility ensure that it shows the appropriate boot device After installing the 3ware 9000 controller in your system go into the BIOS for your computer sys...

Page 37: ...urn to Chapter 4 Driver Installation After installing the driver you may also want to install 3ware s browser based Disk Management tool 3DM 2 or the 3ware Command Line Interface CLI With 3DM 2 and CL...

Page 38: ...Chapter 3 First Time RAID Configuration Using 3BM 28 3ware 9550SX Serial ATA RAID Controller User Guide...

Page 39: ...e controller as you install the operating system If the operating system is already installed on a unit connected to another controller or to the motherboard you start the operating system and then in...

Page 40: ...r may be configured to be your system s boot device Or you can use another device as your boot device such as a disk attached to the motherboard This section contains instructions for how to Create a...

Page 41: ...a New Unit If you want to install Windows on a new drive configuration managed by the 3ware RAID controller follow the instructions in this section If Windows is already installed on another drive tur...

Page 42: ...ilable to Windows Installing the Driver on a System that Boots from a Different Device If you are installing the 3ware RAID controller on a system that already has the operating system installed on an...

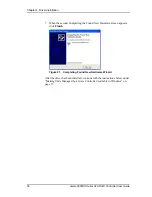
Page 43: ...re Not Found message appears click Yes to continue the installation 4 When the Completing the Found New Hardware Wizard screen appears Figure 15 click Finish Figure 15 Completing Found New Hardware Wi...

Page 44: ...under Windows XP or 2003 When you start Windows after installing a 3ware RAID controller Windows recognizes it as a Plug and Play device and brings up the Found New Hardware Wizard This wizard guides...

Page 45: ...een appears Figure 19 click Finish Figure 19 Completing Found New Hardware Wizard 5 If the Completing screen similar to Figure 19 indicates that you should restart your computer do so now 6 When the W...

Page 46: ...e 7 When the second Completing the Found New Hardware screen appears click Finish Figure 21 Completing Found New Hardware Wizard After the driver has been installed continue with the instructions belo...

Page 47: ...stem administrator 2 Use Disk Administrator to partition and format the new units or disks From the Start menu choose Administrative Tools Computer Management In the Computer Management window under S...

Page 48: ...g and whether it will be your boot device This chapter provides step by step instructions for the following Red Hat Fedora Core Linux Installation Installing the 3ware Driver and Red Hat Linux on a Ne...

Page 49: ...er labeled 3w xxxx The drivers for the 9000 series controllers and the 7 8000 series controllers are not interchangeable but can be used together when both controller types are installed in the same s...

Page 50: ...devices are available in which case it may be host1 or higher If you have a 2 6 kernel without sysfs type the following command dmesg grep 3w dmesg can also be used with earlier kernel versions Drive...

Page 51: ...a Different Device on page 42 Note We have tested some older systems where an IDE drive connected to the motherboard interfered with using a drive or unit managed by the 3ware RAID controller as a boo...

Page 52: ...fer to load the driver manually or from a script instead of updating the RAM About Variables In the Driver Installation Instructions These conventions are used for variable text for kernel strings and...

Page 53: ...e mount dev cdrom and press Enter 3 Copy the driver For Redhat WS4 on Intel x86 and AMD type cp mnt cdrom packages drivers linux redhat ws4 x86 3w 9xxx ko smp or hug lib modules put kernel string here...

Page 54: ...mount dev cdrom and press Enter 3 Copy the driver For Redhat workstation on Intel x86 and AMD x86 type cp mnt cdrom packages drivers linux redhat ws4 x86 3w 9xxx ko smp or hug lib modules put kernel...

Page 55: ...appears click Driver and Firmware Disks 3 In the 3ware Driver and Firmware Disk Images menu click the button for the driver disk you want to create A confirmation window opens 4 Insert a blank disket...

Page 56: ...n the instruction below replace kernel string with the kernel version you are using i e 2 6 etc and replace with your version of SuSE In addition replace 3w 9xxx with the appropriate module file for y...

Page 57: ...d 8 If you are using the GRUB boot loader you are finished If you are using the LILO boot loader run LILO to update the boot record on disk by typing the following sbin lilo The output should be simil...

Page 58: ...e such as a disk attached to the motherboard Obtaining 3ware FreeBSD Drivers The 3ware software CD ROM that came with the 3ware RAID controller includes compiled and tested drivers for FreeBSD 5 4 onl...

Page 59: ...ou have supports it To install the driver as a module 1 Boot with the FreeBSD CD ROM or diskette 2 In the sysinstall menu select Configure Load KLD module Note Immediately after the OS starts booting...

Page 60: ...should be automatically loaded at reboot time To make the driver part of the kernel 1 Boot with the FreeBSD CD ROM or diskette 2 In the sysinstall menu select Configure Load KLD module Note Immediatel...

Page 61: ...ry cd sys conf f Edit the file files i386 and add the lines shown below dev twa tw_cl_fwimg c optional twa dev twa w_cl_init c optional twa dev twa tw_cl_intr c optional twa dev twa tw_cl_io c optiona...

Page 62: ...m log usually var log messages Note Since twa ko behaves like a SCSI driver the units that it controls are seen as da0 da1 etc To make the driver part of the kernel 1 Create the directory sys dev twa...

Page 63: ...s dev twa i If you intend to bundle the firmware image with the driver add the following line to sys conf options TWA_FIRMWARE_FLASH opt_twa h and the following line to your kernel configuration file...

Page 64: ...Chapter 4 Driver Installation 54 3ware 9550SX Serial ATA RAID Controller User Guide...

Page 65: ...ge 58 Displaying Controller Information on page 63 Getting Help While Using 3BM on page 63 Starting 3BM 2 You access 3BM during the start up process for your computer To start 3BM 1 Power up or reboot...

Page 66: ...rds See Figure 24 In this case highlight the board with which you want to work and press Enter Figure 24 AMCC Boards Selection Screen You see a screen similar to Figure 25 warning you that changing yo...

Page 67: ...they will also appear in different BIOS summaries and will launch different versions of 3BM Exiting the 3BM Configuration Utility When you are ready to exit the 3BM configuration utility you have the...

Page 68: ...e more than one unit the boot unit is the one at the top of the list You can change the order by highlighting a unit and pressing the PgUp or PgDn key Unusable Arrays lists any RAID configuration miss...

Page 69: ...OR Tab and Shift Tab Select or unselect what is currently highlighted A selection may be a drive in a list of drives a button at the bottom of the screen or a field in the middle of the screen In list...

Page 70: ...nager screen from the Advanced Details screen Any key Move a highlighted unit up or down in the list of exportable units The top most unit will become the bootable unit if you install the OS Page Up P...

Page 71: ...configured units Pause Time Sets the number of seconds that BIOS loading will pause to displaying the RAID configuration before continuing to boot the operating system You can set a pause time of up t...

Page 72: ...settings 1 On the main 3BM screen Tab to Settings and press Enter 2 On the pop up menu select BIOS and press Enter The BIOS Options Settings screen appears Figure 27 BIOS Option Settings Screen 3 Tab...

Page 73: ...Tab to Information and press Enter 2 On the pop up menu select Controller and press Enter Note that the particular versions shown in the screen shot below may not be current Figure 28 Advanced Detail...

Page 74: ...Chapter 5 3ware BIOS Manager 2 3BM 2 64 3ware 9550SX Serial ATA RAID Controller User Guide...

Page 75: ...nly available for 9000 series controllers Two levels of access are provided user and administrator Users have view only access and can check the status of drives and units Administrators can view and...

Page 76: ...windows illustrated in this chapter are examples only Screenshots were taken in Internet Explorer The actual look of the windows will depend on the browser 3DM version and operating system in use Set...

Page 77: ...alling 3DM on a Microsoft Windows system The 3ware RAID controller works with Windows 2000 Windows XP and Windows Server 2003 The latest service packs should be installed for any Windows release To in...

Page 78: ...figuration screen You can change this setting later within 3DM 6 On the E mail Notification Preferences screen see Figure 30 use the fields to specify initial email settings Note If you do not want em...

Page 79: ...reen and Finish when you reach the last screen 3DM Installation gives you the option of starting 3DM and opening the browser window 8 If you elect to launch the web interface a Security Alert may appe...

Page 80: ...t Windows Use the Add or Remove Programs control panel to uninstall 3DM From the Startup menu choose Control Panels Add or Remove Programs In the Add or Remove Programs control panel select 3DM and cl...

Page 81: ...ill be asked to provide additional information the name of the mail server the user name for the person who will send the E mail notification typically the local host name and the user name for the pe...

Page 82: ...dev cdrom mnt 3 Change the directory and run the uninstall script For FreeBSD replace linux with freebsd in the path shown in this step For Linux cd mnt packages 3dm2 linux x86 install 3dm u Note that...

Page 83: ...ards type etc init d 3dm2 start 3 Open your browser and enter the URL for your system For 32 bit versions of Linux use https localhost 888 For 64 bit versions of Linux use http localhost 888 You can a...

Page 84: ...the time on the file server If the time varies by more than 30 minutes it will not be possible to remotely monitor the system you will not be able to log in If you are in a different time zone you mus...

Page 85: ...be compatible with the driver that is loaded a firmware flash upgrade may be required Figure 32 3DM Main Screen The menu bar across the top of the screen gives you access to other pages in 3DM You ca...

Page 86: ...ler tasks that can be scheduled rebuild verify and self test and maintenance of individual units Unit configuration can also be done through the Management Maintenance page The Monitor menu gives you...

Page 87: ...ller and associated drives Automatic refreshes can also be set For details see Setting the Frequency of Page Refreshes on page 82 Note If you click Refresh on the browser window you will be taken back...

Page 88: ...er and change some of those settings Controller level settings include background task rate Auto Rebuild Auto Carving and policies that can only be changed in the BIOS or CLI Unit level settings inclu...

Page 89: ...lows the user to view pages within 3DM These passwords work independently of each other The default password for both the User and Administrator is 3ware Passwords are case sensitive You can only chan...

Page 90: ...at 3DM be left running on the system that contains the 3ware RAID controller When events occur notification can be e mailed to one or more recipients You can specify the type of events for which notif...

Page 91: ...r an intranet to check status or administer the controller and associated drives If remote access is disabled and a user attempts to connect to 3DM remotely they will see the following error message R...

Page 92: ...the status of the drives attached to your 3ware RAID controller can change while you are viewing information about them in 3DM it s important to refresh the page information regularly That way you ca...

Page 93: ...s organized by page as the pages are organized on the 3DM menu bar Controller Summary Page Controller Details Page Unit Information Page Unit Details Page Drive Information Page Drive Details Window C...

Page 94: ...ler ID you see in 3DM 2 may not match the number that you see for the same controller in 3DM version 1 x Model The model name of the controller The model number is also printed on a sticker on the out...

Page 95: ...ion being used to interact with the controller BIOS The BIOS version on the controller Monitor The Monitor version on the controller This field appears only for 7000 and 8000 series controllers Boot L...

Page 96: ...o see details about a particular unit click the link in the Unit column Unit The unit number assigned to the unit by the firmware For 9000 series controllers unit numbers are in sequential order Name...

Page 97: ...igrating or Verifying the percentage complete is also shown Note If an asterisk appears next to the status of a unit there is an error on one of the drives in the unit This feature provides a diagnost...

Page 98: ...pacity The total capacity of the unit capacities of subunits are not shown Type The type of unit or subunit RAID 0 RAID 1 RAID 5 RAID 10 RAID 50 Single Disk Spare JBOD or Disk Volumes Displays the num...

Page 99: ...ed click the link in the Port column Port The port to which the drive is connected Model The model of the drive Capacity The physical capacity of the drive Note that the capacity as shown on 3DM scree...

Page 100: ...on the Unit Information page Blink Check this box to cause the LED for this drive to blink if it is in a chassis that has a Chassis Control Unit CCU and is connected to the I2C connector on the 9550SX...

Page 101: ...lers support NCQ The NCQ values in this window indicate whether the feature is supported and enabled at the drive At the controller level queuing is enabled or disabled for all drives in a unit on the...

Page 102: ...formed by the controller 9000 series controllers show separate settings for Rebuild Migrate Rate and Verify Rate as shown in Figure 40 The Rebuild Migrate Rate also applies to initialization Although...

Page 103: ...abled in the Other Controller Settings field at the bottom of this Controller Settings page If Disable Write Cache on Unit Degrade is enabled upon degrade of a unit the write cache will automatically...

Page 104: ...is enabled You can disable it if desired NCQ only operates when the feature is enabled at both the drive and the controller If a drive does not support NCQ the policy setting for the controller is ign...

Page 105: ...wn into multiple volumes of that size plus a remainder volume The default carvesize is 2TB For example using the default size if the unit is 2 5 TB then it will contain two volumes with the first volu...

Page 106: ...ne of those controllers use 3DM Version 1 x You can also use the CLI in conjunction with the operating system schedulers For detailed information see the 3ware KnowledgeBase article 12290 on the websi...

Page 107: ...ove all the schedule times for a particular background task initializations rebuilds and migrations will run anytime as they are needed Verify will only run if started by the CLI if the Verify Unit bu...

Page 108: ...he SMART thresholds indicate when a drive is likely to fail based on the number of errors that have been recorded through SMART Self Monitoring Analysis and Reporting Technology If any of the disk dri...

Page 109: ...equired by the system Always use the Remove link to remove a drive before unplugging it This is required for controllers earlier than the 9550SX models and recommended for 9550SX models Warning Physic...

Page 110: ...the page lists all existing units on the current controller and displays summary information about them The top row shows information about the unit while subsequent rows show summary information abo...

Page 111: ...units a row of task buttons lets you preform maintenance and configuration tasks related to the unit Before clicking one of these buttons select the appropriate unit Verify Unit Puts the selected uni...

Page 112: ...If rebuild scheduling is enabled on the Scheduling page the unit will not start actively rebuilding until the scheduled time and the status will change to say Rebuild Paused The Unit Details page ind...

Page 113: ...er you will typically see really bad results bad errors and most likely a reset of the controller or a system hang To unmount a unit under windows use Administrative Tools Computer Management Disk Man...

Page 114: ...ing When a unit is deleted the data will be permanently deleted the drives cannot be reassembled into the same unit If you want to reassemble the drives on another controller and access the existing d...

Page 115: ...nfigurations for the drives selected in the list of Available Drives Available configurations may include RAID 0 RAID 1 RAID 5 RAID 10 RAID 50 Single Disk and Spare Disk For information about these co...

Page 116: ...nd Continue on Source Error during Rebuild These check boxes let you set the policies for the unit These policies can also be set and changed on the Controller Settings page For details about these po...

Page 117: ...enu bar Up to 1000 alarms can be listed After the 1000 limit is reached the oldest alarms are deleted as new ones occur You can sort the alarms by severity or time To do so just click the column heade...

Page 118: ...rom the driver by 3DM The time shown for alarms generated by 9000 series controllers is the time received by the driver from firmware Message The specific text relating to the alarm condition Battery...

Page 119: ...es the BBU is not able to backup the 3ware RAID controller When the BBU is in the charging state write caching is disabled automatically on all units attached to the controller Fault The BBU detected...

Page 120: ...is field is set to zero at the start of a new test and is updated after the test completes A capacity of zero will also show if the BBU is disconnected and then reconnected Under optimal conditions a...

Page 121: ...rmitted and the incoming port for 3DM to listen for requests The initial settings for most of these preferences are specified during installation of 3DM E mail Notification Use the fields in this sect...

Page 122: ...strator When 3DM is first installed the default password for both is 3ware Change Password For Select the access level for which you are setting the password User or Administrator Users can only view...

Page 123: ...ort to be used by 3DM when listening for communications The default port setting is 888 If you change this port make sure the port you specify is not being used Failure to do so will cause 3DM to stop...

Page 124: ...Chapter 6 3ware Disk Manager 3DM 2 114 3ware 9550SX Serial ATA RAID Controller User Guide...

Page 125: ...ne controller in your system you can easily view information about each one using 3DM in the same session If you are working at the BIOS level you access 3BM for each controller separately You can che...

Page 126: ...eatures When you select a different controller from this list the page in view changes to reflect the details for the controller you selected Note Throughout this manual the term current controller is...

Page 127: ...of ports on the controller Delay between spinup The delay time in seconds between drive groups that spin up at one time on this particular controller if staggered spinup is enabled Disable write cache...

Page 128: ...ller firmware will attempt to rebuild a degraded unit if there is no spare using either an available drive or a failed drive Applies only to 9550SX controllers Some additional policies can be set at t...

Page 129: ...and cannot be used for storage When Export JBOD Disks is set to No you make individual disks available for use by configuring them as Single Disks If you want unconfigured disks to be available on you...

Page 130: ...to 7000 8000 series controllers as JBODs Drives that were previously connected to a 9000 series controller and configured will not be seen as JBODs Enabling and Setting Up Staggered Spinup Three polic...

Page 131: ...At the main 3BM screen Tab to Policy and press Enter 2 On the Policy Control screen Tab to Disable Write Cache on Unit Degrade 3 Press Enter to display the choices use the arrow keys to select Yes and...

Page 132: ...fore creating the unit Units created with this policy turned off will not be affected If the policy is turned off later units that have been carved into volumes will retain their individual volumes ex...

Page 133: ...not be deleted except by deleting the unit If you create a bootable unit that has multiple volumes the first volume is always used as the boot device Changing the auto carve policy does not affect exi...

Page 134: ...gh 3DM 3BM or the CLI For how to change this setting through CLI see 3ware 9000 Series Serial ATA RAID Controller CLI Guide To enable Auto Rebuild through 3BM 1 On the main 3BM screen Tab to Settings...

Page 135: ...Setting Other Unit Policies through 3DM Changing An Existing Configuration RAID Level Migration or Online Capacity Expansion Naming a Unit Deleting a Unit Removing a Unit Moving a Unit from One Contr...

Page 136: ...e drives that are not currently part of a unit If you want to use drives that are currently part of a different unit you must delete that unit first to make the drives available For details see Deleti...

Page 137: ...ture is integrated into the StorSave Profile StorSave Profile Protection by default 9550SX controllers only The particular policies that you can adjust when you create the unit vary depending on which...

Page 138: ...ves you want to include in the unit by marking the checkbox in front of the Port number for each one If you are creating single drive units single disks or hot spares you can configure multiple drives...

Page 139: ...drives attached to the controller and selected RAID 50 as the configuration in step 3 select whether you want 3 4 or 6 Drives Per Subunit as shown here Figure 53 Configuring a RAID 50 with 12 Drives 8...

Page 140: ...used while it is initializing and is fault tolerant 12 Partition and format the unit For details see Partitioning and Formatting Units on page 133 Creating a Unit through 3BM In 3BM configuration task...

Page 141: ...re that the proper drives are listed see Figure 56 for an example for RAID 5 Figure 56 Create Disk Array Display 4 Optional Press Enter and type a name for the unit then press Enter again to set the n...

Page 142: ...You are returned to the main 3BM screen Note The unit is not actually created and no data is overwritten until you have finished making all your changes and press F8 10 When you are finished making co...

Page 143: ...S on one of them so that you can boot from that unit that unit must be the first unit You can change the order of the units in 3BM To change the order of units in 3BM 1 At the main 3BM screen in the l...

Page 144: ...window 3 Partition the unit fdisk dev sda If the unit is over 2 TB use parted dev sda 4 Create or make the file system mkfs dev sda1 If you have kernel 2 6 8 1 or higher for partitions over 4 TB spec...

Page 145: ...ther Drive coercion slightly decreases the usable capacity of a drive that is used in redundant units The capacity used for each drive is rounded down to the nearest GB for drives under 45 GB 45 000 0...

Page 146: ...re You ll see the words Hot Spare appear next to the drive in the Available Drives list Figure 60 Hot Spare Indicated If a hot spare is already enabled you can disable it by pressing s again 3 If you...

Page 147: ...have a BBU Battery Backup Unit installed on the controller the battery preserves the contents of the controller cache memory for a limited period of time up to 72 hours in the event of a system power...

Page 148: ...about the write cache settings see the reference section Controller Settings Page on page 92 Enabling or Disabling the Write Cache through 3BM 1 At the main 3BM screen select the unit by highlighting...

Page 149: ...Note If the write cache setting is disabled for a unit the StorSave Profile capability does not apply and is automatically disabled The three profiles automatically adjust several different factors th...

Page 150: ...iod of time up to 72 hours in the event of a power failure Write Journaling Write journaling tracks the writing of data to disk and preserves a copy of data that has not yet been written to the disk m...

Page 151: ...r 3 On the pop up menu select Configure and press Enter 4 In the Configure Disk Array screen Tab to the field StorSave Profile The current setting Protection Balanced or Performance is shown The defau...

Page 152: ...n of the Controller Settings Page enable queuing by checking the box under Queuing for the designated unit disable it by unchecking the box The page refreshes and a message at the top confirms the cha...

Page 153: ...3DM Reference section Controller Settings Page on page 92 To set unit policies 1 Choose Management Controller Settings from the menu bar in 3DM 2 In the Unit Policies section of the Controller Setting...

Page 154: ...ies Serial ATA RAID Controller CLI Guide This section includes the following topics about changing existing configurations RAID Level Migration RLM Overview Changing RAID Level Expanding Unit Capacity...

Page 155: ...ss When you change a RAID level you may also add one or more drives to the unit You can also migrate to change the unit s stripe size For example a four drive RAID 5 with a 64KB stripe size can be mig...

Page 156: ...e Unit ID 3 Click the Migrate Unit button The Migrate dialog box appears 4 Select any drives to be added to the unit 5 Select the new RAID level 6 Optionally select a new Stripe size 7 Click OK The Ma...

Page 157: ...gured unit The Status column title indicates that Migration is in progress 7 If you booted from the unit that is being migrated when migration is complete reboot your system Then turn to Step 4 under...

Page 158: ...he controller rescan in order to update unit information a In 3DM2 select the appropriate unit and choose Management Maintenance Click the Remove Unit button b After the unit has been removed click th...

Page 159: ...hown A name can be up to 21 characters and can include dashes and underscores 5 Click the Save Names button Note If you want to cancel your change before saving it click the Reset Names button Naming...

Page 160: ...e previously part of a unit on a 3ware 7000 8000 series controller they must be deleted before you use them If you want to move a unit from a 7 8000 controller to the 9000 controller you must convert...

Page 161: ...ove and click Delete Unit Figure 64 Figure 64 Deleting a Unit Through 3DM 6 When a message asks you to confirm click OK Configuration information associating the drives with the unit is deleted and th...

Page 162: ...at it is selected 2 Tab to the Delete Unit button and press Enter Note If you want to delete an incomplete drive or unusable unit or a drive that appears with a message such as Unsupported DCB select...

Page 163: ...3BM screen and the drives associated with the unit now appear in the list of Available Drives Remember The unit is not actually deleted and no data is overwritten until you press the F8 key to save y...

Page 164: ...e on a redundant unit or if you want to remove a drive from the Available Drives list so that you can then remove it from the system For more information see Removing a Drive on page 161 Removing a Un...

Page 165: ...ller If you have a hotswap carrier you can do this without shutting down the system If you do not have a hot swap carrier power down the system and ground yourself before making changes to the hardwar...

Page 166: ...disk roaming 3DM includes two features that help you do this without powering down the system allowing you to hot swap the unit The Remove Unit feature lets you prepare a unit to be disconnected from...

Page 167: ...from an 8000 Controller to a 9000 Controller It is possible to move your 8000 storage units to a 9000 series controller You will then have the advantages of the 9000 series controller The drive units...

Page 168: ...ving the 8000 controller installed 2 Install the Windows driver For details see Driver Installation Under Windows on page 30 3 Run the conversion utility to convert the units 4 Power down the system d...

Page 169: ...to a 9550SX controller The steps you follow depend on whether you are booting from the drives attached to the 9500S or whether they are being used for secondary storage To move a bootable unit from a...

Page 170: ...ve through 3DM Note If you have a 9550SX controller when you add a drive to your system and connect it to the controller it is automatically detected and listed in 3DM and the CLI If you have a 9500S...

Page 171: ...ive which has already failed Warnings Physically removing a drive that is not in a hot swap carrier can result in a system hang or may even damage the system and the drive The steps below will destroy...

Page 172: ...the Available Drives list 2 Locate the drive you want to remove and click the Remove Drive link Figure 67 You can remove a drive that is part of a redundant unit or that is shown in the list of Availa...

Page 173: ...through 3DM on page 160 This is useful in a variety of circumstances For example if you added new drives to the controller you can make them available by rescanning the controller Rescanning checks a...

Page 174: ...ller 3DM scans the controller for information about units and drives and updates the information shown on the Maintenance page To rescan the controller through 3BM 1 From the main 3BM screen press Alt...

Page 175: ...3DM Reviewing Alarms and Errors About Background Tasks Scheduling Background Tasks Rebuilding Units Verifying Units Checking Unit and Drive Status through 3DM The information screens in 3DM let you s...

Page 176: ...mation For details about specific pages with summary and detailed status information see these topics in the 3DM Reference section Controller Summary Page on page 83 Controller Details Page on page 85...

Page 177: ...the 3ware RAID controller requires attention such as when a disk unit becomes degraded and is no longer fault tolerant They also include SMART notifications and informational notification such as whe...

Page 178: ...og link 4 When the Save or Open dialog box appears navigate to where you want to save the log and click OK Viewing SMART Data About a Drive You can view SMART Self Monitoring Analysis and Reporting Te...

Page 179: ...drives Foreground initialization can take several hours depending upon the size of the unit After foreground initialization completes you can start the operating system and units will perform at peak...

Page 180: ...ated Initialization of RAID 5 and RAID 50 Units Regardless of the size all 9000 series RAID 5 and 50 arrays are fully fault tolerant upon creation This is because these configurations use a specialize...

Page 181: ...nit is detected to have been shutdown uncleanly the unit or sub unit will change its mode to either Initializing or Verifying 3ware s auto initialization feature determines if this is required During...

Page 182: ...and Degraded in the 3DM pages If a hot spare is specified and a redundant unit degrades an event notification is generated and the hot spare automatically replaces the failed drive in the redundant un...

Page 183: ...ad and write errors About Verifies of Non Redundant Units Verification of non redundant units single disks JBODs spares and RAID 0 units read each sector of a drive sequentially If a sector can t be r...

Page 184: ...ration is active it has priority over other background tasks When migration starts it will take the highest priority over rebuild initialize and verify Once a unit is put into the migration state it m...

Page 185: ...be started manually or scheduled For details about manually starting these processes see Rebuilding Units on page 181 and Verifying a Unit through 3DM on page 187 For details about scheduling rebuild...

Page 186: ...want to change a scheduled task you first remove the scheduled item and then add it back with the desired day time and duration Sometimes you may want to manually start rebuild and verify tasks For in...

Page 187: ...lock it will continue where it left off at the next schedule time block Similarly if a verify operation does not complete in the scheduled time block it will continue where it left off at the next sch...

Page 188: ...M daily schedules exist with 24 hour duration that is the schedule is for all the time Until you change these 24 hour daily schedule enabling the schedule will not have any direct effect You can easil...

Page 189: ...hes and the selected schedule s are removed You can now add another schedule Adding a New Task Schedule Slot When you add a rebuild migrate or verify task schedule you specify the day of the week time...

Page 190: ...nge the schedule for when they are run and you can disable the tests if you prefer not have to have them performed Note These tasks will only be run during scheduled times if they are checked in the S...

Page 191: ...ulted in a RAID 10 configuration the drives are rebuilt simultaneously In a 4 drive RAID 10 configuration up to two drives can be rebuilt In a 6 drive configuration up to three drives can be rebuilt I...

Page 192: ...In the Unit Maintenance section of the Maintenance Page select the degraded unit and click the Rebuild Unit button 4 When a dialog box displays available drives select the drive you want to replace t...

Page 193: ...egraded RAID 5 Array to be Rebuilt You can start the rebuild of a degraded unit manually in 3BM or you can let the system boot and allow the rebuild to take place automatically To start the rebuild of...

Page 194: ...le drives do one of the following If your system has hot swap carriers you can replace the failed or Not In Use drive and rescan Alt R the unit If your system does not have hot swap carriers power dow...

Page 195: ...r Alt R and then select a new drive to be used in the rebuild You can also boot the operating system launch 3DM and cancel a rebuild by using the Remove Drive link on the Maintenance page If you do no...

Page 196: ...ID 5 parity that was incorrect AEN 36 Verify detected and fixed data parity mismatch is posted to the Alarms page When this occurs for 7000 8000 series controllers AEN 36 Verify detected and fixed dat...

Page 197: ...until the next scheduled time A Stop Verify link appears next to the unit on the Maintenance page If you need to stop the verify process use this link If initialization starts because the unit had no...

Page 198: ...ote Drive Locate will be supported by chassis vendors This feature requires a chassis with a Chassis Control Unit CCU The CCU will also support the monitoring of fan speed temperature sensors door loc...

Page 199: ...ler Summary Page on page 83 Using 3BM you can see the firmware version see Displaying Controller Information on page 63 Using the CLI you can see both the driver and firmware versions see 3ware 9000 S...

Page 200: ...3ware website also allows you to download drivers for other 3ware controller models and associated release notes For Windows the firmware and driver can be installed from the same download When you ru...

Page 201: ...river files to a floppy in step 9 above Refer to the user manual for your operating system for more details Updating the 3ware Driver and Firmware Under Windows You can update both the driver and the...

Page 202: ...ains the driver files you extracted in step 1 5 Double click on the file 3wUpdate exe You see a progress dialog box while the update utility checks your system for the driver and firmware versions pre...

Page 203: ...Current If the firmware image is not found with the driver files you will see an error message and the 3ware Driver Firmware Update dialog box will show only the Driver as available Figure 78 Error M...

Page 204: ...the dialog make any changes to what will be updated and click Continue to install your selections During the update the driver installs on your local drive The firmware will first download and then w...

Page 205: ...stallation with an unsigned driver click OK 9 If a final message box confirms that the process is complete click OK This message appears if you do not need to restart your computer Using the Update Ut...

Page 206: ...appropriate 4 Continue with step 6 above in the procedure Updating the 3ware Driver and Firmware Under Windows Updating the 3ware Driver Under Windows XP If you prefer you can update the 3ware driver...

Page 207: ...ck on the Device Manager tab 7 Open the SCSI and RAID Controllers selection 8 Locate and double click on the applicable 3ware Serial ATA RAID Controller The 3ware 9000 Series ATA RAID Controller Prope...

Page 208: ...t screen asks whether you want to connect to Windows Update Select No not this time and click Next Figure 82 Windows XP Service Pack 2 Windows Update Query 12 When you reach the Hardware Update Wizard...

Page 209: ...next screen Figure 84 choose Don t search I will choose the driver to install and click Next Figure 84 Search for Driver Screen 14 When the Select the Device Driver screen appears Figure 85 click the...

Page 210: ...igure 86 Install From Disk Dialog Box 16 When the Select the Device Driver dialog box reappears select the appropriate driver Figure 87 and click Next Be sure to select the correct driver name otherwi...

Page 211: ...oots the first screen of the Hardware Update Wizard appears again informing you that Windows has found new hardware If you are using Windows XP Service Pack 2 the screen asks whether you want to conne...

Page 212: ...Maintaining Your Controller 202 3ware 9550SX Serial ATA RAID Controller User Guide 21 When the second Completing the Found New Hardware screen appears click Finish Figure 89 Completing Found New Hardw...

Page 213: ...xxx ko for 2 6 kernels For Red Hat Uniprocessor cp version 3w 9xxx o lib modules kernel drivers scsi 3w 9xxx o For Red Hat SMP cp version 3w 9xxx smp lib modules kernel drivers scsi 3w 9xxx o For Red...

Page 214: ...d Check the release notes for more details regarding supported operating systems 1 Download and extract the driver as described on page 190 2 Backup any critical data prior to updating the 3ware drive...

Page 215: ...lilo 10 Reboot if booted from the 3ware controller Otherwise continue with step 11 The driver is now updated 11 Stop the current driver module if loaded rmmod 3w 9xxx 12 Load the new driver module mo...

Page 216: ...included in the utility the versions currently installed on your controller and recommends whether to upgrade the firmware or not Warning We strongly recommend backing up your data before updating the...

Page 217: ...SX 01 Note When the BBU status is not Ready write caching is automatically disabled on all units attached to the controller You can see information about a battery backup unit attached to your control...

Page 218: ...akes between 8 and 12 hours While running the battery test and until charging is completed write cache is temporarily disabled For how to replace the battery see the installation guide that came with...

Page 219: ...91 BBU Information Screen While Battery is Testing To test the battery in a BBU in 3BM 1 At the main 3BM screen tab to the BBU button and press Enter 2 Tab to Test Battery Capacity and press Enter Fi...

Page 220: ...Chapter 10 Maintaining Your Controller 210 3ware 9550SX Serial ATA RAID Controller User Guide...

Page 221: ...ity asp Before Contacting Customer Support Three screens in 3DM 2 provide controller version and status information that can be helpful when contacting 3ware Customer Support with questions or for tro...

Page 222: ...sing Alt b This saves the step of changing the boot order in the motherboard BIOS and 3BM and having to change it back again Q3 A Dell Dimension system locks up when booting after a 3ware card is inst...

Page 223: ...4 drive 64K RAID 5 missing drive s Port 1 Maxtor 6B300S0 279 86 GB Port 2 Maxtor 6B300S0 279 86 GB The unit has some but not all of its members available The unit will be unusable If this unit is your...

Page 224: ...Alarms page the AEN number is the last few digits within the parentheses at the beginning of the message description For example in the string 0x04 0x002B 2B is the AEN number To find additional infor...

Page 225: ...m error reported 028h DCB version unsupported 029h Verify started 02Ah Verify failed 02Bh Verify completed 02Ch Source drive ECC error occurred 02Dh Source drive error occurred 02Eh Replacement drive...

Page 226: ...oltage is high 047h Battery voltage is too low 048h Battery voltage is too high 049h Battery temperature is normal 04Ah Battery temperature is low 04Bh Battery temperature is high 04Ch Battery tempera...

Page 227: ...ort as a replacement board may be required 004h Rebuild failed The 3ware RAID controller was unable to complete a rebuild operation This error can be caused by drive errors on either the source or the...

Page 228: ...river 007h Initialize completed The 3ware RAID controller has completed the initialization sequence of RAID levels 1 10 5 or 50 For RAID 5 and RAID 50 the data on the array is read and the resultant p...

Page 229: ...3DM Disk Management Utility may be auto initiated by a hot spare failover or may be started after drive removal or insertion due to the Auto Rebuild policy In any of these cases the user is notified...

Page 230: ...no AEN since there were no IO errors 01Fh Unit Operational Unit operational Drive insertion caused the unit to become operational again This AEN is sent only after the offline timer expires 20 second...

Page 231: ...act that a sector repair AEN has been sent to the user is an indication of the presence of grown defects on a particular drive While typical modern disk drives are designed to allow several hundred gr...

Page 232: ...a reserved area of each disk drive called the Drive Configuration Block DCB As part of power on initialization the 3ware RAID controller performs a checksum of the DCB area to ensure consistency If an...

Page 233: ...ted This AEN indicates the data integrity verification function see AEN 029h was completed successfully 02Ch Source drive ECC error overwritten If a read error is encountered during a rebuild and the...

Page 234: ...ther entries that will give you an idea of why the migration failed such as a drive error on a specific port 035h Migration completed This AEN is sent when migration of a unit is complete The new capa...

Page 235: ...ild schedule 03Dh Verify paused This AEN will be sent when the verify operation is paused Verifies are normally paused for ten minutes after a system first boots up and during non scheduled times when...

Page 236: ...t is made to read the backup DCB even when the primary DCB is successfully read When an error occurs here this is a latent error that needs to be addressed before any future errors so this DCB is re w...

Page 237: ...4Ah Battery temperature is low The Battery Backup Unit measures and evaluates the battery pack temperature on a continuous basis If the temperature is below a warning threshold this AEN will be posted...

Page 238: ...e 3ware RAID controller all units have their write cache disabled until the test completes 04Fh Cache synchronization skipped The 3ware RAID controller performs cache synchronization when system power...

Page 239: ...level The measured capacity of the battery is below the warning level When this occurs the Battery Backup Unit is still able to backup the 3ware RAID controller but it signals that the battery pack sh...

Page 240: ...t be replaced The Battery Backup Unit becomes not ready and is unable to backup the 3ware RAID controller 05Eh Cache synchronization completed If drive insertion causes unit to become operational this...

Page 241: ...erformance high capacity Serial ATA SATA RAID storage solutions A Chip AccerATA chip Automated data port to handle asynchronous ATA disk drive interface AMCC Applied Micro Circuits Corporation provide...

Page 242: ...without deleting the data on it do not delete it instead use the Remove feature in 3DM and then physically remove the drives Destroying Same as deleting a unit Degraded unit A redundant unit that cont...

Page 243: ...placed failed drives when a hot swap carrier is used I C or Inter IC bus A two wire serial bus solution used as a control diagnostic environmental and power management for EMS enclosure management ser...

Page 244: ...unit Non redundant units A disk array without fault tolerance RAID 0 single disk or JBOD OCE Online Capacity Expansion The process of increasing the size of an existing RAID unit without having to cre...

Page 245: ...B or 256KB This stripe size is sometimes referred as a a minor stripe size A major stripe size is equal to the minor stripe size times the number of disks in the unit Striping The process of breaking...

Page 246: ...Appendix A Glossary 236 3ware 9550SX Serial ATA RAID Controller User Guide...

Page 247: ...munications However there is no guarantee that interference will not occur in a particular installation If this equipment does cause harmful interference to radio or television reception which can be...

Page 248: ...ty with the following Common Technical Regulations and or normative documents EN 55022 Limits and methods of measurements of radio interference characteris tics of information technology equipment EN...

Page 249: ...ranty AMCC warrants this product against defects in material and workmanship for a period of twelve 12 months from the date of original purchase AMCC at no charge and at its option will repair or repl...

Page 250: ...vary from state to state Some states do not allow the exclusion of incidental or consequential damages or allow limitation of implied warranties or their duration so that the above exclusions or limi...

Page 251: ...ry is accessible at http www 3ware com support download asp Web based software downloads feature upgrading multiple switches simultaneously For specific answers to questions or to give feedback about...

Page 252: ...Appendix C Warranty Technical Support and Service 242 3ware 9550SX Serial ATA RAID Controller User Guide...
Page 253: ...nabling remote access 81 errors 167 hot spare 135 incoming port number 113 installing 3DM on Linux 70 installing 3DM on Windows 67 main screen 75 Maintenance page 98 managing email event notification...

Page 254: ...completed 007h 218 Initialize failed 00Eh 219 Initialize paused 03Ch 225 Initialize started 00Ch 219 Migration completed 035h 224 Migration failed 034h 224 Migration paused 03Eh 225 Migration started...

Page 255: ...ing a controller 115 121 configuring units 125 first time in BIOS 19 Continue on Error During Rebuild setting in 3DM 93 controller moving unit to another 156 rescanning 163 updating driver 190 FreeBSD...

Page 256: ...ired 040h 225 FreeBSD driver installation 48 updating 205 H hardware installation troubleshooting 212 help getting for 3BM 63 hot spare 8 introduction 135 specifying in 3BM 136 specifying in 3DM 135 h...

Page 257: ...042h 226 Q Queuing policy setting in 3DM 94 R RAID concepts and levels 4 configurations 5 configurations available 8 determining level to use 8 RAID 0 5 RAID 1 6 RAID 10 7 RAID 50 7 RAID 5 6 RAID Leve...

Page 258: ...iguring 125 creating a unit in 3DM 127 128 introduction 125 creating a unit for the first time in BIOS 19 creating in 3BM 130 definition 4 235 deleting a unit 150 in 3BM 152 in 3DM 150 expanding capac...

Page 259: ...3DM remotely 74 volumes in a unit 88 resulting from auto carvings 88 W Warranty 239 WHQL 238 working in 3BM 59 write cache 12 93 disable on unit degrade 121 disable on unit degrade policy viewing in 3...

Page 260: ...250 3ware 9550SX Serial ATA RAID Controller User Guide...

Reviews: