2
1
2
3
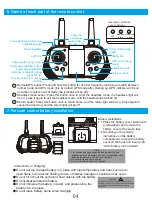
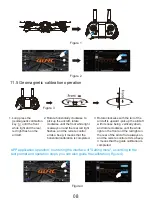
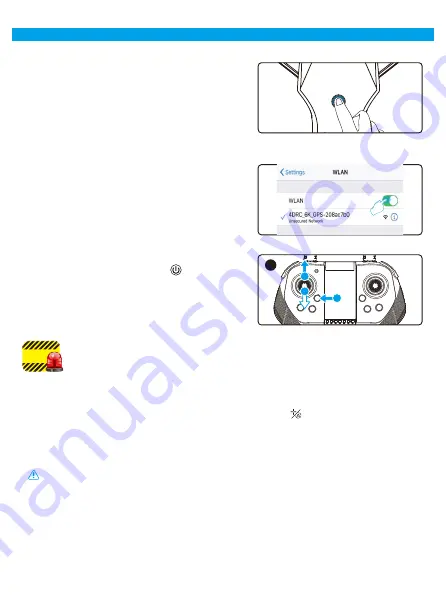
11.3: Turn on the remote control (default mode): long
press the power switch button (step 1), turn on
the power and the indicator flashes; push the
throttle lever up to the top (step 2) and then to the
bottom (step 3), and thus the frequency matching
is successful, the UAV lights change from flashing
to being permanently on.
Warning
11. Preparation instructions before flight
11.2 Turn on the WiFi function in the mobile device,
select "4DRC_6K_GPS " in the WiFi list, and
open the APP after it connected successfully.
11.1 Turn on the power of the aircraft and place it on
the horizontal plane. At this time, the aircraft
placed on the horizontal plane will automatically
enter the code-matching state, and the front white
light and the red light of fuselage will flash.
Note: Set the aircraft in a correct direction, and the
nose shall face forward. It must be placed on the
horizontal plane.
It must ensure that the power of the aircraft/remote control is sufficient or
it cannot take off!
11.4 Horizontal calibration operation:
Short press the horizontal calibration button on the remote control , the white and red lights on the
aircraft will flash quickly. When the white and red lights on the aircraft are always on, it will means that
the calibration is completed (Figure 1).
APP application operation: Click "Set more" icon in the APP interface, and follow the text prompt
steps after entering, and it can also be horizontally calibrated (Figure 2).
Note: In calibration, the aircraft must be placed on a horizontal surface to complete the calibration.
07


