background image

Quick Installation Guide 

HSG326

 Wireless Hotspot Gateway ENGLISH 


Copyright © 4IPNET, INC. All rights reserved. 

14 


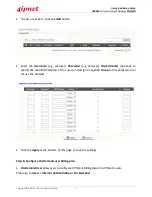
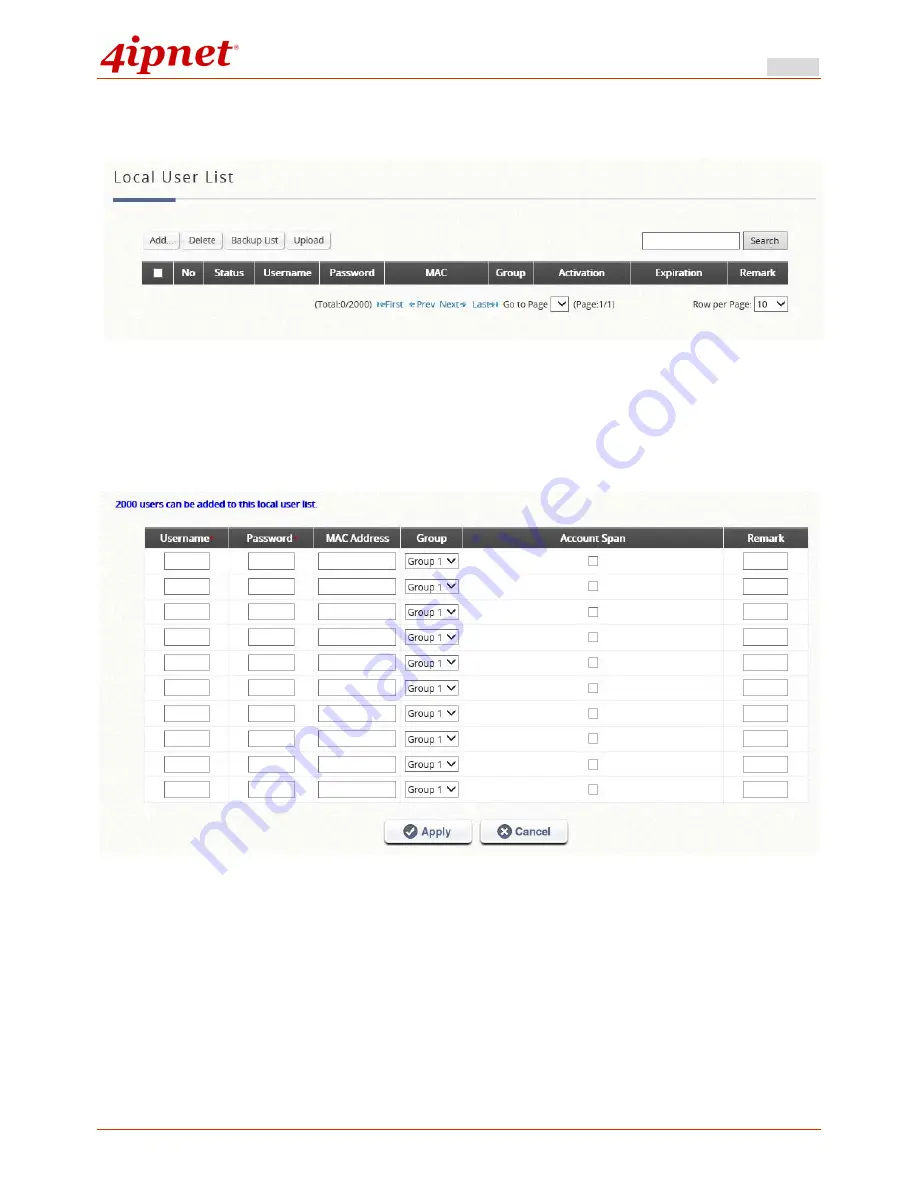
To add a user here, click the 

Add

 button 


Enter the 

Username

  (e.g. testuser), 

Password

  (e.g. testuser), 

MAC Address

  (optional, to 

specify the valid MAC address of this user) and assign an applied 

Group

 to this particular user 

(or use the default). 


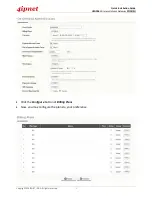
Click the 

Apply

 at the bottom of this page to save the settings. 


Step 6: Configure On-Demand user billing plan 


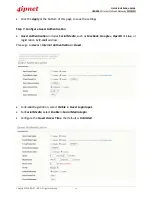
On-Demand User

 allows you to configure different billing plans for different users. 

Please go to 

Users > Internal Authentication > On-Demand

Summary of Contents for HSG326

Page 1: ...HSG326 Wireless Hotspot Gateway ...

Page 2: ...m or modify any part of this publication in any form or by any means without prior written permission from 4IPNET INC You may not alter or remove any copyright or other notice from copies of the content All other brand and product names are claimed or registered marks of their respective companies or organizations All rights reserved To download up to date version please visit www 4ipnet com ...

Page 3: ... Settings 10 Step 1 Time Zone 10 Step 2 WAN Interfaces 11 Step 3 Configure Service Zone Settings with ESSID 11 Step 4 Configure Service Zone Settings with Authentication 12 Step 5 Add Local users 13 Step 6 Configure On Demand user billing plan 14 Step 7 Configure Guest Authentication 16 Step 8 Configure QoS Policy for User Group Optional 17 ...

Page 4: ...ision reception which can be determined by turning the equipment off and on the user is encouraged to try to correct the interference by one or more of the following measures Reorient or relocate the receiving antenna Increase the separation between the equipment and receiver Connect the equipment into an outlet on a circuit different from that to which the receiver is connected Consult the dealer...

Page 5: ...4 11 Safety EN 60950 1 A11 Caution This declaration is only valid for configurations combinations of software firmware and hardware provided and supported by 4ipnet Inc The use of software or firmware not provided and supported by 4ipnet Inc may result in the equipment no longer being compliant with the regulatory requirements European standards dictate maximum radiated transmit power of 100mW EIR...

Page 6: ...ng 10 billing templates based on 4 billing alternatives flexible means to authenticate customers real time monitoring of current users as well as customizable billing reports sent to an administrator s email boxes or FTP server periodically designing an exclusive Web pages that interact with the users is also possible whether by means of external URLs HTML files etc This Quick Installation Guide p...

Page 7: ...Upper Panel 1 LAN 1 2 Ports Attach Ethernet cables here to connect to the wired local network 2 Bypass RJ 45 pass through port 3 DC Jack 12V 1 A Attach the power adaptor here 1 Restart Reset Button Press once to restart the system Press and hold for more than 5 seconds to reset to factory default 2 LED Indicators 4 LED lights Representation is listed at the top of the panel ...

Page 8: ...ss through Copper wire punch down for wiring bypass 3 110 Punch down Block Uplink PoE Copper wire punch down for Uplink connection This can be used to connect to the internet PoE is supported 4a SMA Connectors 2 4GHz Connect external antennas for RF Card A here 1 is the primary antenna connector while 2 is the secondary connector 4b SMA Connectors 5GHz Connect external antennas for RF Card B here ...

Page 9: ...ually at the center of your wireless network The HSG326 can be mounted on any wall outlets or on any flat surface Universal Mounting Panel Secure the mounting plate on the mounting surface by tightening the screws included at the highlighted area below a Standard US Outlet box b Standard EU Outlet box Connect one end of the Ethernet cable to the Uplink port and the other end of the cable to a swit...

Page 10: ...fferent power adapter may damage this system 3 Connect HSG326 to your outbound network device Connect one end of the Ethernet cable to the Uplink port of HSG326 on the back panel Depending on the type of Internet service provided by your ISP connect the other end of the cable to the ATU Router of an ADSL a cable modem a switch or a hub The Uplink LED indicator should be ON to indicate a proper con...

Page 11: ...he HSG326 LAN1 port to your network device for configuring the system After login to the management UI you can click on the Quick Start Guide button to start the configuration or you can also consult the QIG and User Manual for detailed network setup instructions To verify the wired connection between HSG326 and your switch router hub please check the LED status indication of these network devices...

Page 12: ...d to Default Service Zone for administrator usage Note The instructions below are illustrated with the administrator PC connected to LAN1 Steps 1 Once the hardware installation is complete set DHCP in TCP IP settings of the administrator PC to Obtain an IP address automatically Connect the PC to the LAN1 Port of HSG326 An IP address will be assigned to the PC automatically via the HSG326 built in ...

Page 13: ...n the default value in the Username and Password fields and then click Login to log in 4 The first time login will force you to change the administrator password for security purpose Enter the Original Password New Password and enter the new password again in Verify Password to confirm the new password is correct After change password success login again with the new password ...

Page 14: ...tspot Gateway ENGLISH Copyright 4IPNET INC All rights reserved 9 5 The Welcome Page will appear after a successful login Note To logout simply click Logout at the upper right hand corner of the interface to return to the Administrator Login Page ...

Page 15: ...326 by using the Quick Start Guide click on the Quick Start Guide button to start the configuration process Step 1 Time Zone Please go to System General System Time Select an appropriate time zone from the Time Zone drop down list box and enter the URL of a valid NTP server to set up the system time HSG326 supports NTP time synchronization please make sure the NTP server is reachable and alive Com...

Page 16: ... type of Internet connection for WAN interface from the following three available connections Static Dynamic or PPPoE Your ISP or network administrator can advise on the connection type available to you Below depicts an example for Static Step 3 Configure Service Zone Settings with ESSID Please go to System Service Zones Click the Link of the Service Zone Name you would like to configure ...

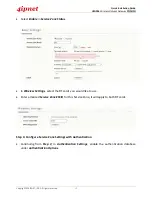
Page 17: ...Zone Status In Wireless Settings select the RF cards you would like to use Enter a desired Service Zone ESSID for this Service Zone it will apply to both RF cards Step 4 Configure Service Zone Settings with Authentication Continuing from Step 3 in Authentication Settings enable the authentication database under Authentication Options ...

Page 18: ...PNET INC All rights reserved 13 Click the Apply at the bottom of this page to save the settings Step 5 Add Local users A new user can be added to the Local User database Please go to Users Internal Authentication Local Authentication Click the Configure button of Local User List ...

Page 19: ...g testuser MAC Address optional to specify the valid MAC address of this user and assign an applied Group to this particular user or use the default Click the Apply at the bottom of this page to save the settings Step 6 Configure On Demand user billing plan On Demand User allows you to configure different billing plans for different users Please go to Users Internal Authentication On Demand ...

Page 20: ...uick Installation Guide HSG326 Wireless Hotspot Gateway ENGLISH Copyright 4IPNET INC All rights reserved 15 Click the Configure button of Billing Plans Now you may configure the plans to your preference ...

Page 21: ... Step 7 Configure Guest Authentication Guest Authentication includes Social Media such as Facebook Google OpenID or Line or registration by E mail address Please go to Users Internal Authentication Guest For E mail registration select Visible in Guest Login Input For Social Media select Enable in Social Media Login Configure the Guest Access Time the default is Unlimited ...

Page 22: ...in check box and input the related settings Click the Apply at the bottom of this page to save the settings Step 8 Configure QoS Policy for User Group Optional For each Authentication it can be applied to different User Group Different User Group can be assign with different Policy Each Policy contain Firewall Privilege QoS Specific Route and Prefer DHCP Pool Bandwidth limitation QoS is shown here...

Page 23: ... link and redirect to the configuration page enable the Bandwidth Limitation on WAN Click the Apply at the bottom of this page to save the settings Click Restart to take effect on all settings After restart success login again with admin go to Users Policies QoS again to configure the QoS profile You may assign different uplink downlink limit in different QoS profile here ...

Page 24: ...Authentication Option Go to Users Groups Configuration Assign with different Policy in different Service Zone in each User Group Click the Apply at the bottom of this page to save the settings Congratulations Now 4ipnet HSG326 is installed and configured successfully It is strongly recommended to make a backup copy of your configuration settings For further configuration and backup information ple...

Reviews: