102
User Manual ENGLISH
WHG-Series Wireless WLAN Controller
Copyright © 2017, 4ipnet, Inc. All rights reserved. All other trademarks mentioned are the property of their respective owners.
9
How to configure Switch Management
The 4ipnet SW1024 is a powerful 24+2 Port VLAN switch with 500W of power budget. The WLAN
controller gives administrators one comprehensive interface for managing your 4ipnet equipment
including the 4ipnet SW1024.
There are several features for centralized managed switches
Switch List
PoE Schedule Template
Backup Configuration
9.1
Switch List
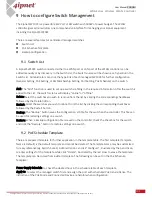
A 4ipnet SW1024 switch connected either to a WAN port or LAN port of the WLAN controller can be
added manually or by discovery. In the Switch List, the Switch's name will be shown as a hyperlink in the
Switch List. Administrators can click the hyperlink of each managed SW1024 for further configuration
(General Setting, PoE Setting, VLAN Membership Setting, Port Setting, PoE Schedule) on the switch.
Add: The “Add” function is used to set up a switch via filling in the required information. After the switch is
added to the List, the switch's status will display "online" or "offline”.
Delete: Select the switches you wish to remove from the list by clicking the corresponding checkboxes
followed by the Delete button.
Restart: Select the switches you wish to reboot from the list by clicking the corresponding checkboxes
followed by the Restart button.
Backup: The “Backup” button saves the configuration .db file for the switch on the controller. This file can
be used for restoring settings on a switch.
Restore: When a Backup configuration file is saved on the controller, check the checkbox for the switch
and click the “Restore” button to restore settings on a switch.
9.2
PoE Schedule Template
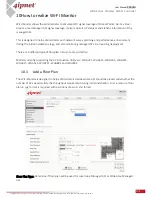
There are prepared template for further application in the template table. The first template (Template
Name is Default) is the default template and cannot be deleted. The Template Name may be customized
for easy reference (eg. Switch-Core1). Administration can click "Configure", illustrated by the pencil icon,
to enter settings for the Template while click “Delete”, illustrated by the red cross to erase the template.
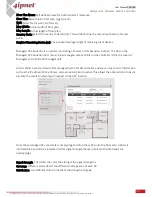
The template can be copied from existed template. The following can be set on the PoE Schedule
Template:
Power Supply Schedule: to check the desired hour in the schedule table of each template
Apply to: to select the managed switch first and assign the port with scheduled PoE transmittance. The
indication of the PoE Mode and Connected Device are helpful when configuration.

