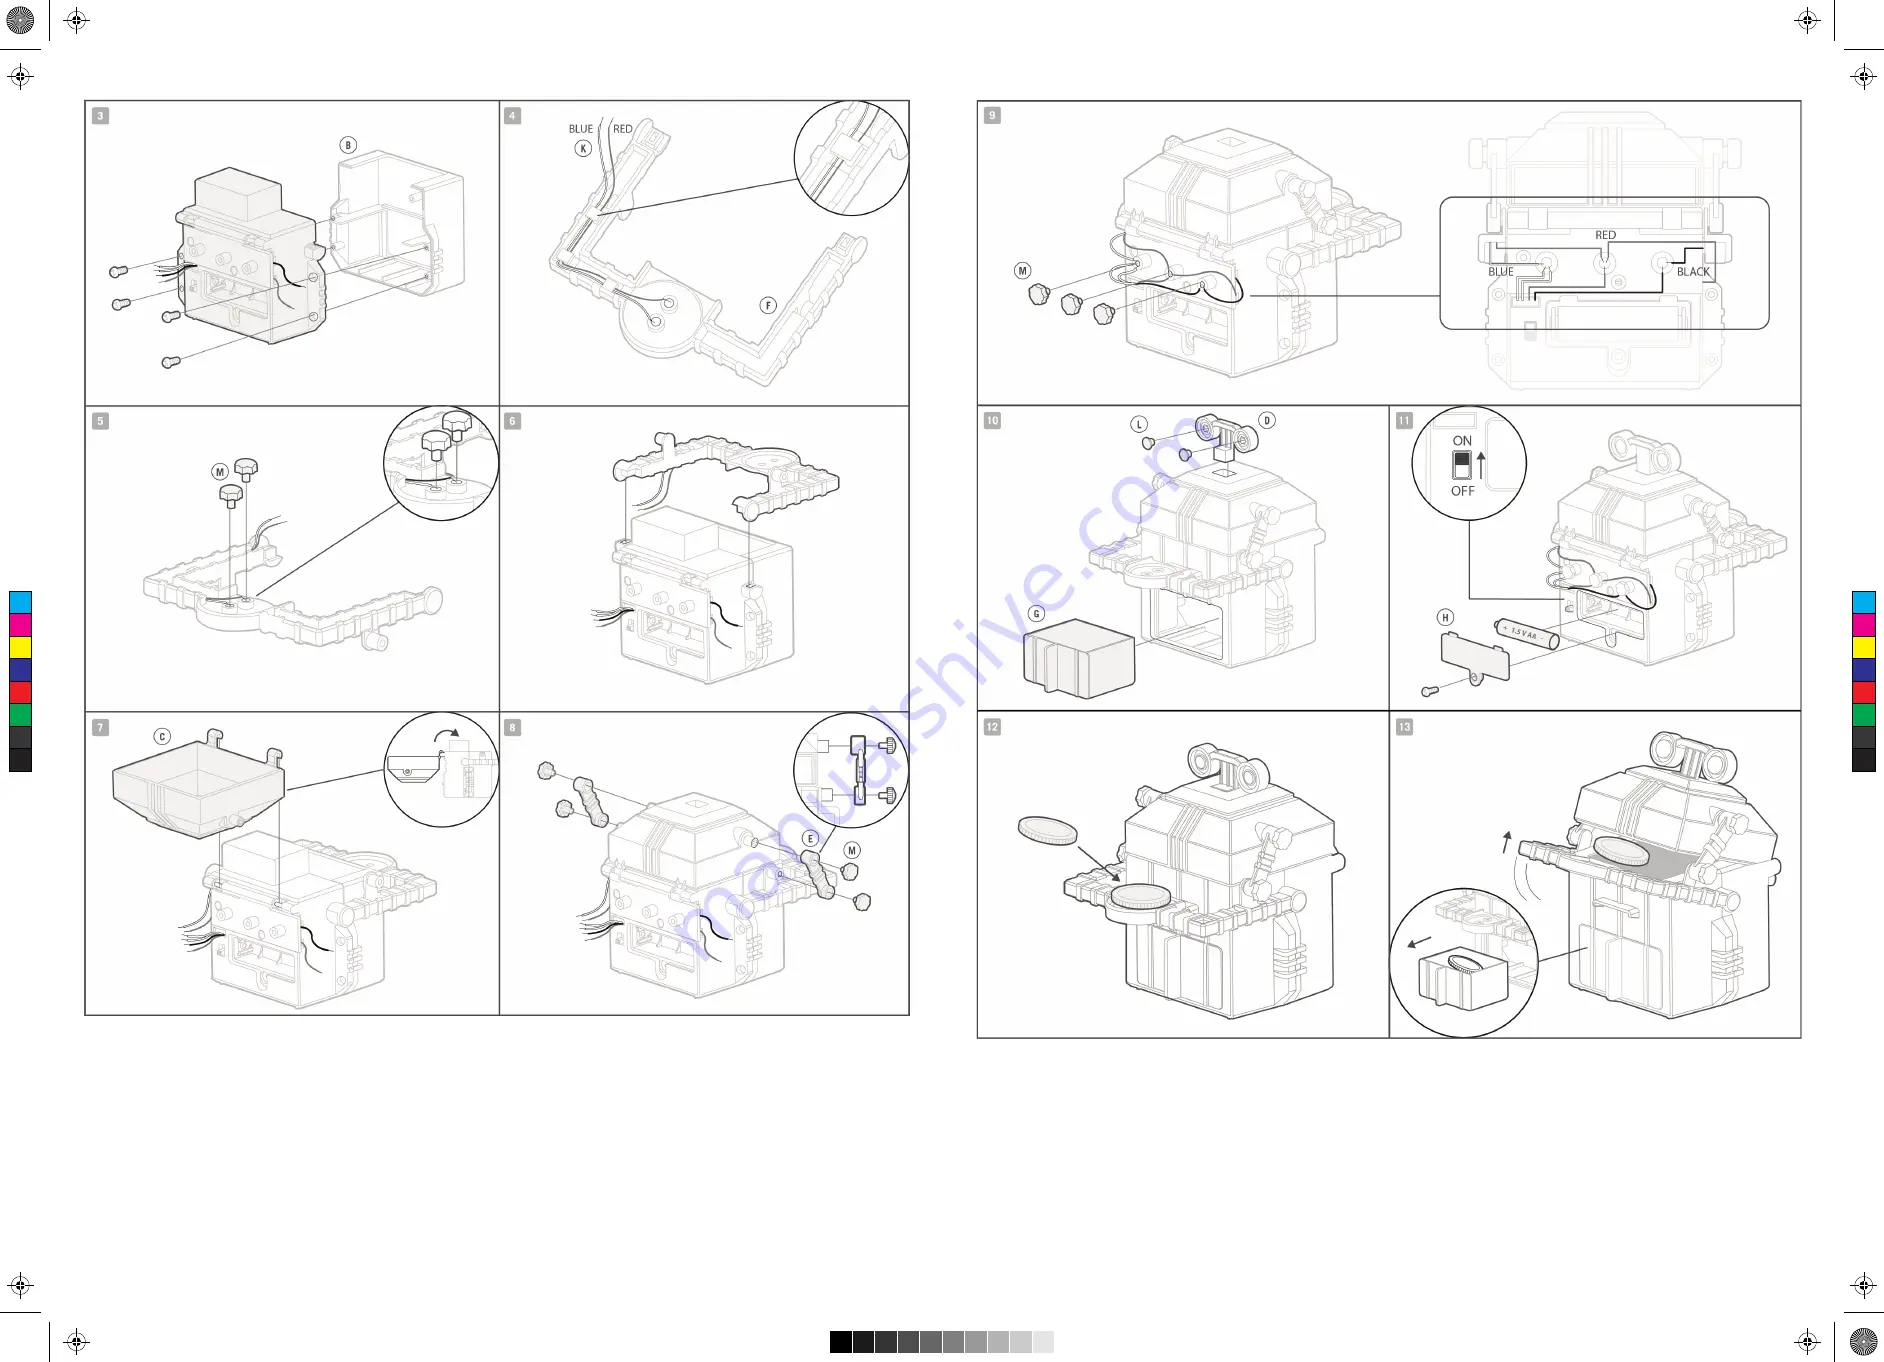
3. Push the rear body onto the front body (part B) and secure the two parts together with four screws.
4. Insert the blue and red wires (parts K) into the underside of the coin arm (part F) as shown.
5. Push two terminal caps (parts M) into the terminals on the arm to keep the wires in place. The bare ends of the wires must be in
contact with the metal terminals.
6. Clip the coin arm onto the body. The wires must be on the underside of the arm.
7. Clip the lid (part C) onto the body.
8. The two links (part E) have a wide end and a narrow end. Fit the wide end of each link to one of the pins on the lid and the narrow end
to one of the pins on the coin arm. Push terminal caps into the holes on the links.
9. Push matching colour wires into the terminals on the motor compartment cover as shown. Push terminal caps into the terminals to
keep the wires in place. The bare ends of the wires must be in contact with the metal terminals. Check your robot against the diagram to
make sure you have put the correct wires in the correct holes.
10. Push the eye holder (part D) into the lid and insert the two eyes (part L) into it. Also push the coin drawer (part G) into place.
11. Insert a 1.5-volt AA battery into the battery compartment making sure it is the correct way round. Secure the battery compartment
cover (part H) with a screw. Flick the switch to the ON position.
E. OPERATION
12. Your Money Bank Robot is ready! Place a coin on the tray on the coin arm.
13. The robot gobbles up the coin automatically! Open the drawer to get your coin back.
C
M
Y
CM
MY
CY
CMY
K
3422_prelime draft_10_OP.pdf 2 20/8/2019 6:08 PM


