background image

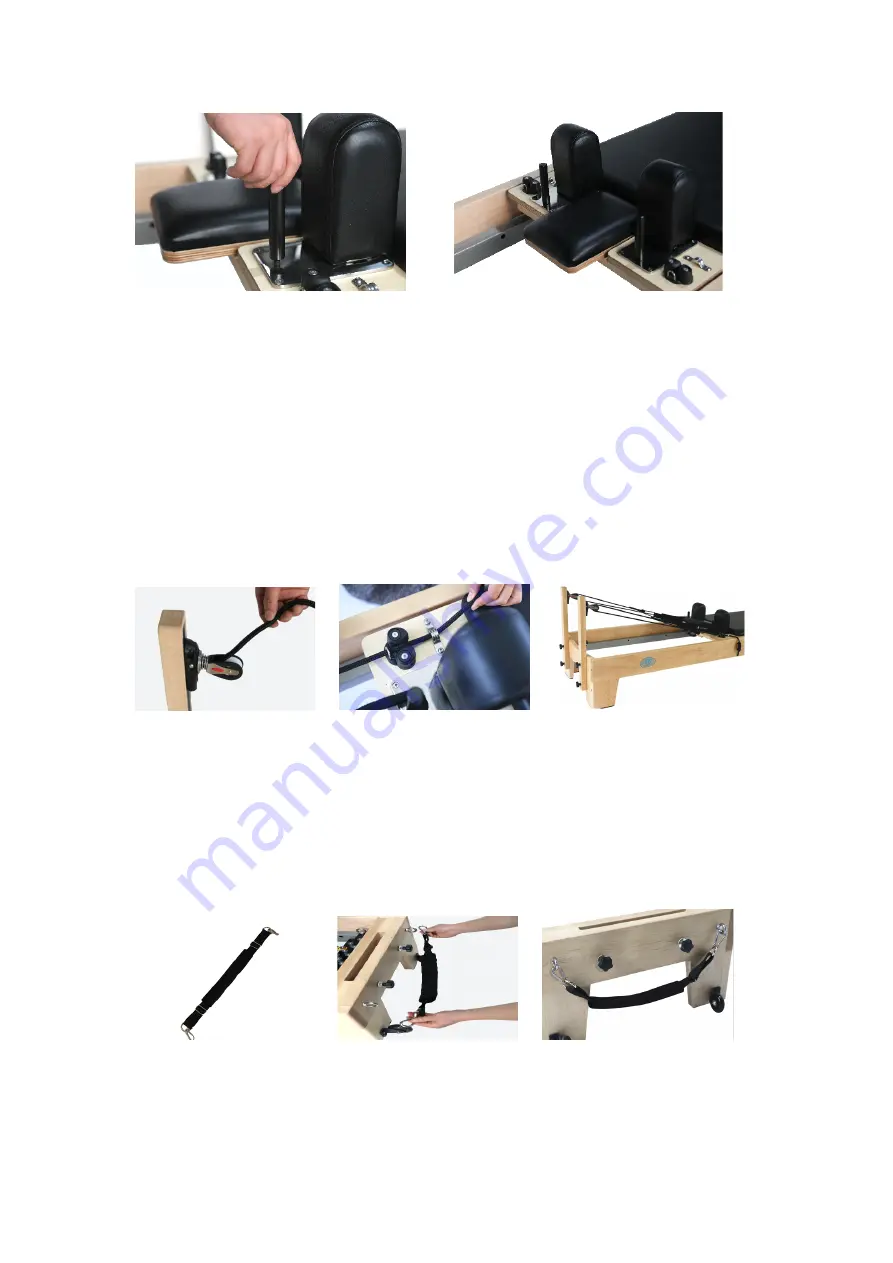
Fig15

Fig16

l

Step 5: Attaching The Ropes

Thread one end of the rope into the rope pulley, extending into

the rope holder and buckle, and place the silent straps & ropes on

the rope holder. 

Fig17

Fig18

Fig19

l

Step 6: Hang The Silent Foot Strap

Fig20

Fig21

Fig22

Summary of Contents for FD2303

Page 1: ...FD2303 Pilates Reformer W Tower Assembly Instruction User Manual...

Page 2: ...stance 6 resistance springs w 3 levels of adjustments l Springs 2 red heavy resistance 60lb 2 blue medium resistance 26lb 2 yellow light resistance 19lb l Size 90 X 27 X 15 228 5 X 68 5 X 39CM l Net w...

Page 3: ...Before Assembly Unpacking the FD2303 reformer you will receive the frame and all needed accessories as below l Frame l Accessories...

Page 4: ...iser and then into hollow at the end of the bed you can adjust the rope at different height through the ropeway Fig1 Fig2 Fig3 Step 2 Install The Foot Pedal Placement Please put the stainless steel fa...

Page 5: ...ust have a hand bar as a support Fig9 Fig10 Fig11 l Step 4 Installing The Shoulder Rests The shoulder rest has two holes to adjust You can adjust the position according to your own needs Turn the shou...

Page 6: ...ng The Ropes Thread one end of the rope into the rope pulley extending into the rope holder and buckle and place the silent straps ropes on the rope holder Fig17 Fig18 Fig19 l Step 6 Hang The Silent F...

Page 7: ...gs can be used in any combination although when using the reformer for asymmetric exercises In addition the spring has three rows of hangers which you can hang in any row to achieve the effect of your...

Page 8: ...dling When you need to move it please lift the tail and move it easily against the wheel Assembly Procedure Part 2 l Step 1 Install semi elevated aluminum pipe sleeve There are two types of screws lon...

Page 9: ...teel pipes 1 short steel pipe 2 screws connect the two long steel pipes to the short steel pipe align the holes and then use a screwdriver to fix all the screws Finally insert the shelf into the alumi...

Page 10: ...of the steel pipe insert it and then relax your thumb Fig9 Fig10 Fig11 l Step 4 Hang springs and various kinds of rope The tower rack has 49 holes eight springs a maple rod two drawstrings and a harne...

Page 11: ...the bar Then picked up two short blue springs and hung them on the hook above the pole with a stick attached to each end of the spring Finally take two short yellow springs hang them on the hook near...

Page 12: ...er bed Fig15 Fig16 Fig17 Periodic Maintenance Always check the apparatus before first use and again affer each of the first few uses to check all the fitting are securely fastened Thereafter it is imp...

Page 13: ...dust on the surface of the wood Another thing to note is that solid wood is easily damaged and not easily repaired so be careful when handling or moving it l Springs Spring Clips Inspect all spings if...

Page 14: ...Rests Check that the shoulder rests are firmly attached to the shoulder pads if loose then retighten it l Nuts Allen Bolts Check all nuts and bolts are tight Including screws and nuts under the skate...

Page 15: ...f you are not familiar with using a pilates reformer we suggest you seek advice from a qualified pilates professional in order to learn how to get the most out of your reformer and cover the basic saf...

Page 16: ...ar space with at least 1m of space all around the machine this equipment is for indoor use only on a firm and flat surface Before starting any exercise program consult a physician Before using the equ...

Page 17: ...Do not allow children to use or be around equipment without adult supervision If standing the equipment for storage be sure it is kept in a safe place on level ground and away from children...

Reviews: