background image

S T E P   B Y   S T E P   B U I L D   G U I D E

TOOLS

1

LET’S GET STARTED

2

INSTALLING THE QUILL STEM

3

INSTALLING THE FRONT FENDER

4

INSTALLING THE QUICK RELEASE

5

INSTALLING THE FRONT WHEEL

6

INSTALLING THE HANDLEBAR

7

INSTALLING THE SEATPOST

8

OPTIMIZING THE BRAKE PADS

9

PREPARING PEDALS FOR INSTALLATION

10

INSTALLING THE PEDALS

11

PUMPING THE TIRES

12

ALIGNING THE HANDLEBAR

13

MAINTENANCE

14

CONTACT INFORMATION

15

MODEL: COMMUTER / ROAD BIKE

TABLE OF CONTENTS

Summary of Contents for COMMUTER

Page 1: ...NSTALLING THE QUICK RELEASE 5 INSTALLING THE FRONT WHEEL 6 INSTALLING THE HANDLEBAR 7 INSTALLING THE SEATPOST 8 OPTIMIZING THE BRAKE PADS 9 PREPARING PEDALS FOR INSTALLATION 10 INSTALLING THE PEDALS 11 PUMPING THE TIRES 12 ALIGNING THE HANDLEBAR 13 MAINTENANCE 14 CONTACT INFORMATION 15 MODEL COMMUTER ROAD BIKE TABLE OF CONTENTS ...

Page 2: ...S T E P B Y S T E P B U I L D G U I D E TOOLS 1 15mm Box Wrench 2 15mm Pedal Wrench 3 4mm 5mm and 6mm Allen Keys 4 Grease 5 Gloves optional 6 Scissors Clippers 7 Air Pump Compatible with Presta Valves 1 ...

Page 3: ...box d Grab your clippers and get ready to remove some zip ties be mindful to not scratch your bike e First remove zip ties from the fender and set the fender aside f Next cut all zip ties off from the front wheel and carefully slide the front wheel off of the crankarm and handlebar g Finally remove zip ties from the handlebar and turn the fork so it faces forward away from the bike 2 ...

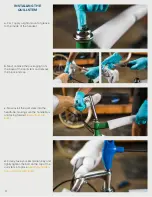
Page 4: ...from the base of the quill stem and remove the black end cap c Now install the quill stem into the headtube making sure the handlebars are facing forward away from the bike d Finally take your 6mm Allen Key and lightly tighten the bolt on the top of the qull stem into place we ll fully tighten the quill stem a bit later 3 ...

Page 5: ...e the front brake c Align the fender s mounting tab in between the fork and front brake running the brake bolt through all 3 pieces d Retighten the brake and the brake bolt e Finally take your 4mm Allen Key and remove the fender s mounting bolts located at the bottom of the fork f Align the fender arms on top of the fork s mounting bracket reinstall and tighten the fender bolts onto the fork 4 ...

Page 6: ...hen closed to it s midway point If this action is too easy tighten the nut on the opposite side If it won t close fully loosen the nut Repeat until locking the lever gives satisfactory resistance The pressure involved should leave a mark on your hand This section is for the 6KU 16S Classic Road Bike only and does not apply to the 6KU 8 Speed Commuter bike If you are building the 6KU 8 Speed Commut...

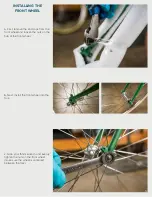
Page 7: ... end caps from the front wheel and loosen the nuts on the hub of the front wheel b Next install the front wheel into the fork c Grab your 15mm wrench and evenly tighten the nuts on the front wheel make sure the wheel is centered between the fork 6 ...

Page 8: ...ign the stem to the center of the front wheel the stem and front wheel should be parallel d While still holding the stem tighten the top bolt into place with your 6mm Allen Key please note that there is a minimum insertion mark on the quill stem be sure that your desired height is well below this line e Cut the string off that holds the crankset and rear wheel in place and remove all packaging on ...

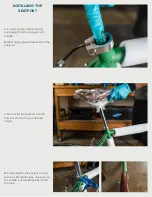
Page 9: ... the seatpost and saddle b Next lightly grease the inside of the seatpost c Now insert the seatpost into the frame and hold it at your desired height d Finally tighten the seatpost clamp with your 5mm Allen Key making sure the saddle is centered parallel to the top tube 8 ...

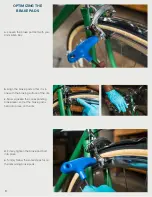
Page 10: ...gn the brake pad so that it is in line with the braking surface of the rim c Now squeeze the corresponding brake lever so that the brake pad is held into place on the rim d Finally tighten the brake pad bolt into place e Simply follow the same steps for all the remaining brake pads 9 ...

Page 11: ...PREPARING PEDALS FOR INSTALLATION a First open your accessory box and remove the pedals b Next remove the packaging from the pedals c Finally lightly grease the pedal threads 10 ...

Page 12: ...ht drive side c Now slowly and gently turn the pedal spindle in a CLOCKWISE motion until the spindle catches the crank arm d Finally use your Pedal Wrench to fully tighten the spindle do not over tighten or you will strip your pedals e Repeat the same process for the left pedal this time turning your spindle in a COUNTERCLOCKWISE motion instead note left hand pedal has reverse threads 11 ...

Page 13: ... valve cap b Then unscrew the presta valve nut c Now insert your pump head onto the presta valve and inflate your tire between 70 85 PSI d Retighten the presta valve nut e Replace the valve cap f Repeat the same process on the rear wheel 12 ...

Page 14: ...nd stable footing and sit on your bike b When you are balanced place your hands on the handlebars and gently rotate the bars to your desired angle c Finally tighten the stem s front bolt with your 6mm Allen Key and you re done 13 ...

Page 15: ...C ROAD BIKE 6KU 8 SPEED COMMUTER BIKE AND 6KU 16 SPEED CLASSIC ROAD BIKE Typically after about 30 days of riding depending on mileage you will need to stop by your local bike shop for a routine derailleur and brake adjustment Since your cables are brand new they will stretch slightly during initial use 14 ...

Page 16: ... grow Regardless of where you purchased your 6KU bike we humbly ask for you to leave us a review once you are completely satisfied with your purchase Registering your 6KU bike is fast and easy Registering your bike activates your warranty as well as other awesome perks Our Customer Service Team will be able to assist you much faster when your bike is registered and you ll also be one of the first ...

Reviews: