


15
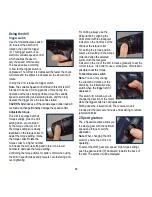
To select the HIGH gear (high
speed, low torque setting), push
the gear selector (9) forward,
towards the chuck. The symbol II
will be displayed.
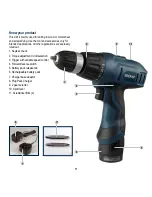
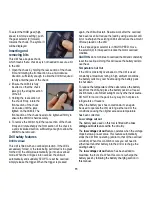
Inserting and
removing bits
This drill has a keyless chuck,
which means that a chuck key is not needed to secure a bit
in the drill.
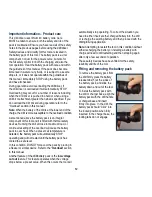
1. Open the chuck by holding the rear section of the chuck
firm and rotating the front section in a anti-clockwise
direction, sufficiently enough to allow the drill bit required
to fully enter the jaws of the chuck.
2. Ensure the drill bit is fully
inserted, so that the chuck
jaws grip the straight section
of the bit.
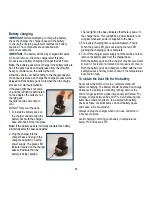
3. Holding the rear section of
the chuck firmly, rotate the
front section of the chuck
clock-wise until the jaws
tighten on the drill bit. The
front section of the chuck needs to be tightened firmly to
ensure the drill bit is held securely.
4. To remove the drill bit, hold the rear section of the chuck
firmly and rotate sharply the front section of the chuck in
a anti-clockwise direction, sufficiently enough to allow the
drill bit to be removed.
Drill safety features
Drill Overload
This drill is fitted with an overload protection. If the drill is
excessively forced, or the task being performed is too great
for the drill, the drill will automatically go into an overload
mode. When the drill goes into overload, the drill will
automatically and suddenly STOP. To reset the overload,
simply release the trigger. When the trigger is pressed
again, the drill will restart. Resume work after the overload
has been reset, but reduce the load by using a smaller drill
bit or re-sharpen the existing drill bit and reduce the amount
of force placed on the drill.
If the 2 speed gear selector is in HIGH SPEED, move
the selector (9) to low speed to reduce the motor overload
condition.
CAUTION.
Do not continue to overload the drill and constantly
reset the overload. Doing this will cause the battery cells to
over heat.
Temperature Cut Out
If the drill is constantly overloaded, or the drill is used
constantly at maximum rating in high ambient conditions,
the battery cells may over heat causing the battery pack
to shut down.
To reduce the temperature of the cells remove the battery
pack from the drill and place the battery pack in a free air
environment, out of direct sunlight or any other heat source.
DO NOT force cool the pack in any way. Do not place in
refrigerators or freezers.
When the battery pack has cooled down it can again
be used to operate the drill, as long as the load or the
conditions causing the original excessive temperature
has been corrected.
Low voltage cut out
The battery pack used on this tool is fitted with a
low
voltage cut out
feature within the circuitry.
The
low voltage cut out
feature operates when the voltage
drops below a pre-set value. This feature automatically
stops the drill from operating (similar to that of the overload
condition). When this condition occurs you will need to
either insert another battery into the drill or recharge the
existing battery.
The
low voltage cut out
feature has been added to
maximise the tool’s life. When this occurs, recharge the
battery pack by following the battery charging section in
this manual.
Summary of Contents for 12V2BLI
Page 1: ...INSTRUCTION MANUAL 12V2BLI 12V Lithium Drill Driver ...
Page 17: ...17 ...
Page 18: ...18 ...
Page 19: ...19 ...
Page 20: ......


