


Summary of Contents for 12V2BLI
Page 1: ...INSTRUCTION MANUAL 12V2BLI 12V Lithium Drill Driver ...
Page 17: ...17 ...
Page 18: ...18 ...
Page 19: ...19 ...
Page 20: ......
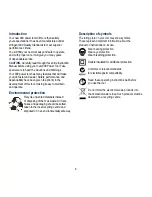
The 909 12V2BLI is a cutting-edge product designed to deliver exceptional performance. To ensure proper operation and installation, don't forget to download the free Instruction Manual from our website. This comprehensive manual provides detailed step-by-step instructions, allowing you to maximize the potential of your 909 12V2BLI.
Page 1: ...INSTRUCTION MANUAL 12V2BLI 12V Lithium Drill Driver ...
Page 17: ...17 ...
Page 18: ...18 ...
Page 19: ...19 ...
Page 20: ......


