
8
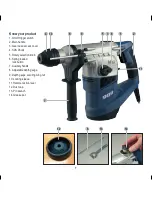
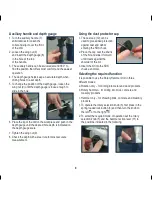
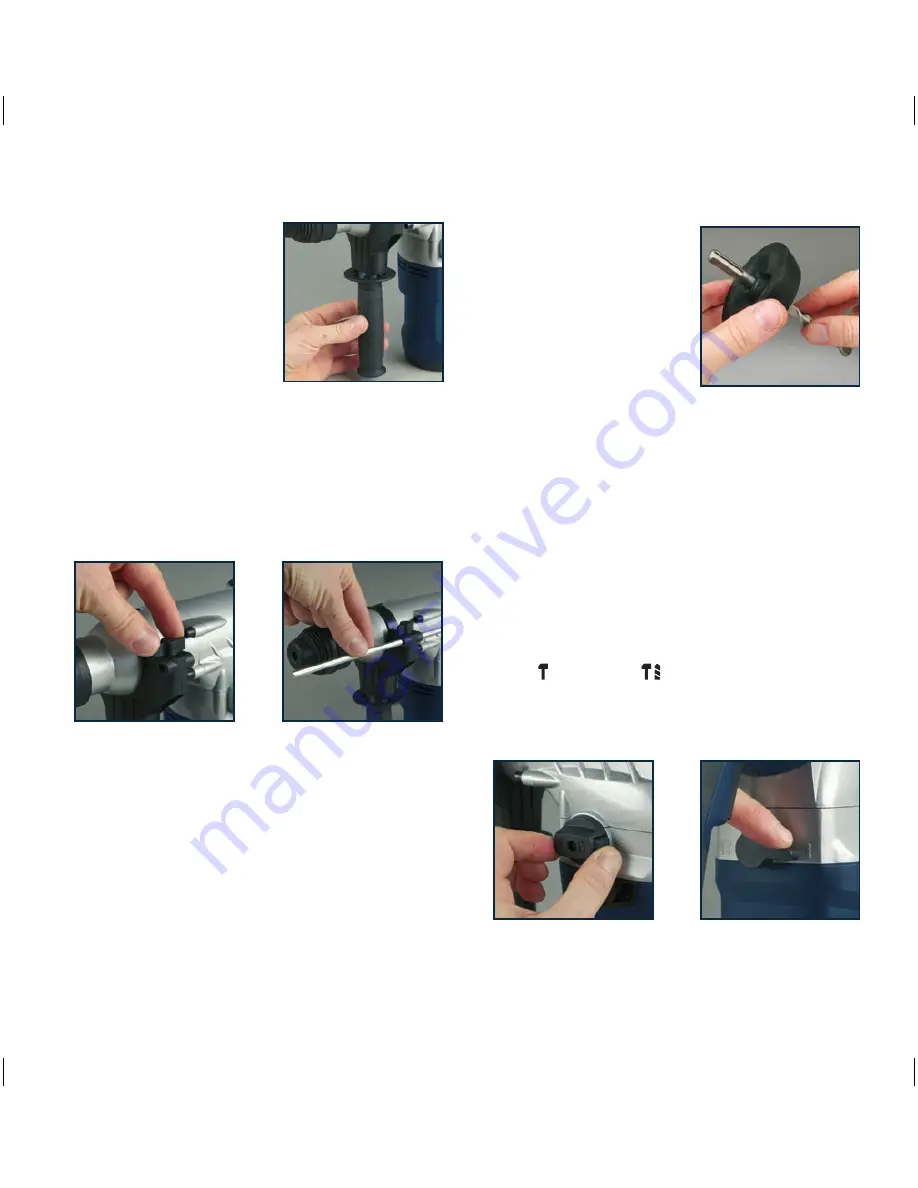
Auxiliary handle and depth gauge
1. Turn the auxiliary handle (7)
anticlockwise to loosen the
collar and slip it over the front
of the drill.
2. Loosen the wing nut (9)
and insert the depth gauge (8)
in the hole at the top
of the handle.
3. The auxiliary handle can be swiveled around 360° to
find the position that offers most comfort and the easiest
operation.
4. The depth gauge helps keep an accurate depth when
drilling holes to a set depth.
5. To change the position of the depth gauge, loosen the
wing nut (9) until the depth gauge is loose enough to
slide in the hole.
6. Place the tip of the drill on the workpiece and push in the
depth gauge until the desired hole depth is indicated on
the depth gauge scale.
7. Tighten the wing nut (9).
8. Check the depth with a steel rule for most accurate
measurement.
Using the dust protector cap
1. The dust cap (12) can be
used to give added protection
against dust and debris
entering the SDS chuck.
2. Place the cap over the shank
of the bit and slide it forward
until it rests against the
shoulder of the bit.
3. Insert the bit into the SDS
chuck as normal.
Selecting the required function
It is possible to use the Rotary Hammer Drill in three
different modes:
a. Rotation only – for drilling into metal and wood products.
b. Rotary hammer – for drilling into brick, concrete and
masonry products.
c. Hammer only – for chiseling brick, concrete and masonry
products.
1. To operate the rotary selection knob (5), first press in the
spring loaded lock button (6) and then turn the knob to
the left or to the right .
2. To select the required mode of operation set the rotary
selection knob (5) and the hammer action lever (11) to
the positions indicated in the following.
Summary of Contents for KHD1050K
Page 12: ......