


8
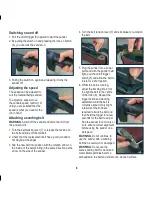
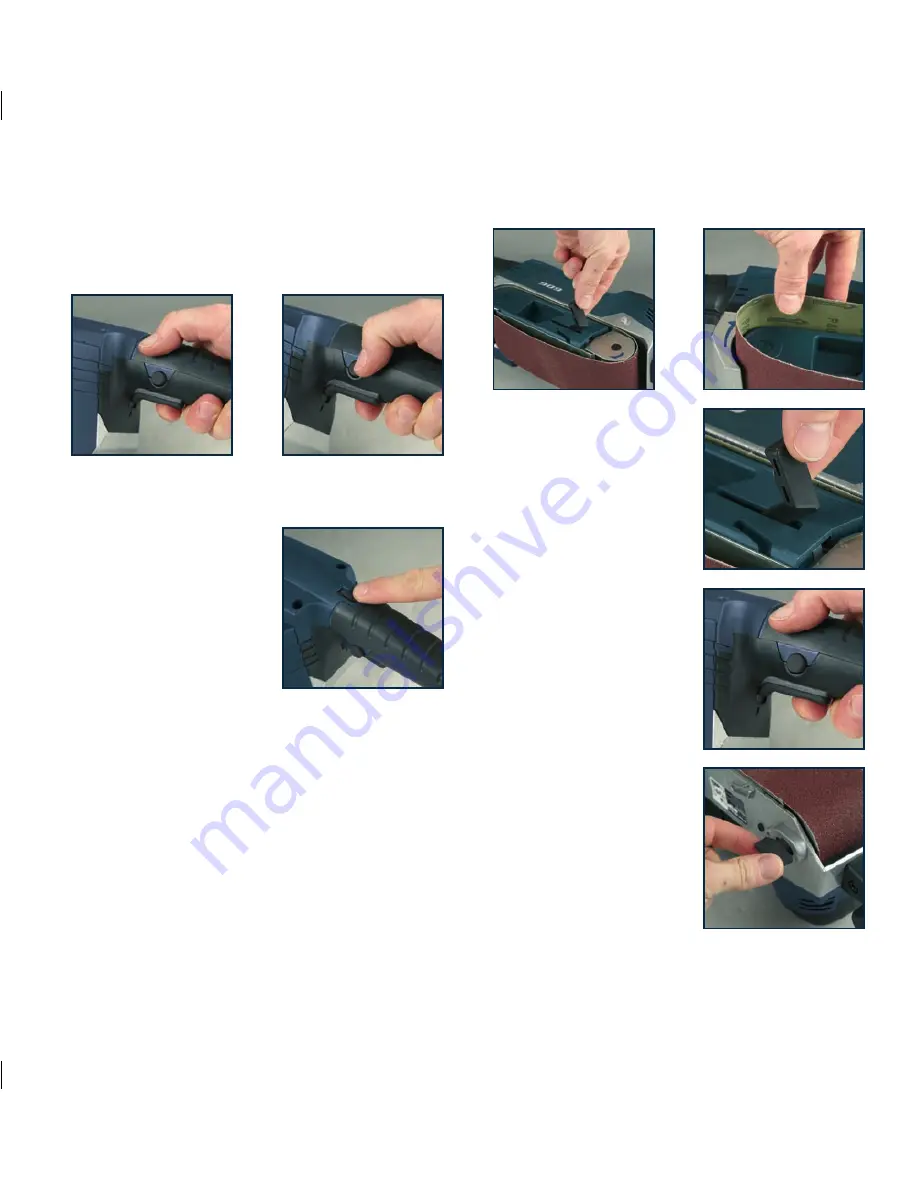
Switching on and off
1. Pull the on/off trigger (5) upward to start the sander.
2. By pulling the switch on and pressing the lock-on button
(4), you can lock the sander on.
3. Pulling the switch on again and releasing it turns the
sander off.
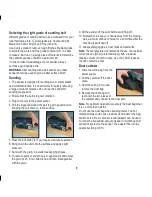
Adjusting the speed
The speed can be adjusted to
suit the material being sanded.
To adjust the speed, move
the variable speed control (12)
until you are satisfied that the
speed is what you need for the
job in hand.
Attaching a sanding belt
WARNING.
Switch off the sander and disconnect it from
the power point.
1. Turn the belt tension lever (7) to release the tension on
the belt and slide off the old belt.
2. Check that the replacement belt has a good join and is
not frayed at the edges.
3. Slip the new belt into position with the rotation arrow on
the inside of the belt pointing in the same direction as the
arrow on the side of the sander.
4. Turn the belt tension lever (7) anti-clockwise to re-tension
the belt.
5. Plug the sander into a power
point and with the sander held
tight, pull the on/off trigger
switch (5) and allow the belt to
rotate for a short period.
6. Whilst the belt is running,
adjust the tracking knob (10)
to align the belt to the centre
of the roller (6). Repeat the
trigger action and tracking
adjustment until the belt is
correctly aligned. Only slight
rotations of the knob are
required to track the belt and
then hold the trigger for a few
seconds for the belt to adjust.
Run the sander for a minute or
so to ensure correct alignment
before using the sander on a
workpiece.
WARNING.
Do not continue to
use the sander with a sanding
belt that is overworn or damaged.
WARNING.
Do not use the
same sanding belt for wood and
metal. Metal particles become
embedded in the belt and will scour a wooden surface.
Summary of Contents for TS900
Page 11: ......


