background image


 11


CONTENTS                                               


p. 11 Introduction 


p. 11 First installation 

IMPORTANT


p. 12 General instructions


p. 12 Important safety precautions


p. 12 Installation – Water tank


p. 12 Coffee Preparation


p. 12 Cleaning


p. 13 Boiler Draining


p. 13 Orange light – Triple protection function


p. 14 Diagram: Coffee machine & controls


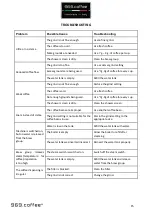
p. 15 Troubleshooting


p. 16 Box contains and options


INTRODUCTION 


Please read this instruction manual carefully before using the espresso machine. It will advise how to get 

the best out of your machine, correct maintenance, and troubleshooting.


IMPORTANTE:

 FIRST INSTALLATION


1. Remove cup warmer lid (4). Lift the stainless steel water tank (10) some cm and slide 

it from one side away.


2. Fill it up, if possible with filtered water.


3. Put the water tank in its position.


4. Shut ON the machine lifting the main switch (5) up. Green light and PID remains shut 

off.


5. Lift the group lever (8) in upper position and wait until approx. ½ liter water is flown 

from the group (7) (boiler full) then push lever down.


6. Switch the main (5) down to the second ON position in order to give power to the 

heating element and warm up the water inside. postare l’interruttore generale (5) verso 

il basso in posizione ON. Green light (1) and PID (3) are now lighting.


7. Push the left button of the PID until you see “PRG” on the display and after pushing 

first  the  right  and  after  the  left  or  right  button,  set  the  desired  temperature  of  the 

water. Wait until the temperature is reached. 


Summary of Contents for ELBA Mini Solo

Page 1: ...1 ELBA Mini Solo Lux Top All Black...

Page 2: ...na quindi riabbassare la leva 6 Spostare l interruttore generale 5 verso il basso in posizione ON per far partire il riscaldamento della caldaia la spia verde 1 e il PID 3 si accendono 7 Premere il ta...

Page 3: ...egare la macchina dalla presa di corrente Non lasciare esposta la macchina ad agenti atmosferici pioggia sole ecc Non permettere che la macchina sia utilizzata da minori o incapaci Non mettere le mani...

Page 4: ...e Tensione ON 2 Portafiltro i 3 P I D 4 Vassoio scaldatazze 5 interruttore generale ON OFF ON 6 Manometro pompa solo versioni Lux e Top All Black 7 Gruppo erogazione 8 Levetta erogazione 9 Vaschetta r...

Page 5: ...macinatura pi grosso Il caff vecchio Usare caff fresco La quantit di polvere troppo poca Usare 7 9 grammi per porzione La doccetta sporca Pulire la doccetta Schiuma invece di crema I grani del caff s...

Page 6: ...warten Sie bis zirka Liter Wasser aus der Gruppe 7 ausl uft voller Kessel Schwenken Sie dann den Hebel wieder nach unten 6 Stellen Sie den Schalter 5 nach unten auf Stelle ON um die Heizung des Kesse...

Page 7: ...e keinen Witterungseinfl ssen aussetzen Regen Sonne usw Nicht erlauben dass die Maschine von Minderj hrigen oder Unf higen benutzt wird Die H nde w hrend der Abgabe von Wasser oder Dampf nicht unter d...

Page 8: ...cksp len bis das Reinigungsmittel ausgesp lt ist und reines Wasser kommt aus berdruckventil Wir empfehlen fl ssige Reinigungsmittel Reinigung Siebe Br hkopf Ausl ufe Kaffeefette lagern sich auf all d...

Page 9: ...Gr ne Lampe Heizstab ON 2 Siebtr ger 3 P I D 4 Tassenw rmer 5 Hauptschalter ON OFF ON 6 Manometer Pumpe nur auf Versionen Lux und Top All Black 7 Br hgruppe 8 Kaffeeauslauf Hebel 9 Wassersammlungssch...

Page 10: ...t zu alt Frisches Kaffee benutzen Kaffeepulver Menge zu Gering Benutzen Sie 7 9 Gramm per Portion Dusche oder Filter ist schmutzig Dusche oder Filter reinigen Schaum anstatt Crema Kaffebohnen sind fal...

Page 11: ...eel water tank 10 some cm and slide it from one side away 2 Fill it up if possible with filtered water 3 Put the water tank in its position 4 Shut ON the machine lifting the main switch 5 up Green lig...

Page 12: ...nozzle or the group head while water or steam is flowing otherwise you put yourself at risk of scalding and burns The group head and or steam wand will be hot during machine operation Take care when...

Page 13: ...lter to rinse the system To finish run water through the group head without the portafilter locked into place for 10 seconds or until the water is clear DRIP TRAY Cleaning the drip tray each evening i...

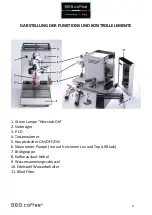
Page 14: ...armer lid 5 Main switch ON OFF ON 6 Pump pressure gauge versions Lux and Top All Black only 7 Group head 8 Brew lever lift the lever upwards until level to start extraction When the desired quantity o...

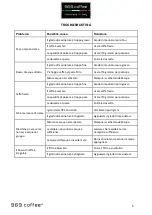
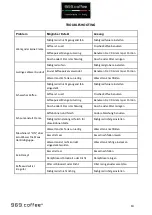
Page 15: ...screen is dirty Clean the shower screen Foam instead of crema The coffee beans are improper Use another coffee bean The grind setting is not suitable for the coffee beans in use Dial in the grind set...

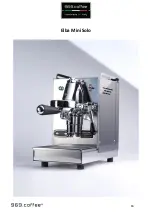
Page 16: ...16 Elba Mini Solo...

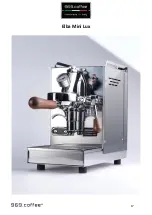
Page 17: ...17 Elba Mini Lux...

Page 18: ...18 Elba Mini Top All Black...

Page 19: ...rti clausole di norme armonizzate EMISSIONE EN 55014 1 EN 61000 3 2 1995 EN 61000 3 3 1995 IMMUNITA EN 55014 2 DIR 73 23 Direttiva Bassa Tensione con applicazione delle seguenti parti clausole di norm...

Reviews: